How To Render Lard | Ultimate Lard Rendering Guide
If you would have asked me five years ago if I would ever render lard for my own cooking, my answer would have been no! Since then I have returned to cooking, growing, and raising more whole foods for my family. Read on to find out exactly how to render lard for use in cooking, baking, and even skin care. Learn the difference between leaf lard and back lard, how to know when you are done rendering lard, and how to properly store lard.
Rendering lard has many health benefits including it’s high vitamin D content and the fact that it is low in omega-6 (inflammatory) and high in omega-3 (anti-inflammatory).
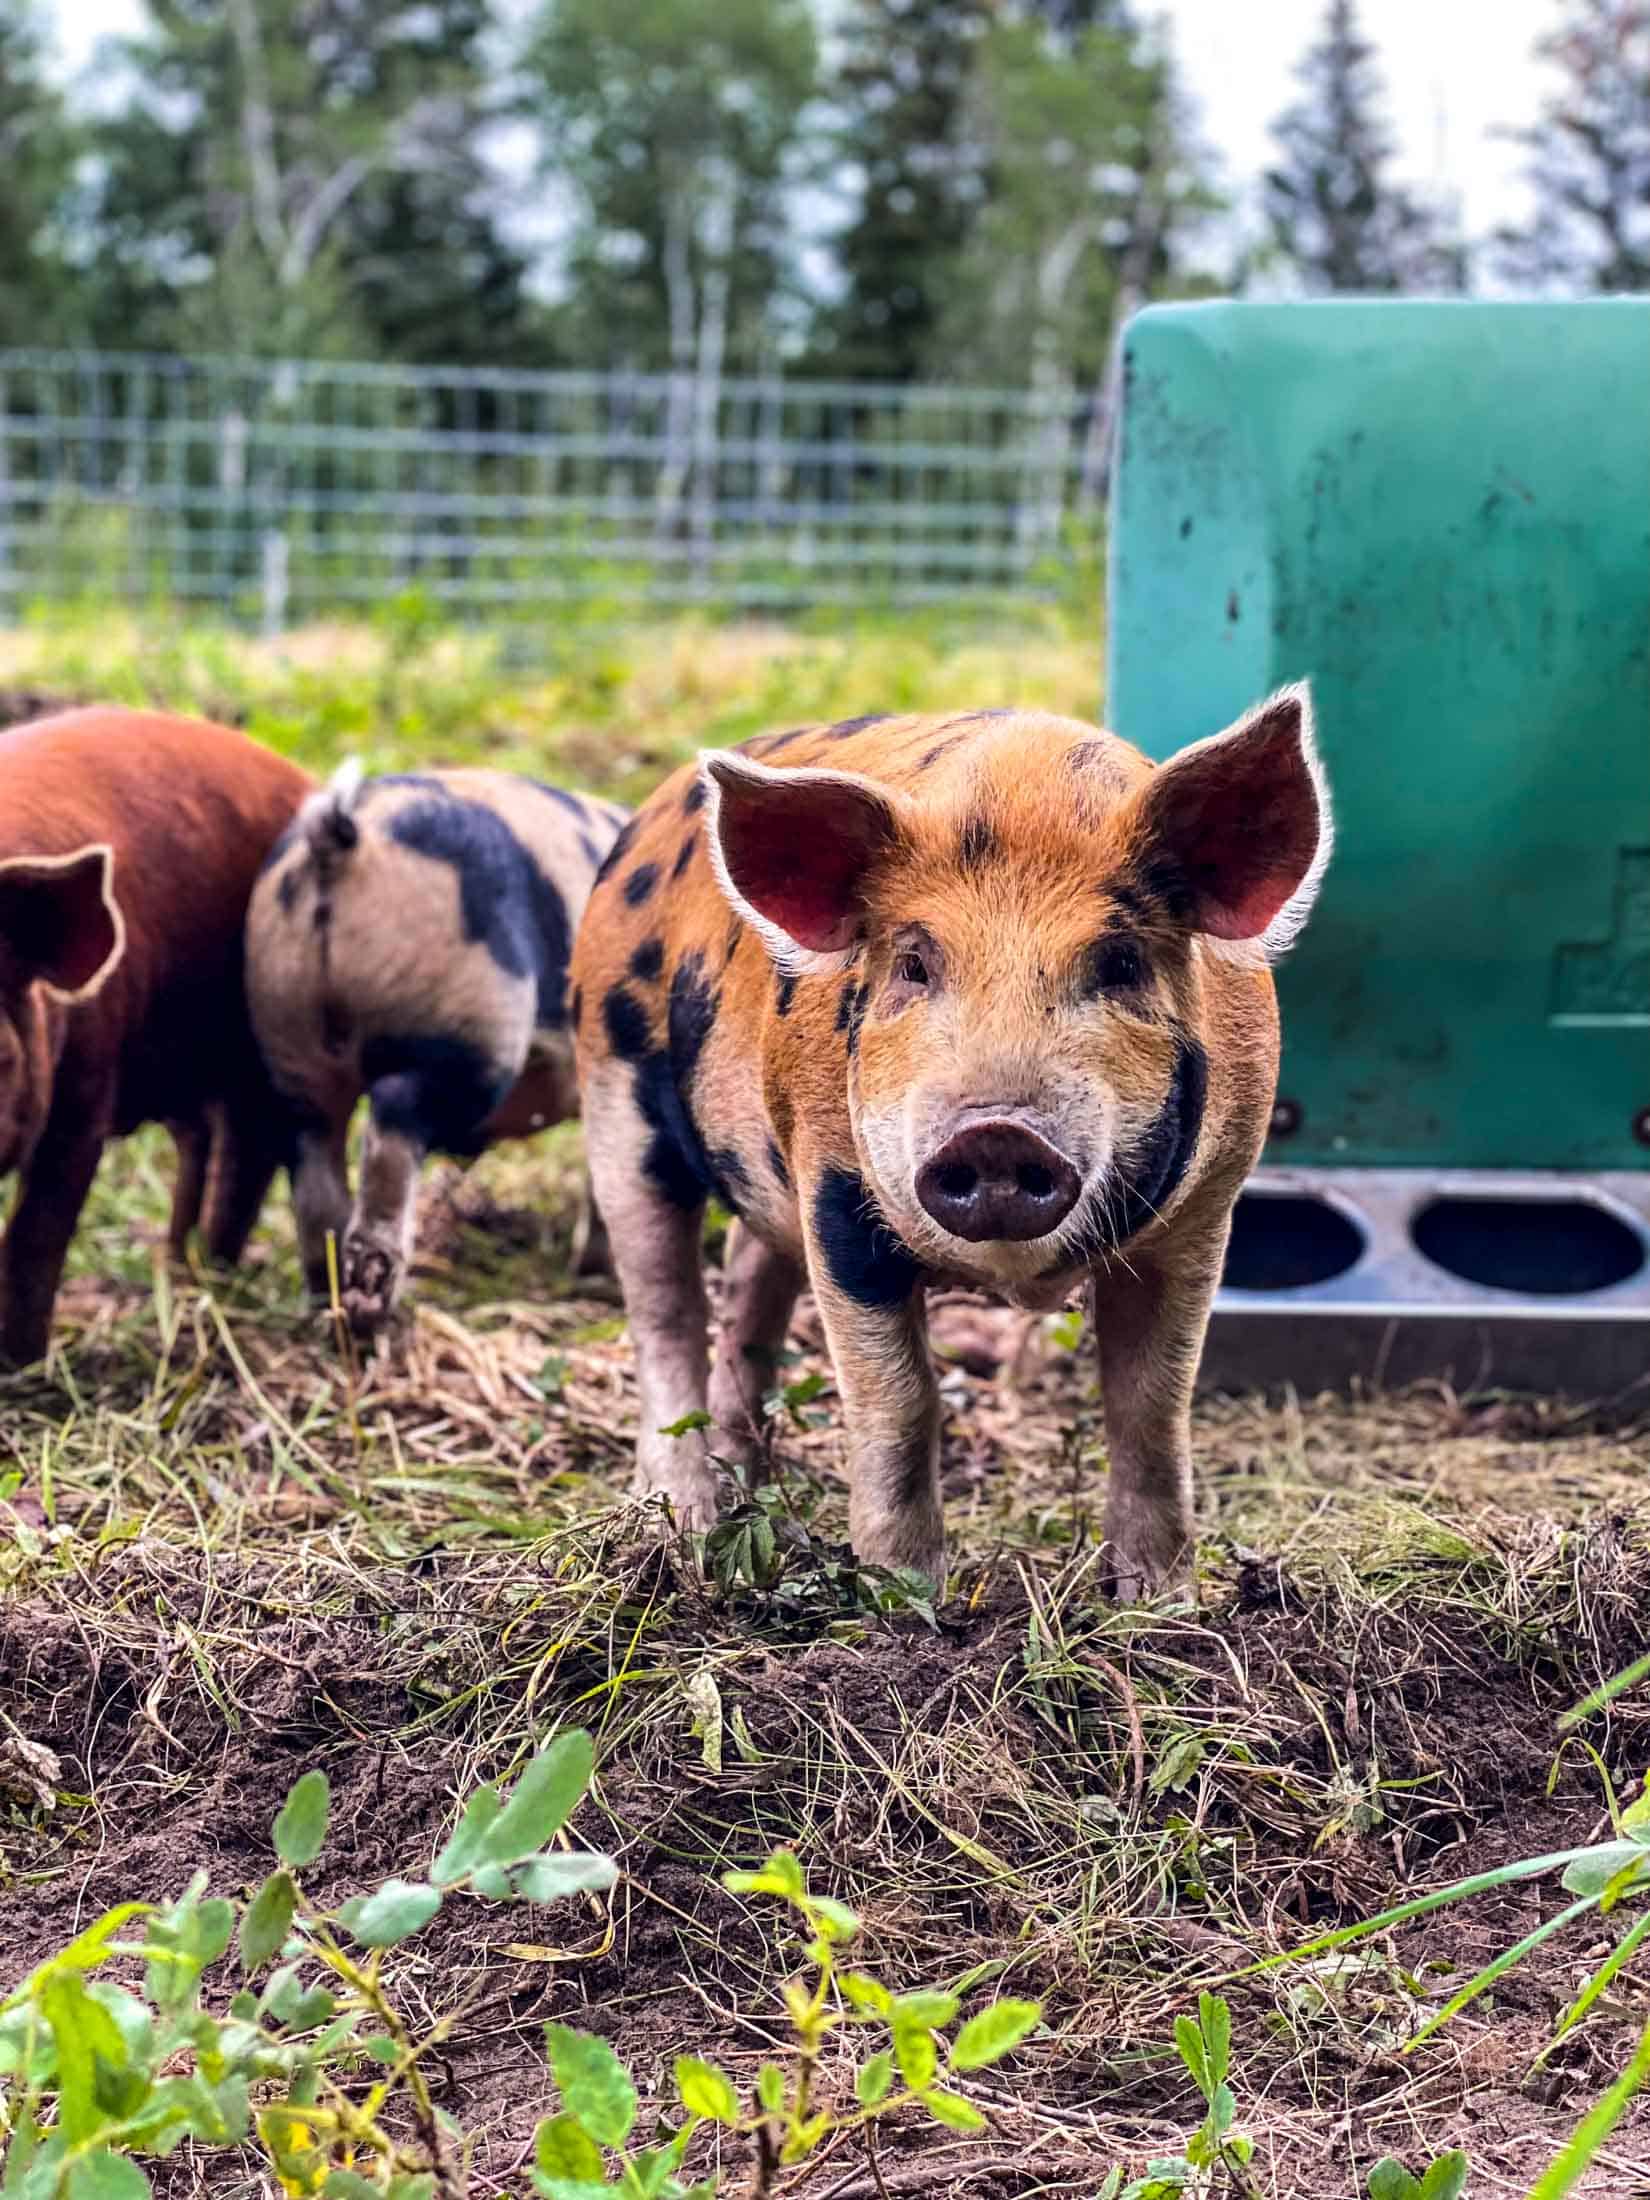
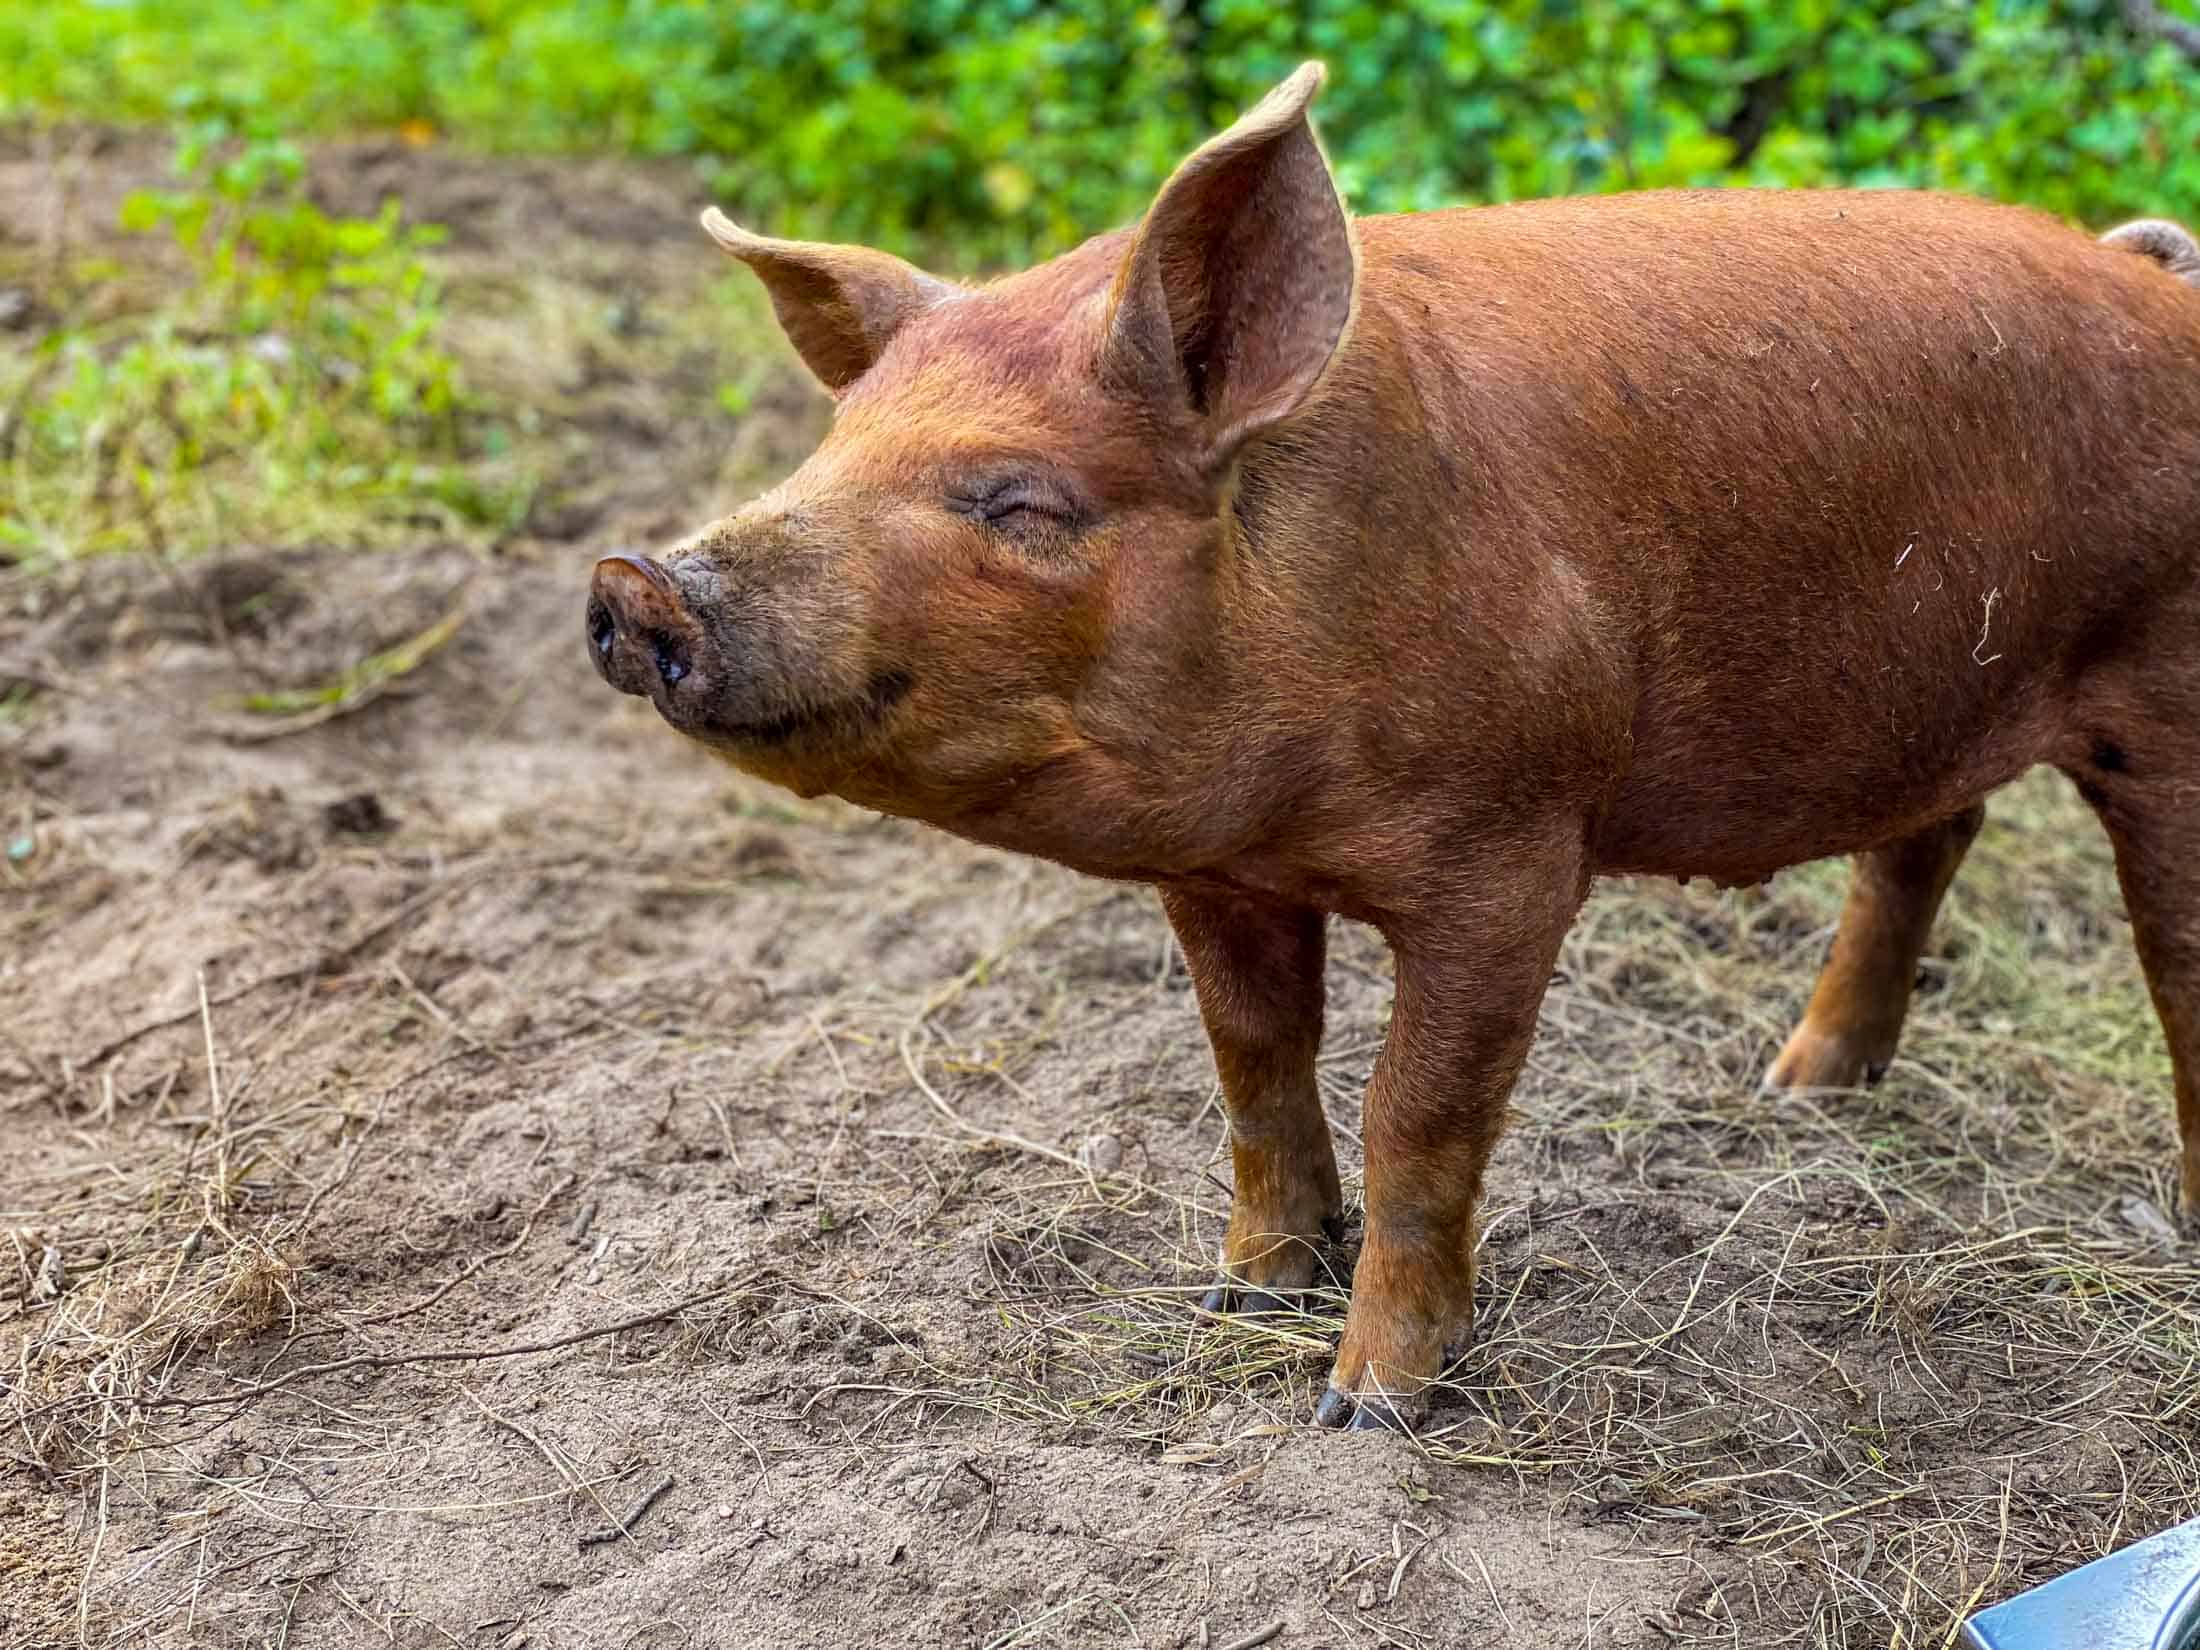
Last fall we raised our second batch of pigs (4). They were raised in a treed area that we continued to expand and move as they grew. The pigs were a mixture of Duroc and Kune Kune. The Duroc breed is generally more lean, awesome for bacon and ham (considered high quality meat) whereas the Kunekune pig breed is known for their lard. From these pigs we got the BEST of both worlds, lots of delicious meat and a lot of pork fat to render. This will be our go to mix from here on out!
Why You Should Render Lard At Home
A Few Notes About Lard
The practice of rendering lard is making a comeback in the kitchens of home cooks. In recent years, there has been a revival of interest in returning to the “old ways.” I am all about returning to my roots with fresh perspectives on traditional skills. Learning how to render lard is no different!
Rendering lard involves extracting the fatty tissue from a pig and transforming it into a semi-solid white fat product. It’s a traditional technique that follows the desire to embrace and utilize every part of an animal. Fast forward to today, and we’re witnessing a resurgence of interest in returning to our culinary roots. More and more people are rediscovering the benefits and flavors of rendering animal fat for their home cooking adventures.
Leaf Lard vs. Back Lard

When it comes to lard, there are two types that often steal the spotlight: leaf lard and back lard.
Leaf lard is like the crown jewel of lard. It’s the fat that surrounds the pig’s kidneys, and it’s known for its delicate and mild flavor. Imagine it as the refined, high-class sibling of lard. Leaf lard is snow white, visceral fat that has a higher melting point, around 110-118°F, making it perfect for baking flaky pastries – try my Memere’s famous pie dough– and other sweet treats that would be ruined with a porky flavor.
On the other hand, we have back lard. As the name suggests, it comes from the back of the pig. Back fat lard has a more pronounced porky flavor compared to leaf lard. With a melting point of around 86-104°F, it’s a versatile all-purpose lard that can add richness and depth to your savory dishes.
So, whether you’re aiming for buttery croissants or hearty stews, understanding the differences between leaf lard and back lard can help you choose the right fat for your culinary adventures.
How Is Lard Different From Tallow and Shmaltz?

As discussed above, lard is the rendered fat obtained from pigs. It has a smooth and creamy texture, adding richness to dishes. In terms of flavor, lard boasts a subtle savory taste that enhances both sweet and savory recipes. Nutritionally, lard contains a good balance of monounsaturated and saturated fats. Its high smoke point makes it ideal for frying, while its ability to create flaky pastries makes bakers rejoice.
Tallow is made from rendering suet, the fat from cattle or sheep (less commonly from horses, goats, and other stock.) With its distinct beefy taste, tallow adds depth to stews, roasts, and even pie crusts. Tallow’s nutritional profile includes high levels of beneficial fatty acids and vitamin E making it a skincare favorite. Many appreciate its high smoke point, making it a favorite for searing meats and deep-frying.
Schmaltz is rendered chicken or goose fat, known for its golden hue and indulgent flavor. Its texture ranges from soft to firm, depending on the rendering process. Schmaltz brings a delightful savory and slightly nutty taste to dishes. From Jewish cuisine’s beloved matzo ball soup to Austrian strudels and Eastern European classics like chopped liver, schmaltz adds incredible depth and richness. In skincare, schmaltz’s moisturizing properties and high vitamin content make it a natural choice for nourishing the skin.
How to Source Out the BEST Lard
Ask your butcher! Last year we were fortunate to be able to grow our own pigs- a Kune Kune- Duroc cross- full of delicious fat and flavor. There is nothing more rewarding than harvesting food that you’ve grown yourself. The pigs were raised in a treed area with plenty of shade, leafy greens, and high quality grain chop. We specifically asked our butcher to separate the leaf lard from the back lard. We weren’t charged any extra… don’t hesitate to ask!
Ask neighbours, local farmers, and butchers! If you don’t raise your own livestock, aim to source out some high quality pork fat from a local farmer or butcher. Consider asking around at a local farmer’s market or CSA program. Word of mouth is often a great way to get your hands on locally grown meat/ lard.
Check out the meat counter at your local grocery store. Pork fat is often set aside for sale at grocery stores. If the local store doesn’t have pork fat on hand, they may be able to order some in for you or direct you to somewhere who can.
Rendered and refined lard is readily available on grocery store shelves in Canada. We have a product called Tenderflake that is made from high quality leaf lard. If you don’t have the time to render lard, this is a great option.
Wet Rendering Lard vs. Dry Rendering Lard
Wet method for rendering lard vs. dry method for rendering lard: The wet method for rendering lard involves rendering ground lard (or finely diced lard) with water. In theory this should result in a mild, light colored lard. The enemy to properly rendered lard is moisture and impurities; for this reason, I choose to stick with the dry rendering method.
Dry rendering involves placing ground or cut lard directly into a large pot, and rendering down the fat, similar to what you would do with bacon but on a larger scale. Dry rendering can produce a light and neutral end product as long as it is done low and slow and the pork “cracklins” are filtered out early on. Rushed lard rendering can result in extra piggy flavor and a darker colored lard.
Key Ingredients + Equipment
Lard: Choose high quality lard. If you plan on using the lard for baking and more delicately flavored dishes, opt for leaf lard.
Heavy Bottomed Stock Pot OR Crockpot: Heavy bottomed pots help the lard heat more evenly and help to prevent charring on the bottom layer. If you choose, you can also use your crockpot on the lowest heat setting.
Fine Mesh Sieve: Always use metal when working with hot lard!
Filter: I love to use plain coffee filters to strain out the impurities from my lard. They are very inexpensive and can be replaced easily during the straining process. You can also use 3-4 layers of cheese cloth.
Air Tight Containers: I recommend using glass jars for storing the lard (see batch + storage section below). If you are planning on storing the lard in a plastic container, strain it into a heat safe container and transfer to a plastic container once it has cooled.
Tips + Tricks
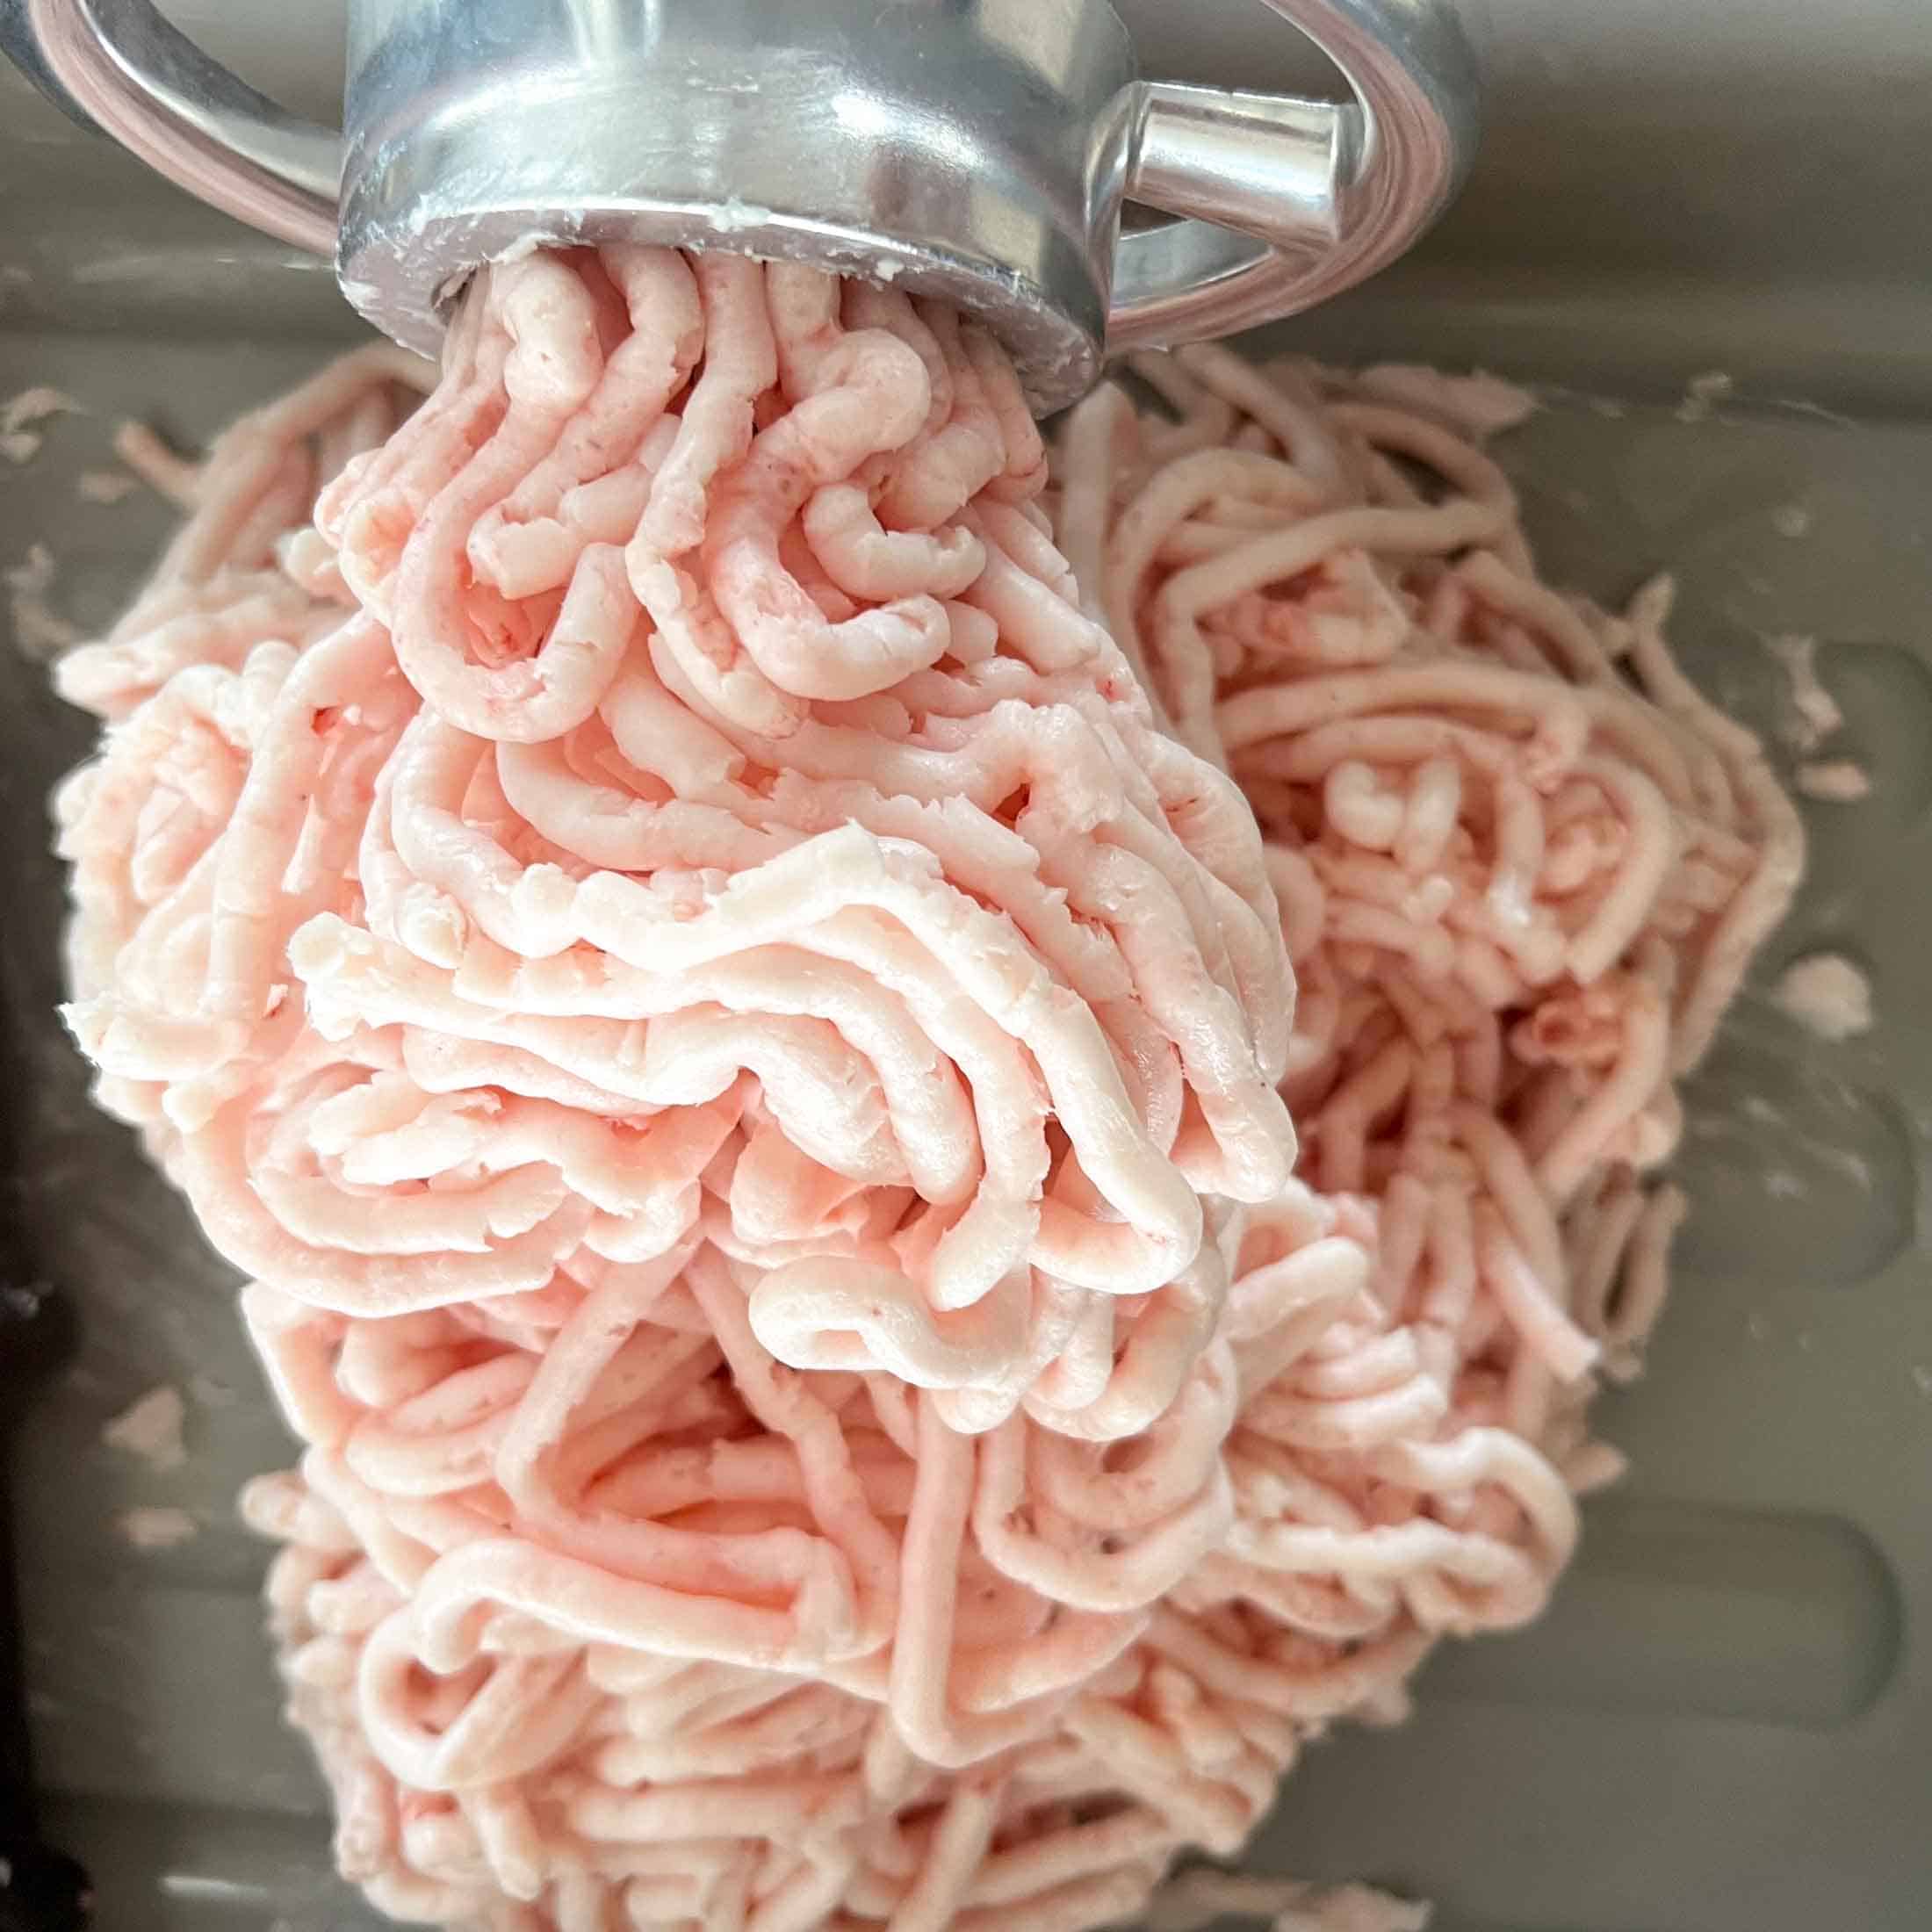
-Grind or chop your lard when it is still slightly frozen. This will allow you to manipulate it more easily and it will push through the grinder more efficiently.
-Be mindful not to burn the fat. Adjust the heat accordingly to maintain a gentle simmer throughout the process.
-Avoid over-stirring the pot as excessive agitation can emulsify the fat and water, resulting in a less desirable texture.
Exactly How To Render Lard At Home
Step 1. Gather + Prepare Your Fat
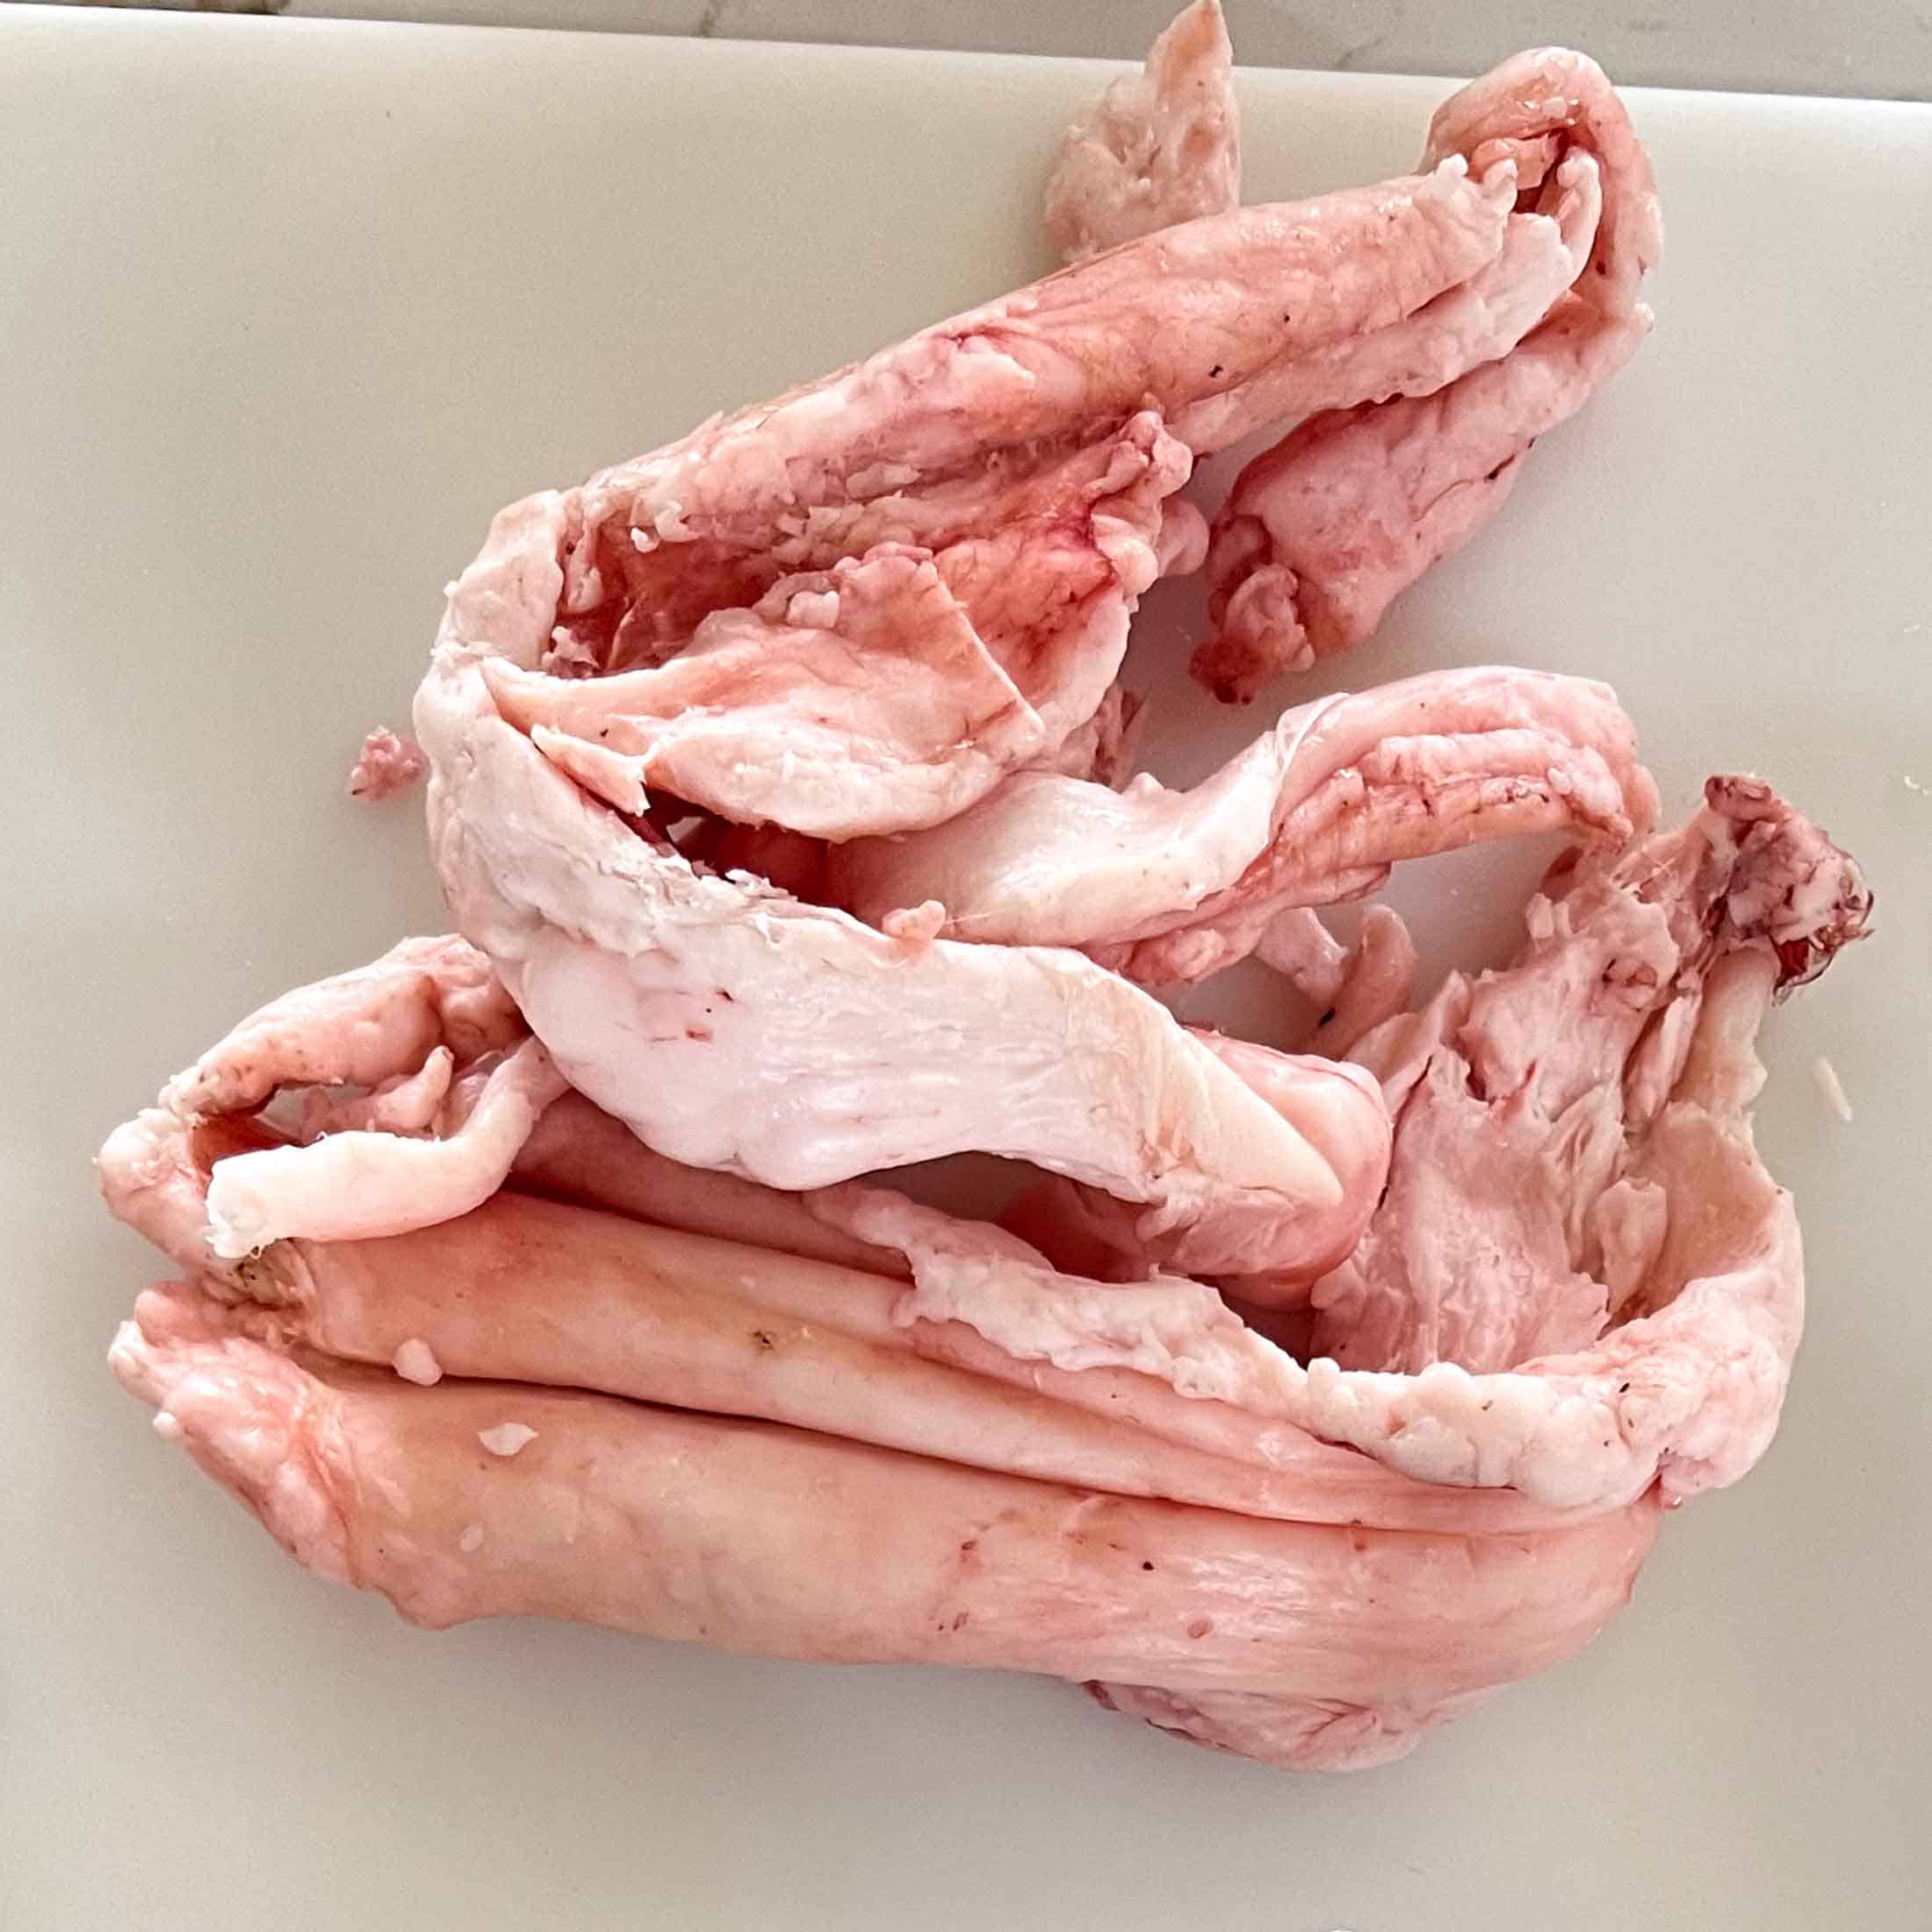
To start off, you’ll need high-quality fat such as pork fatback or leaf fat. See the section above about the two kinds of fat, and decide which is best for you. There are also ideas of where to source out the pork fat in the section above. Remove any visible pieces of meat- it is okay to leave some behind (it will end up as cracklings later on)
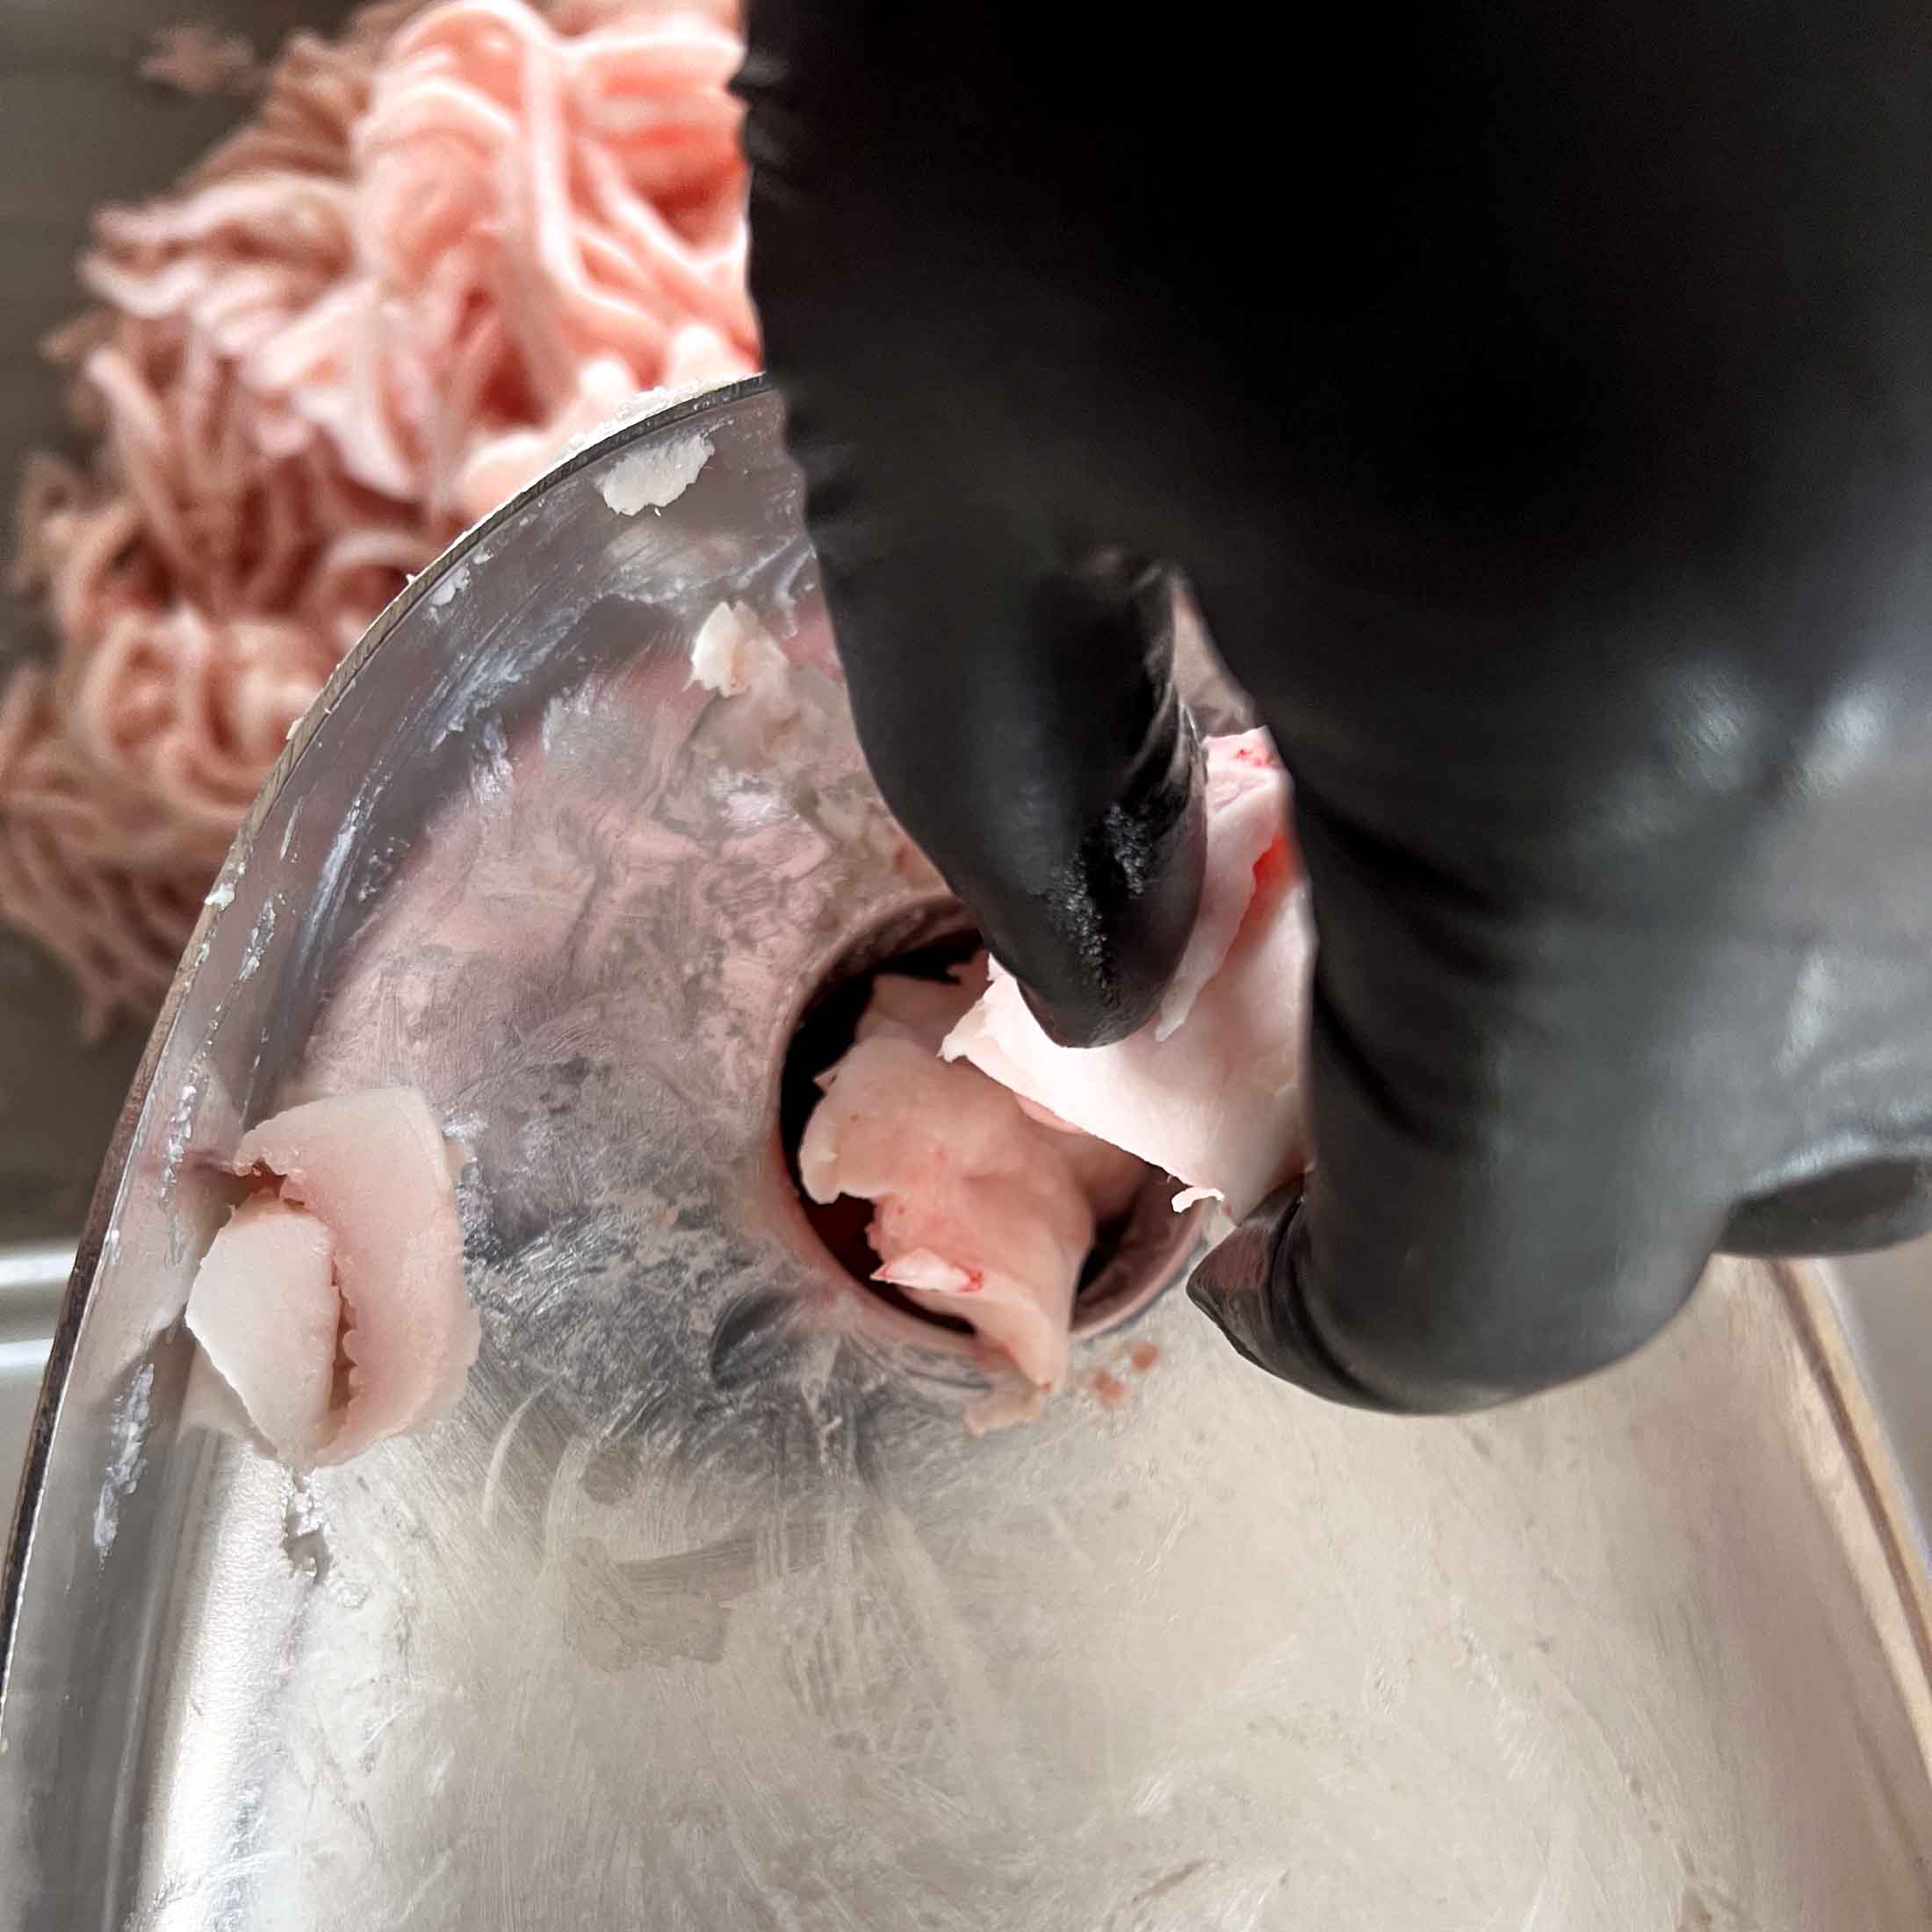
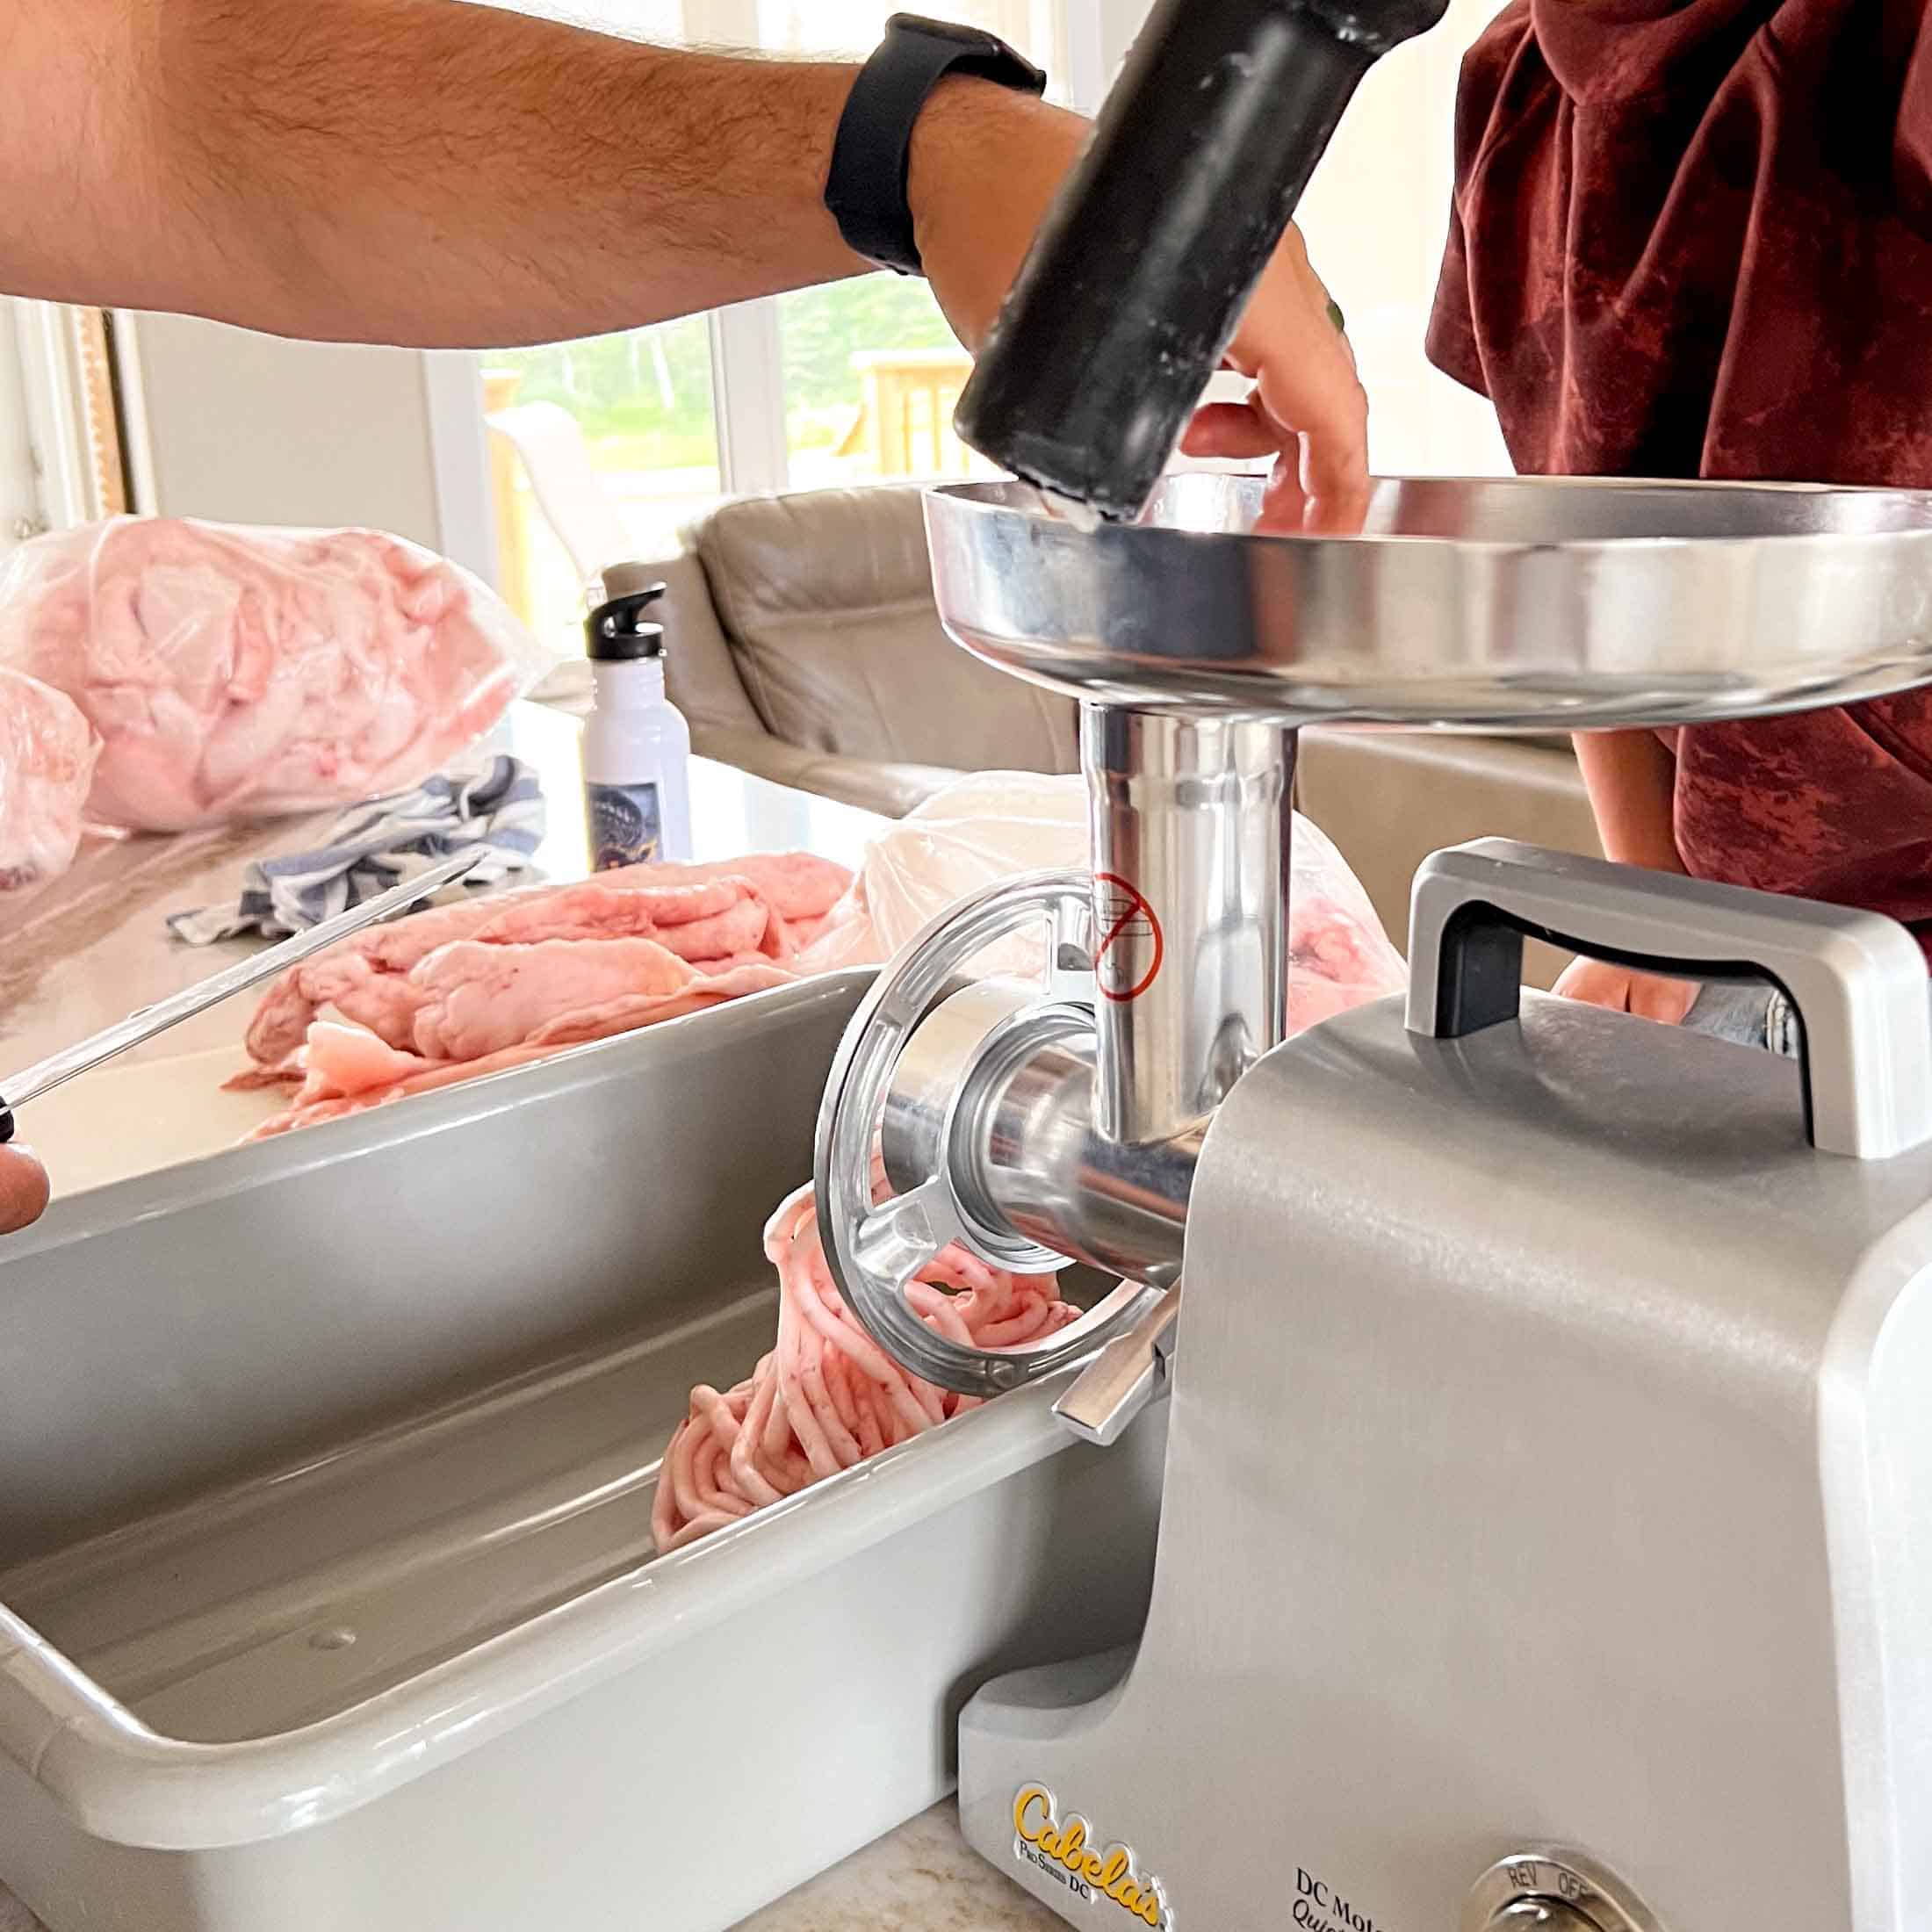
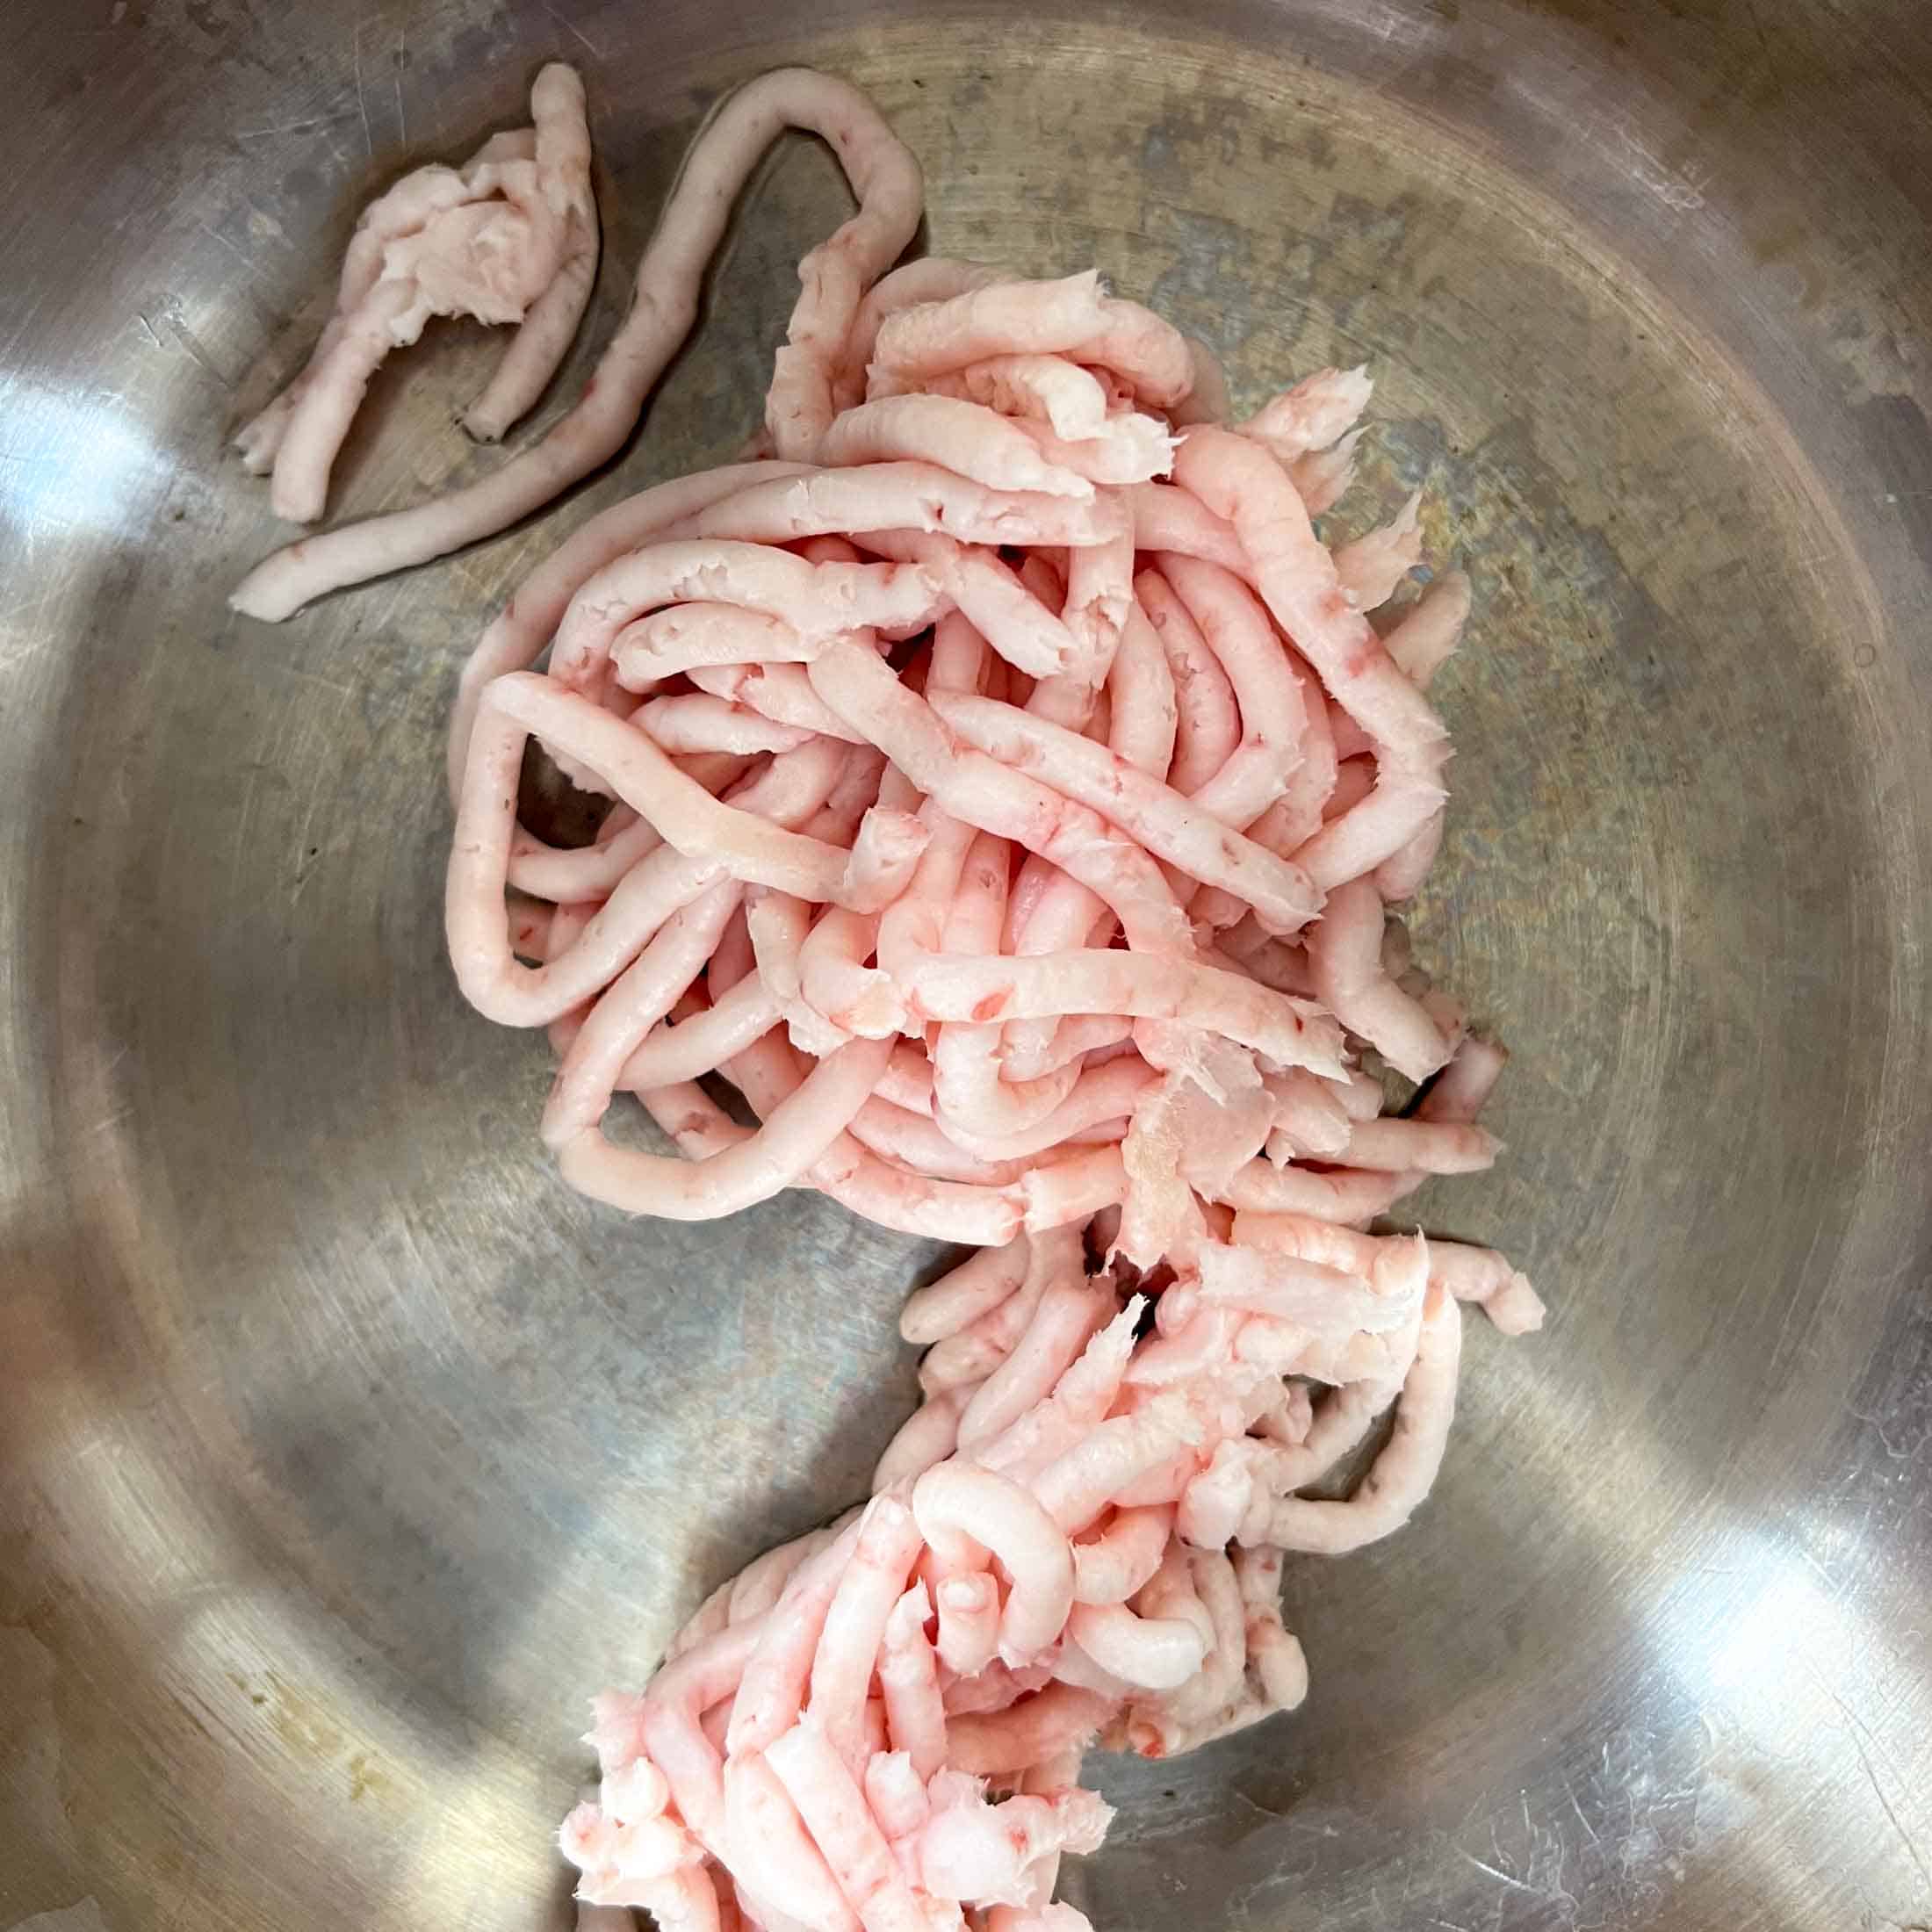
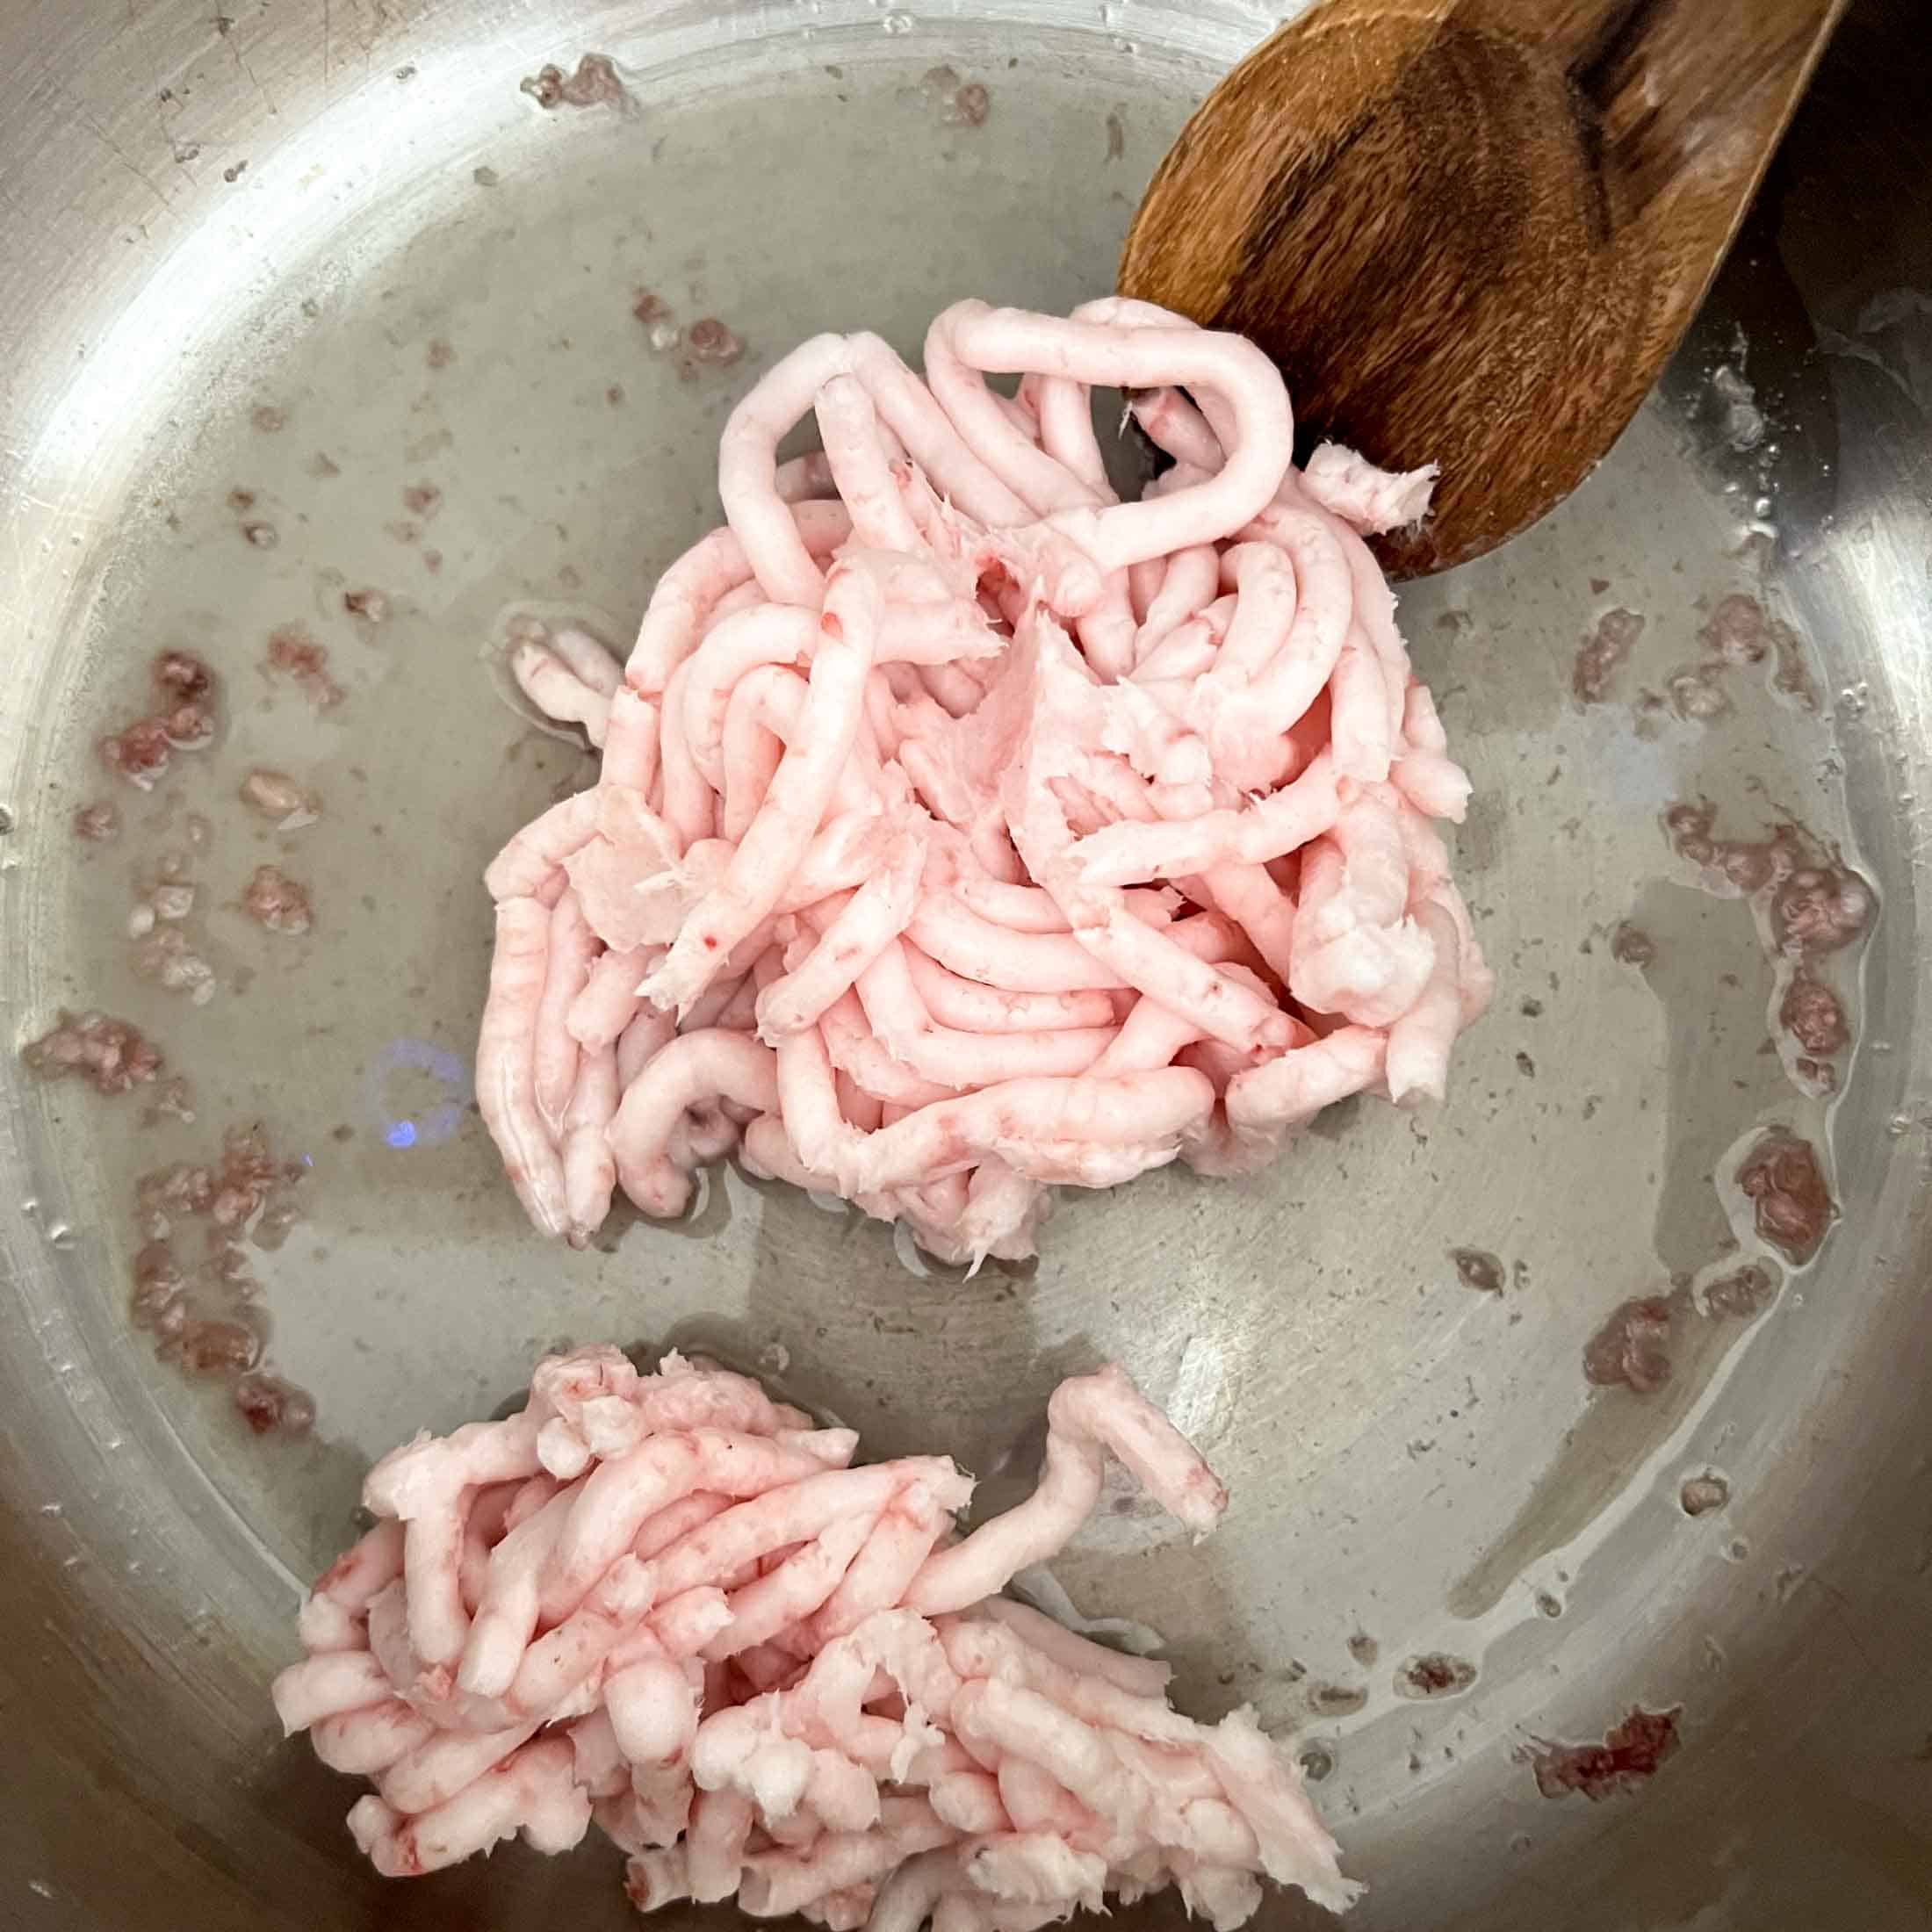
If you have a meat grinder, I recommend grinding the fat before rendering. If not, slice the pork fat up into small pieces. This process is long, grinding or finely chopping the lard will allow it to render more evenly and ensures that you are able to render all of the impurities out. Your butcher may be able to grind the lard for you to save you time, for a small fee.

Step 2. Begin To Heat
Put a small amount of lard (enough to cover the bottom of the pot) into a large heavy-bottomed pot or slow cooker. Turn the burner on to a very low temperature. Watch the lard carefully and once it has fully melted, you can add the remaining lard, keeping the heat on very low. The small layer of melted lard on the bottom of the pot will help to prevent the rest of the lard from burning and adding more pork flavor and darker color. Continue to heat the pot of lard over very low heat, stirring occasionally.

Step 3: Remove Cracklings
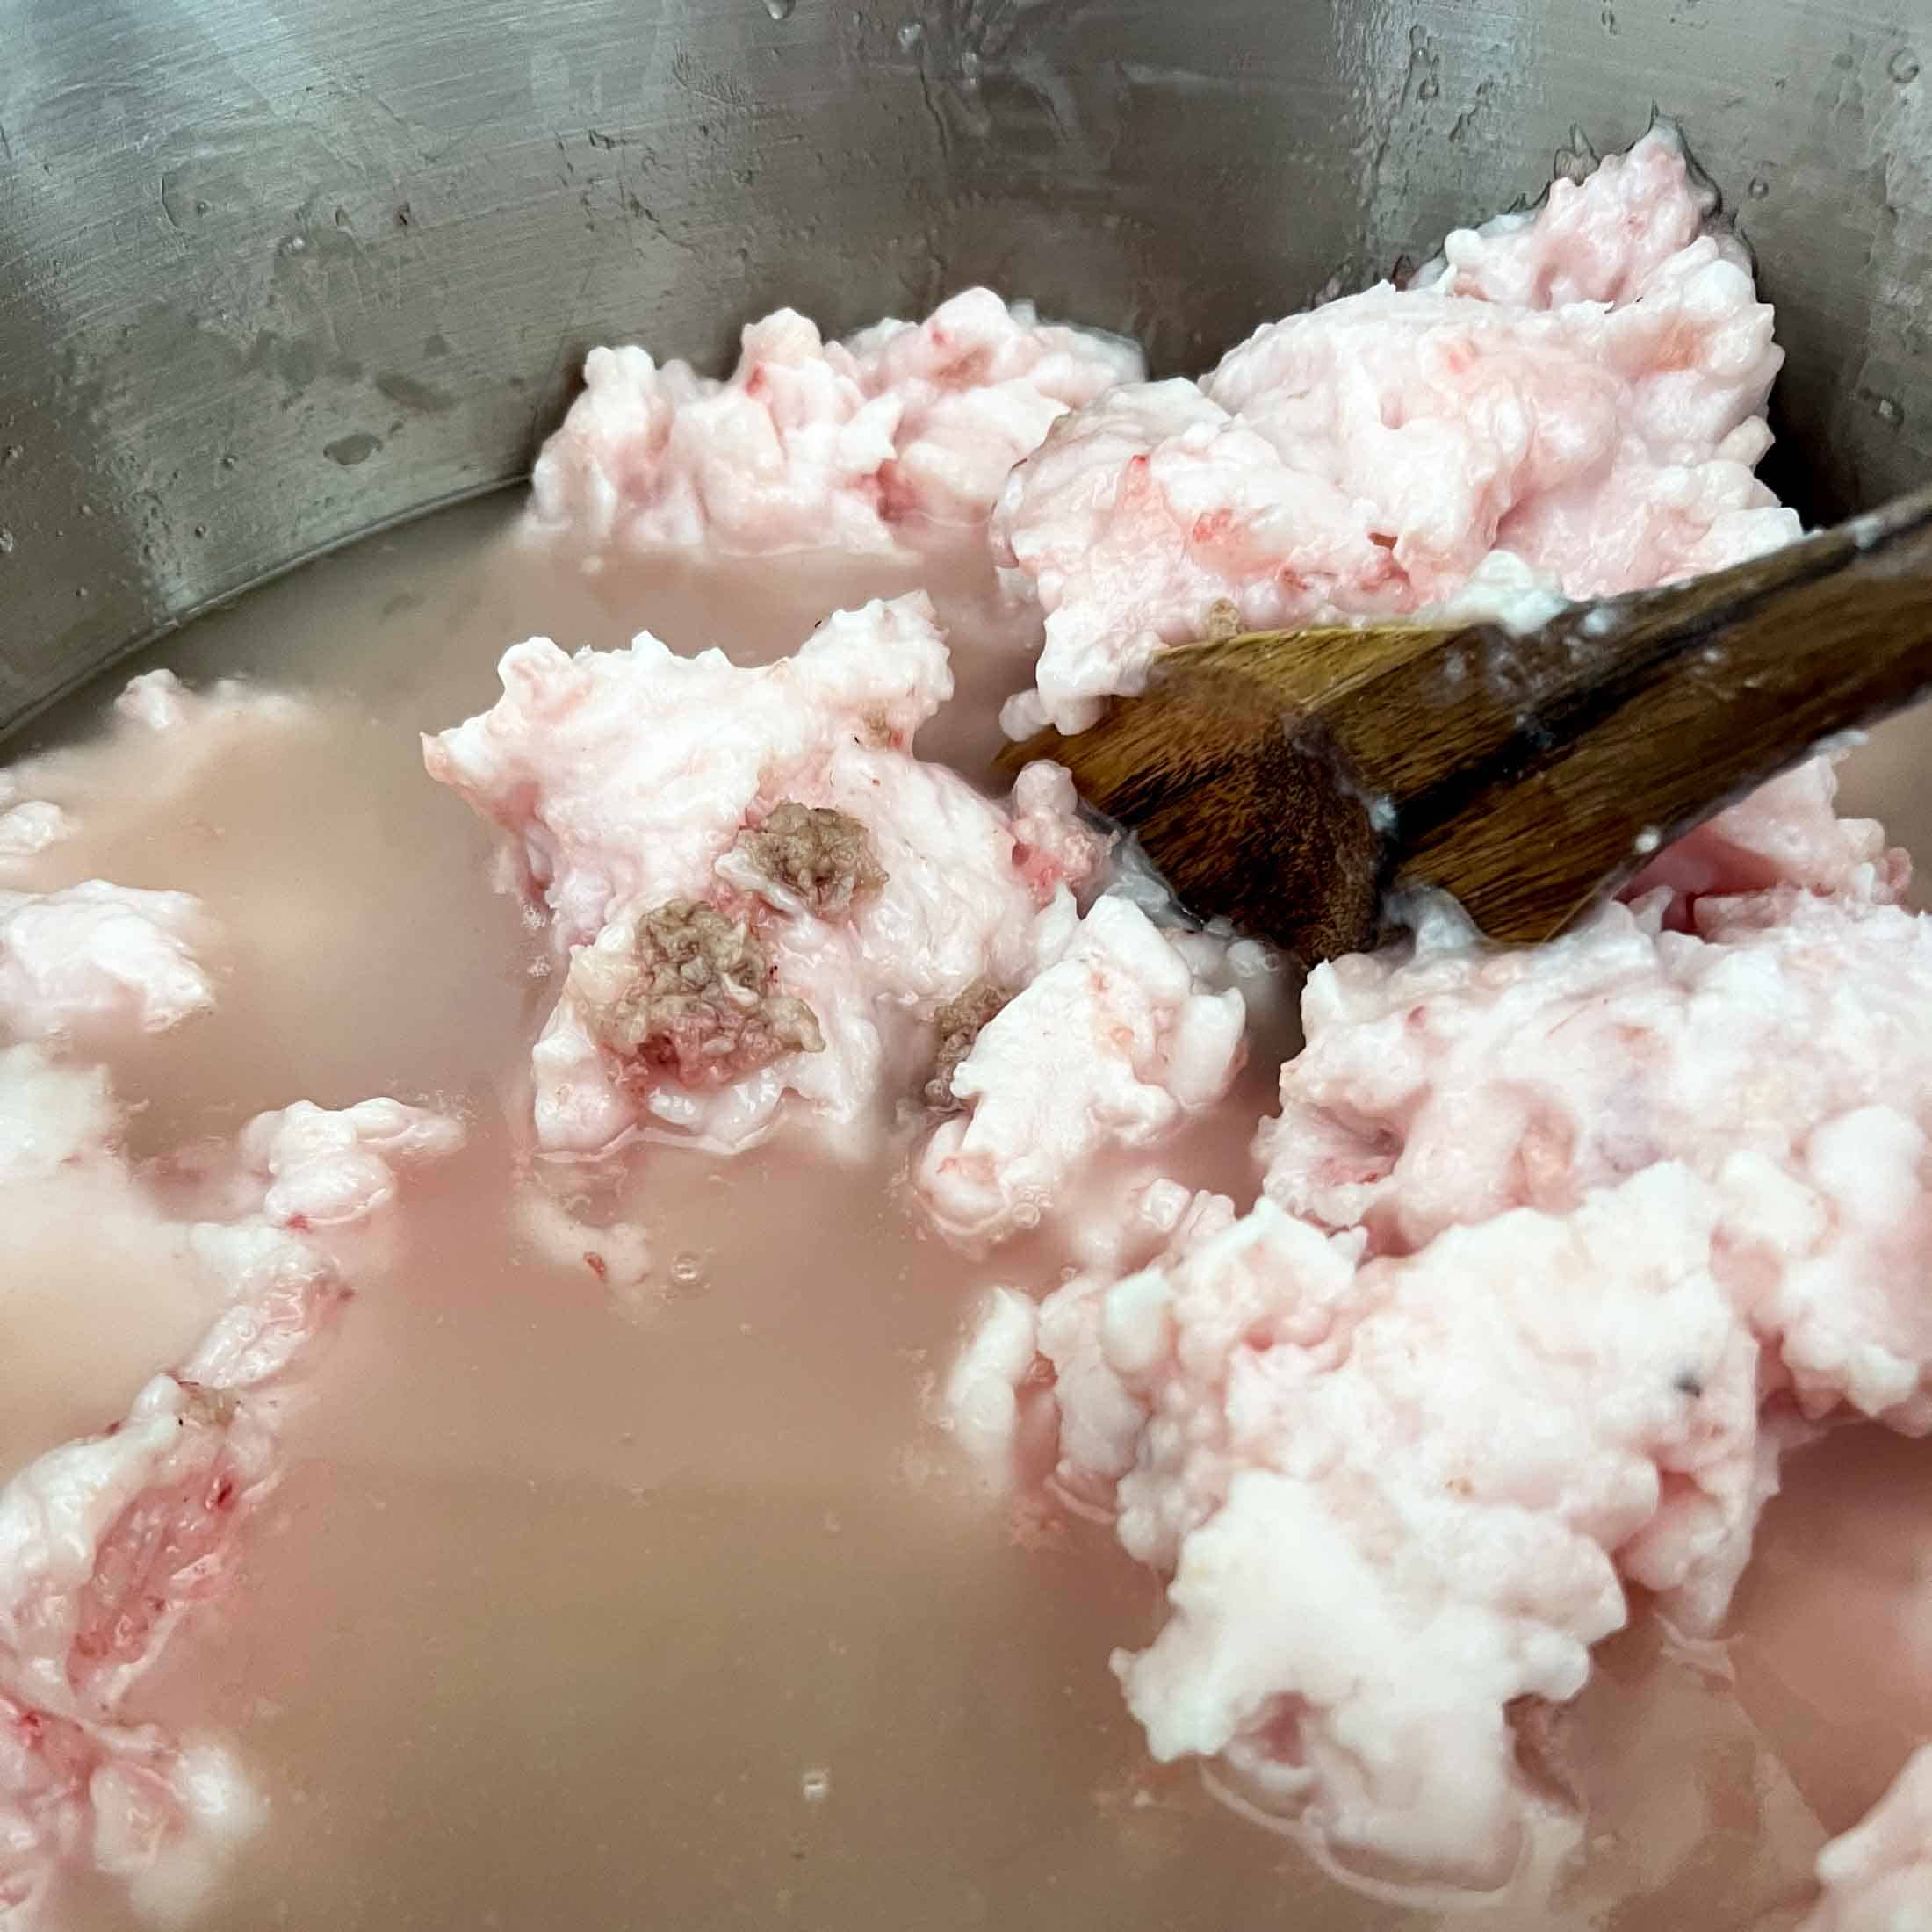
Continue to heat the melted lard, allowing it to come to a gentle simmer. Using a slotted spoon or mesh sieve, start straining out any pieces of pork that appear. Set them aside in a bowl or zip top bag for use in other savory recipes (think hashbrowns, salad topper, spaghetti + meat sauce, meatballs).
As the mixture simmers, gently stir it from time to time. This helps the fat melt evenly and prevents it from sticking to the bottom of the pot. Additionally, keep an eye out for any impurities that rise to the surface. Skim them off with a slotted spoon or a skimmer to maintain the purity of your lard.
Step 4: Patience
The process typically takes around 3-4 hours, depending on the amount of fat that you are rendering and the heat level.
Step 5: Straining/Bottling
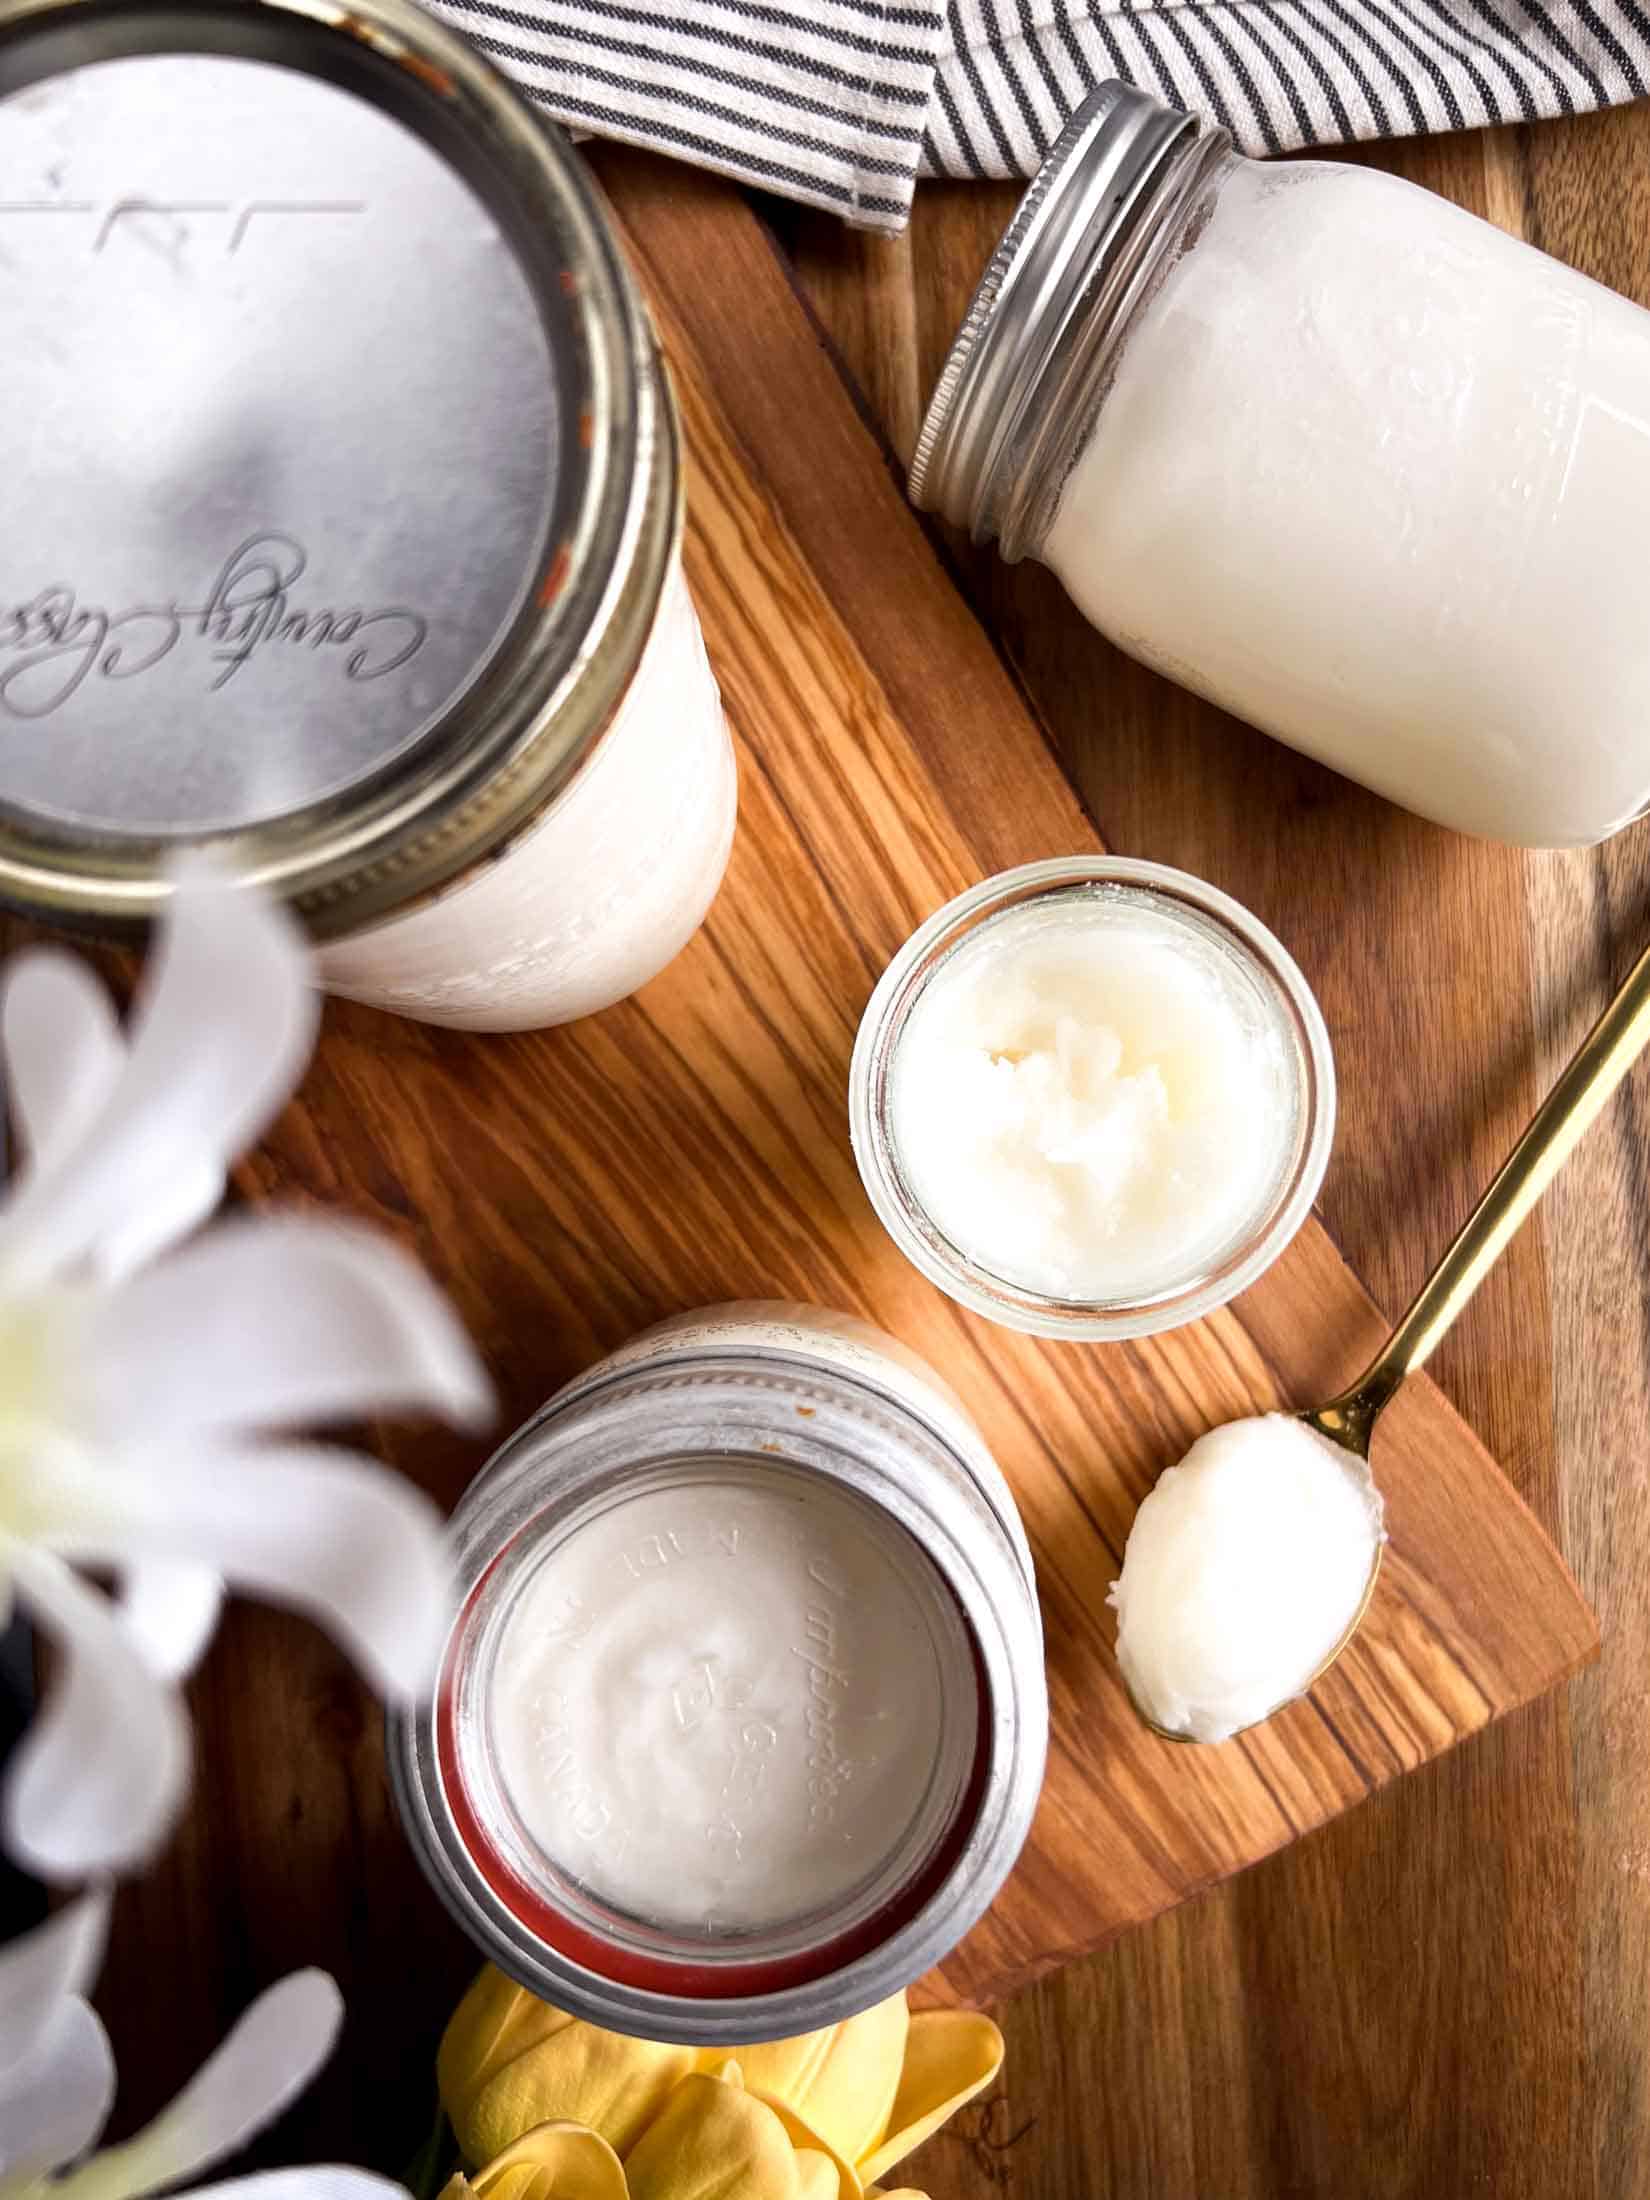
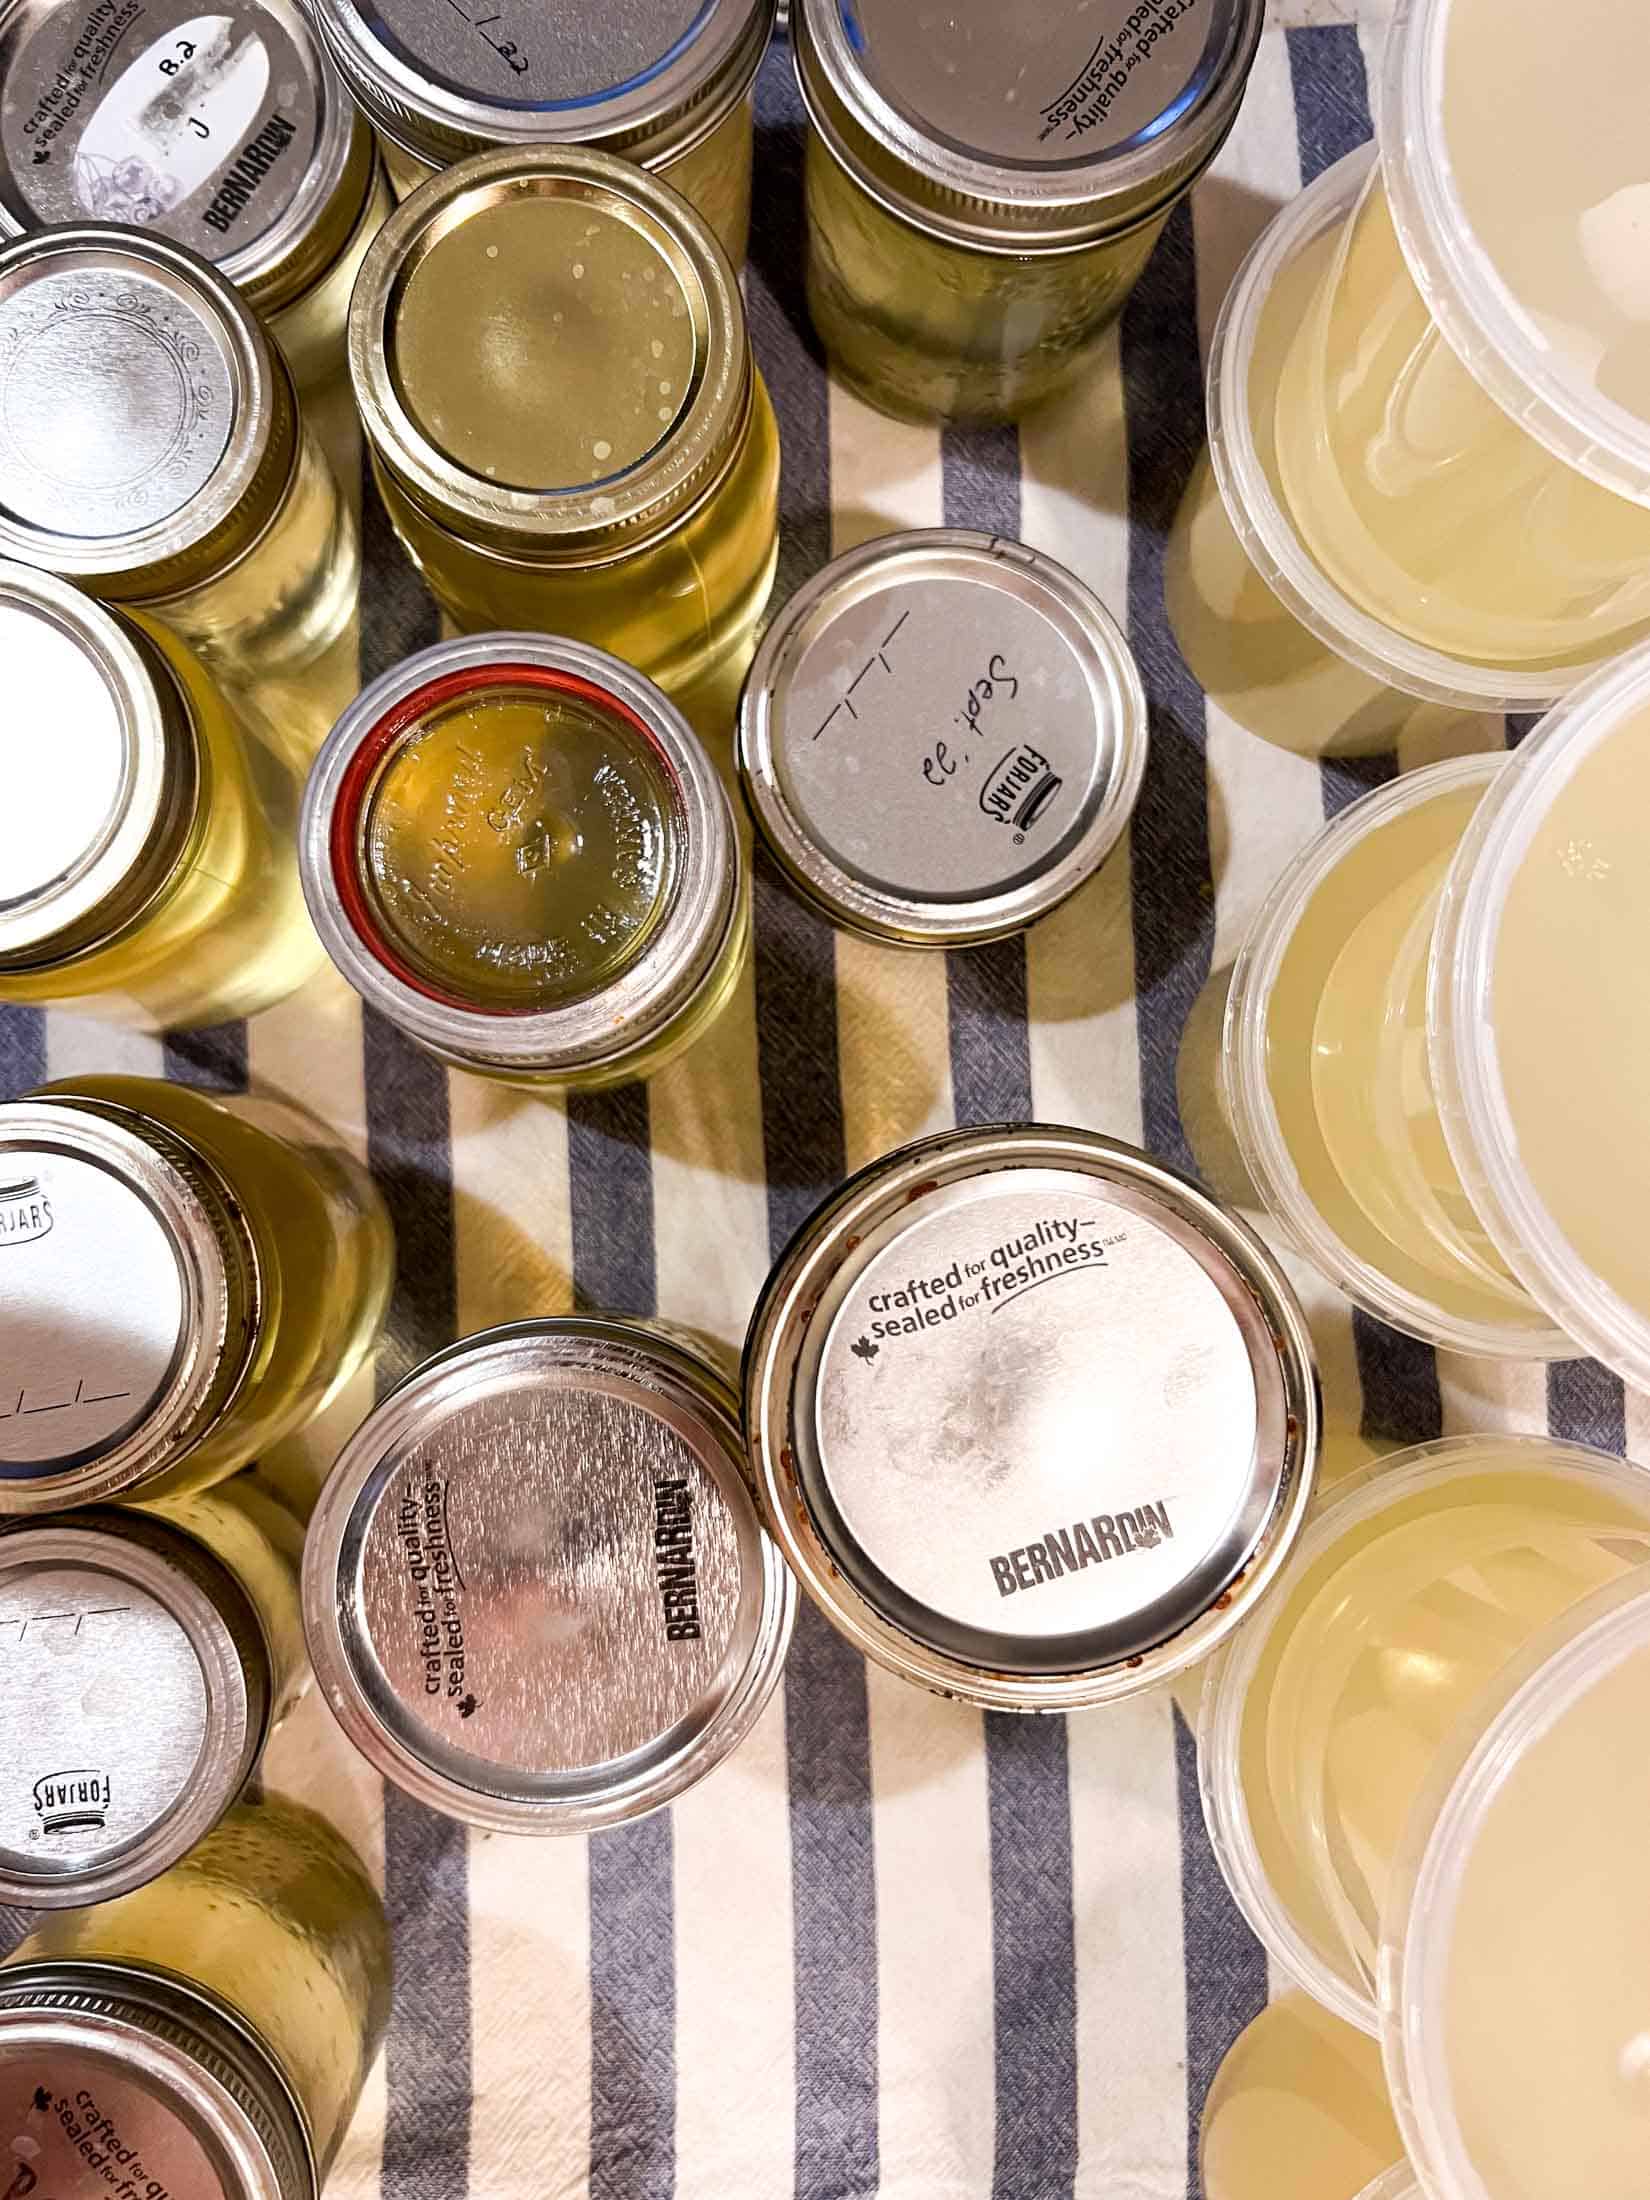
By the end of the rendering process, you’ll notice the fat has transformed into a beautiful, light colored golden liquid. When it is done, the lard should be clear, there should be far less bubbling, and zero crackling from moisture.
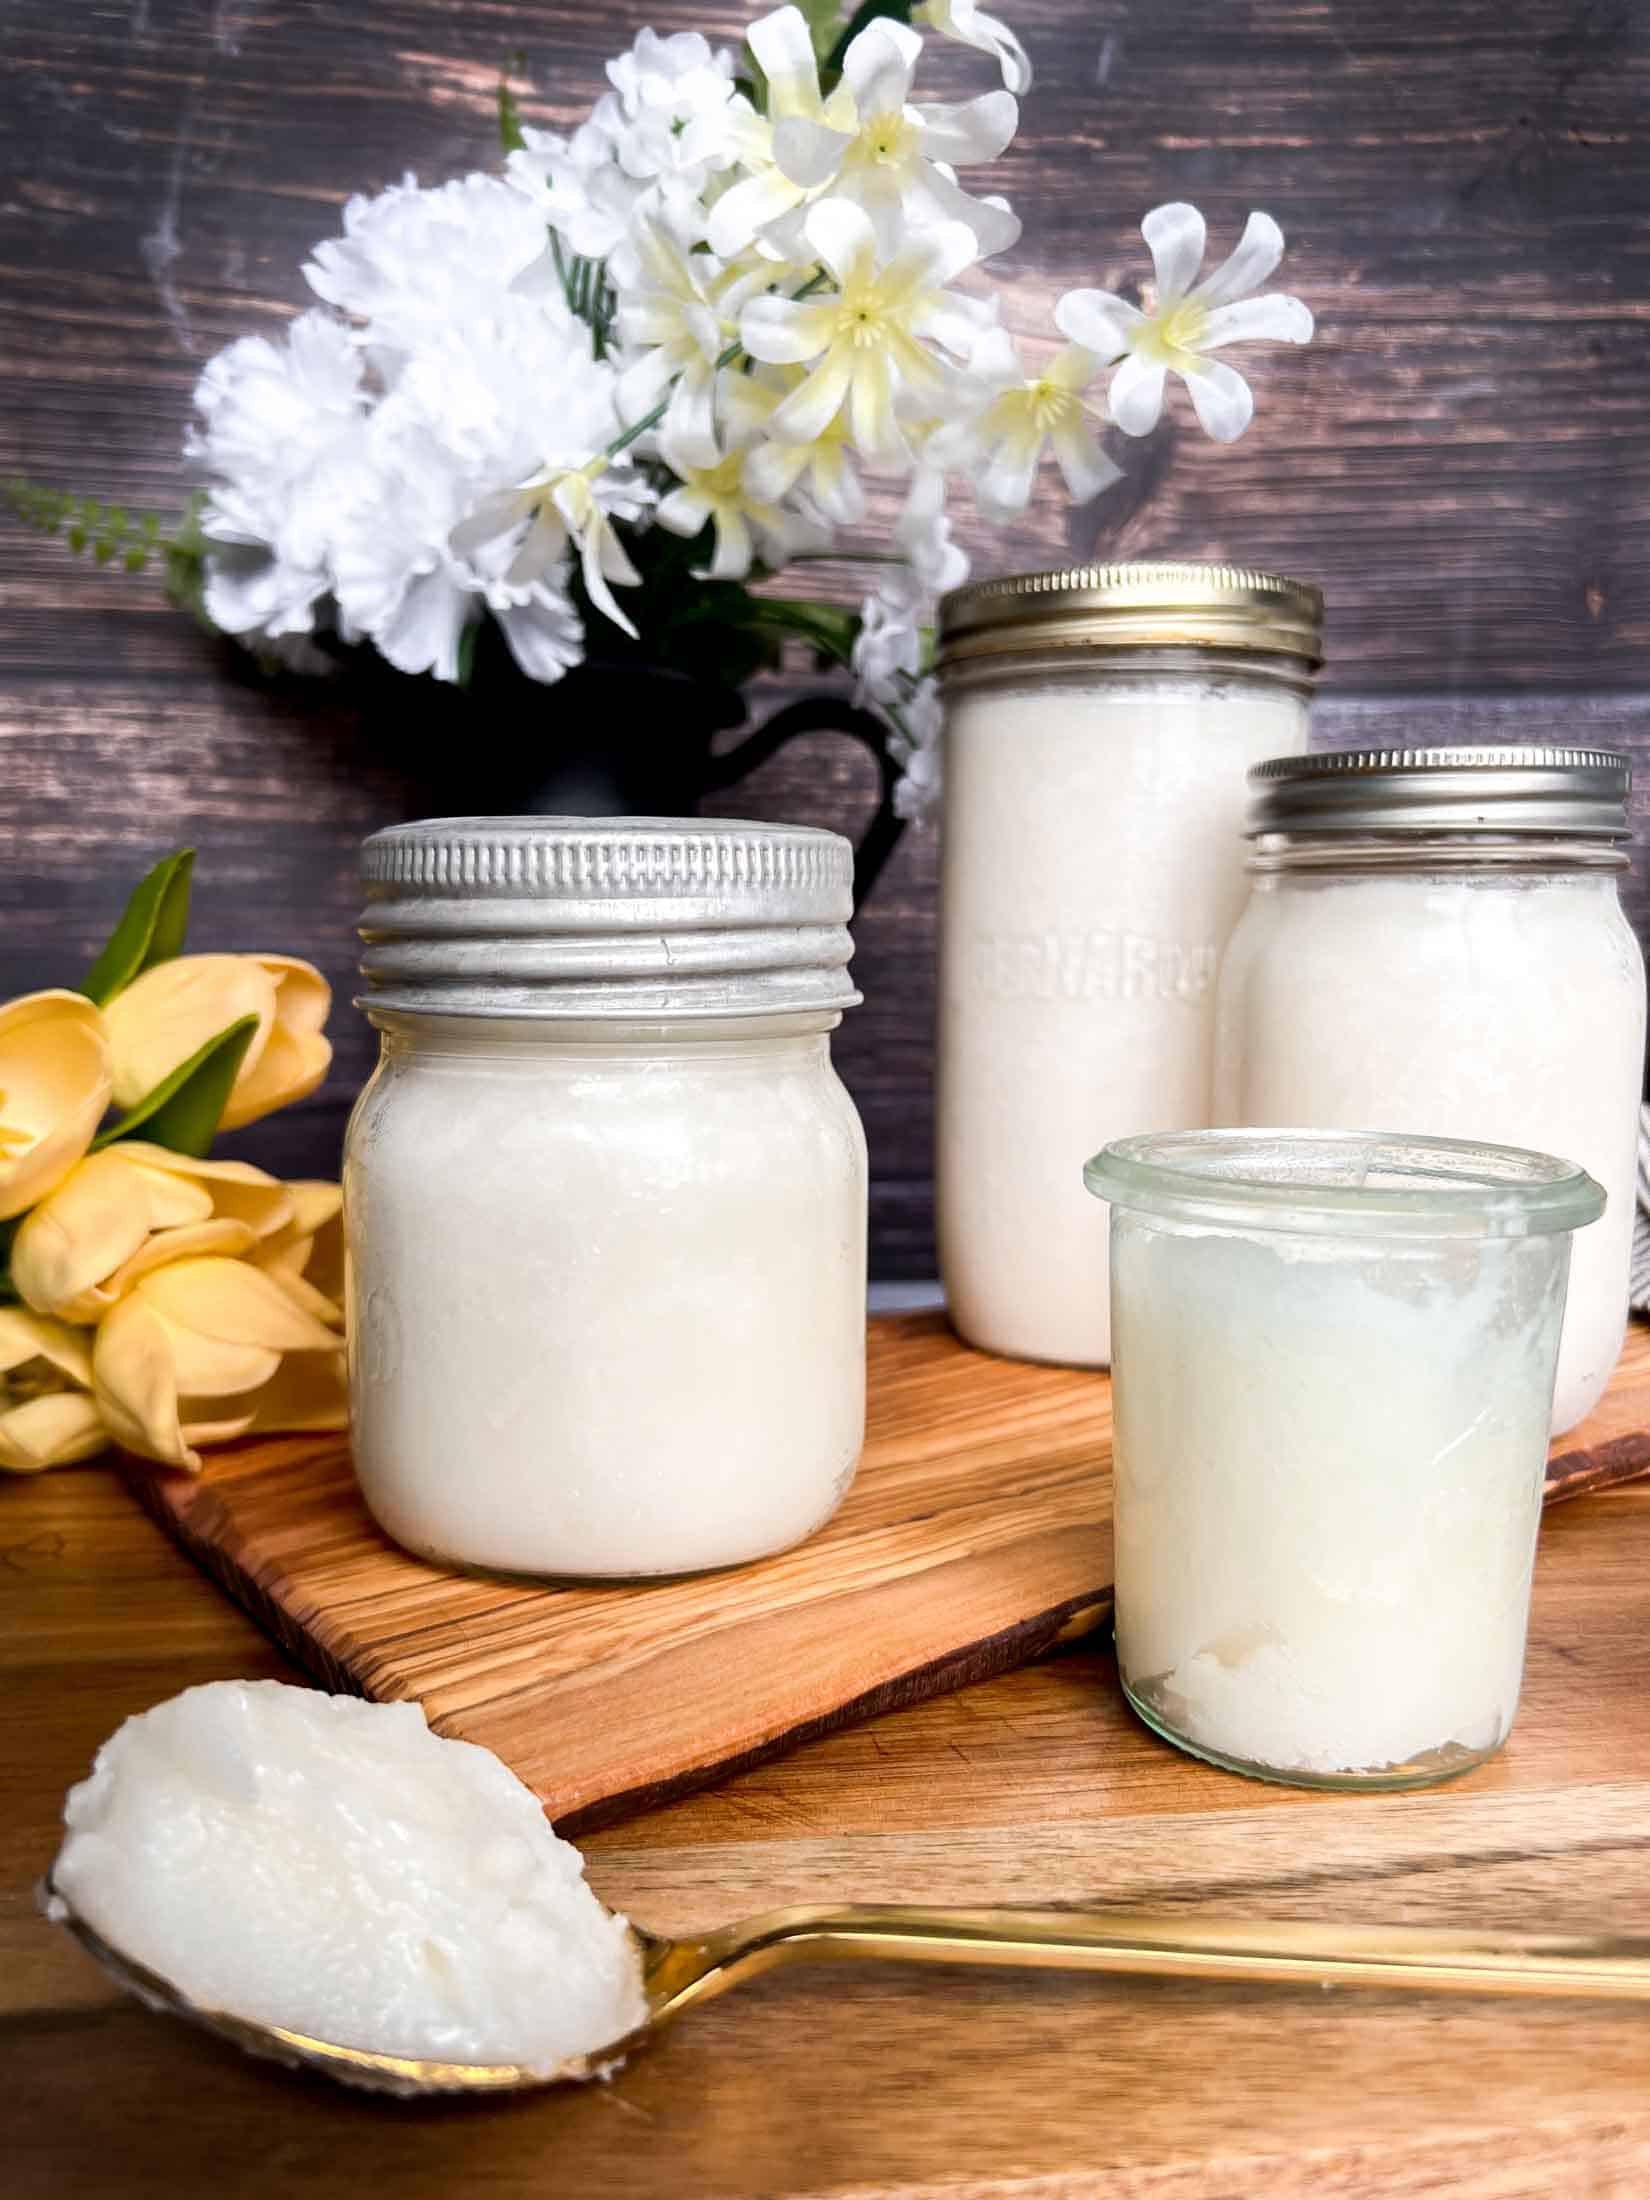
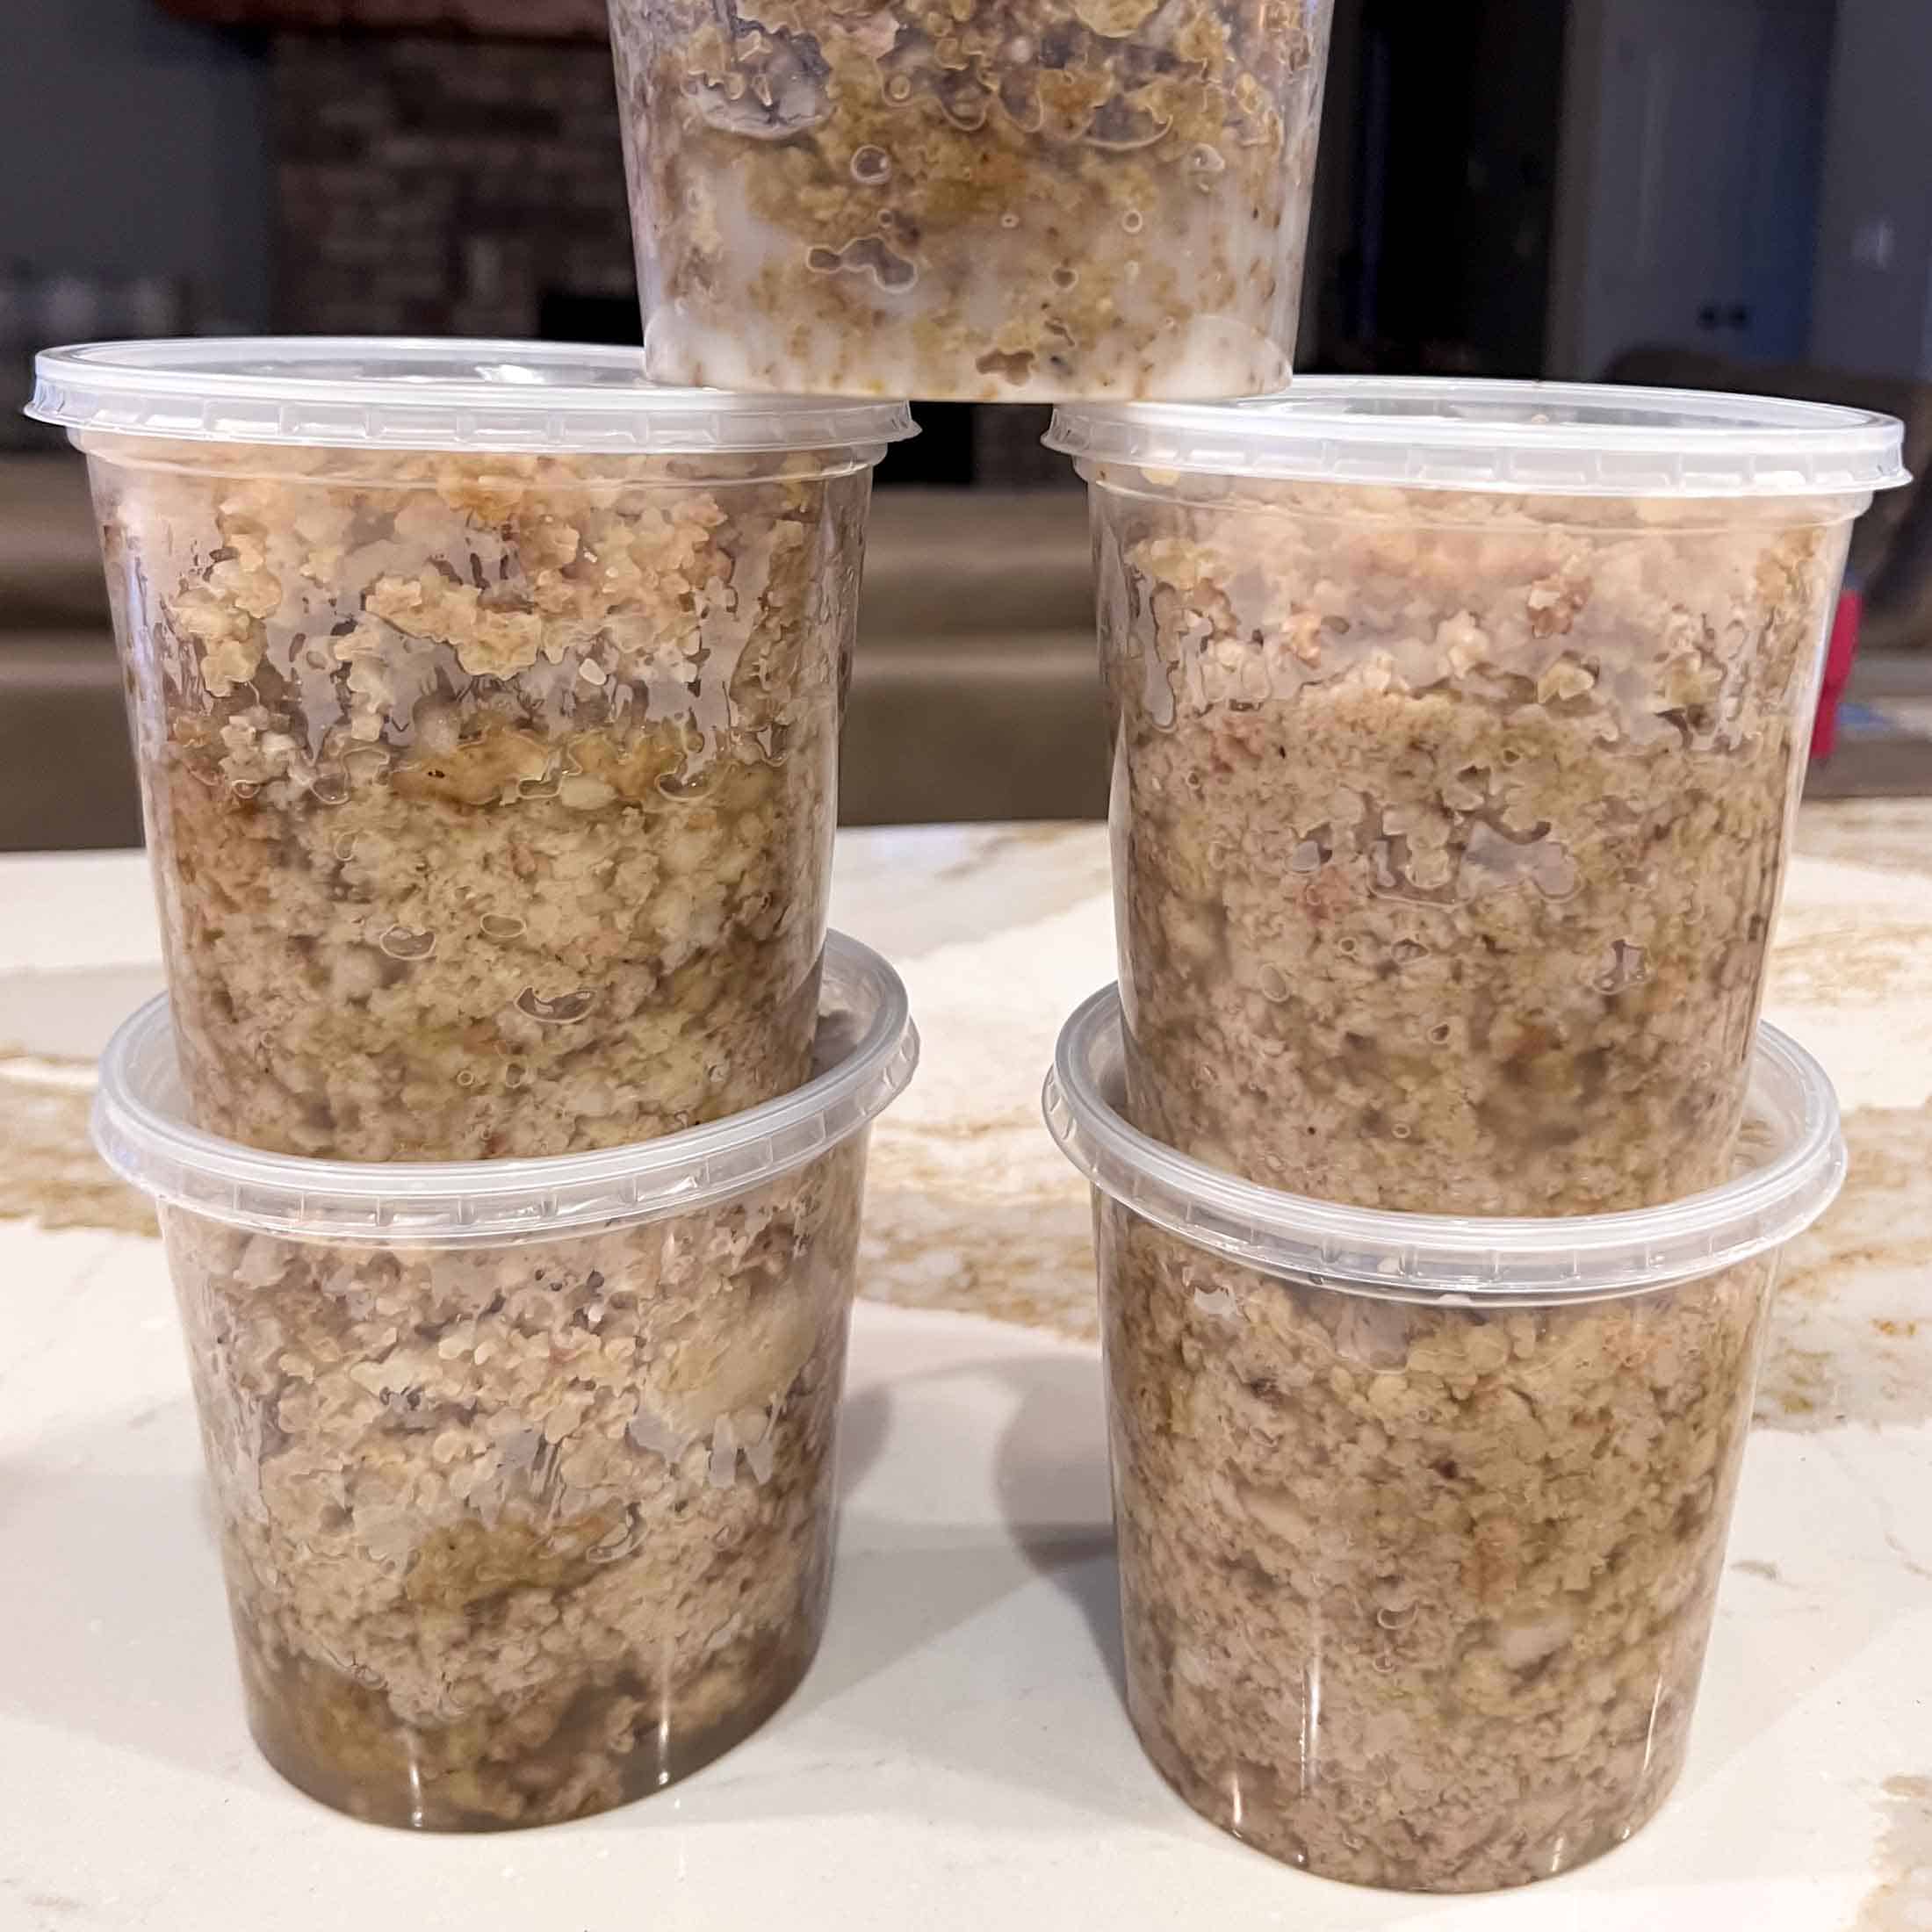
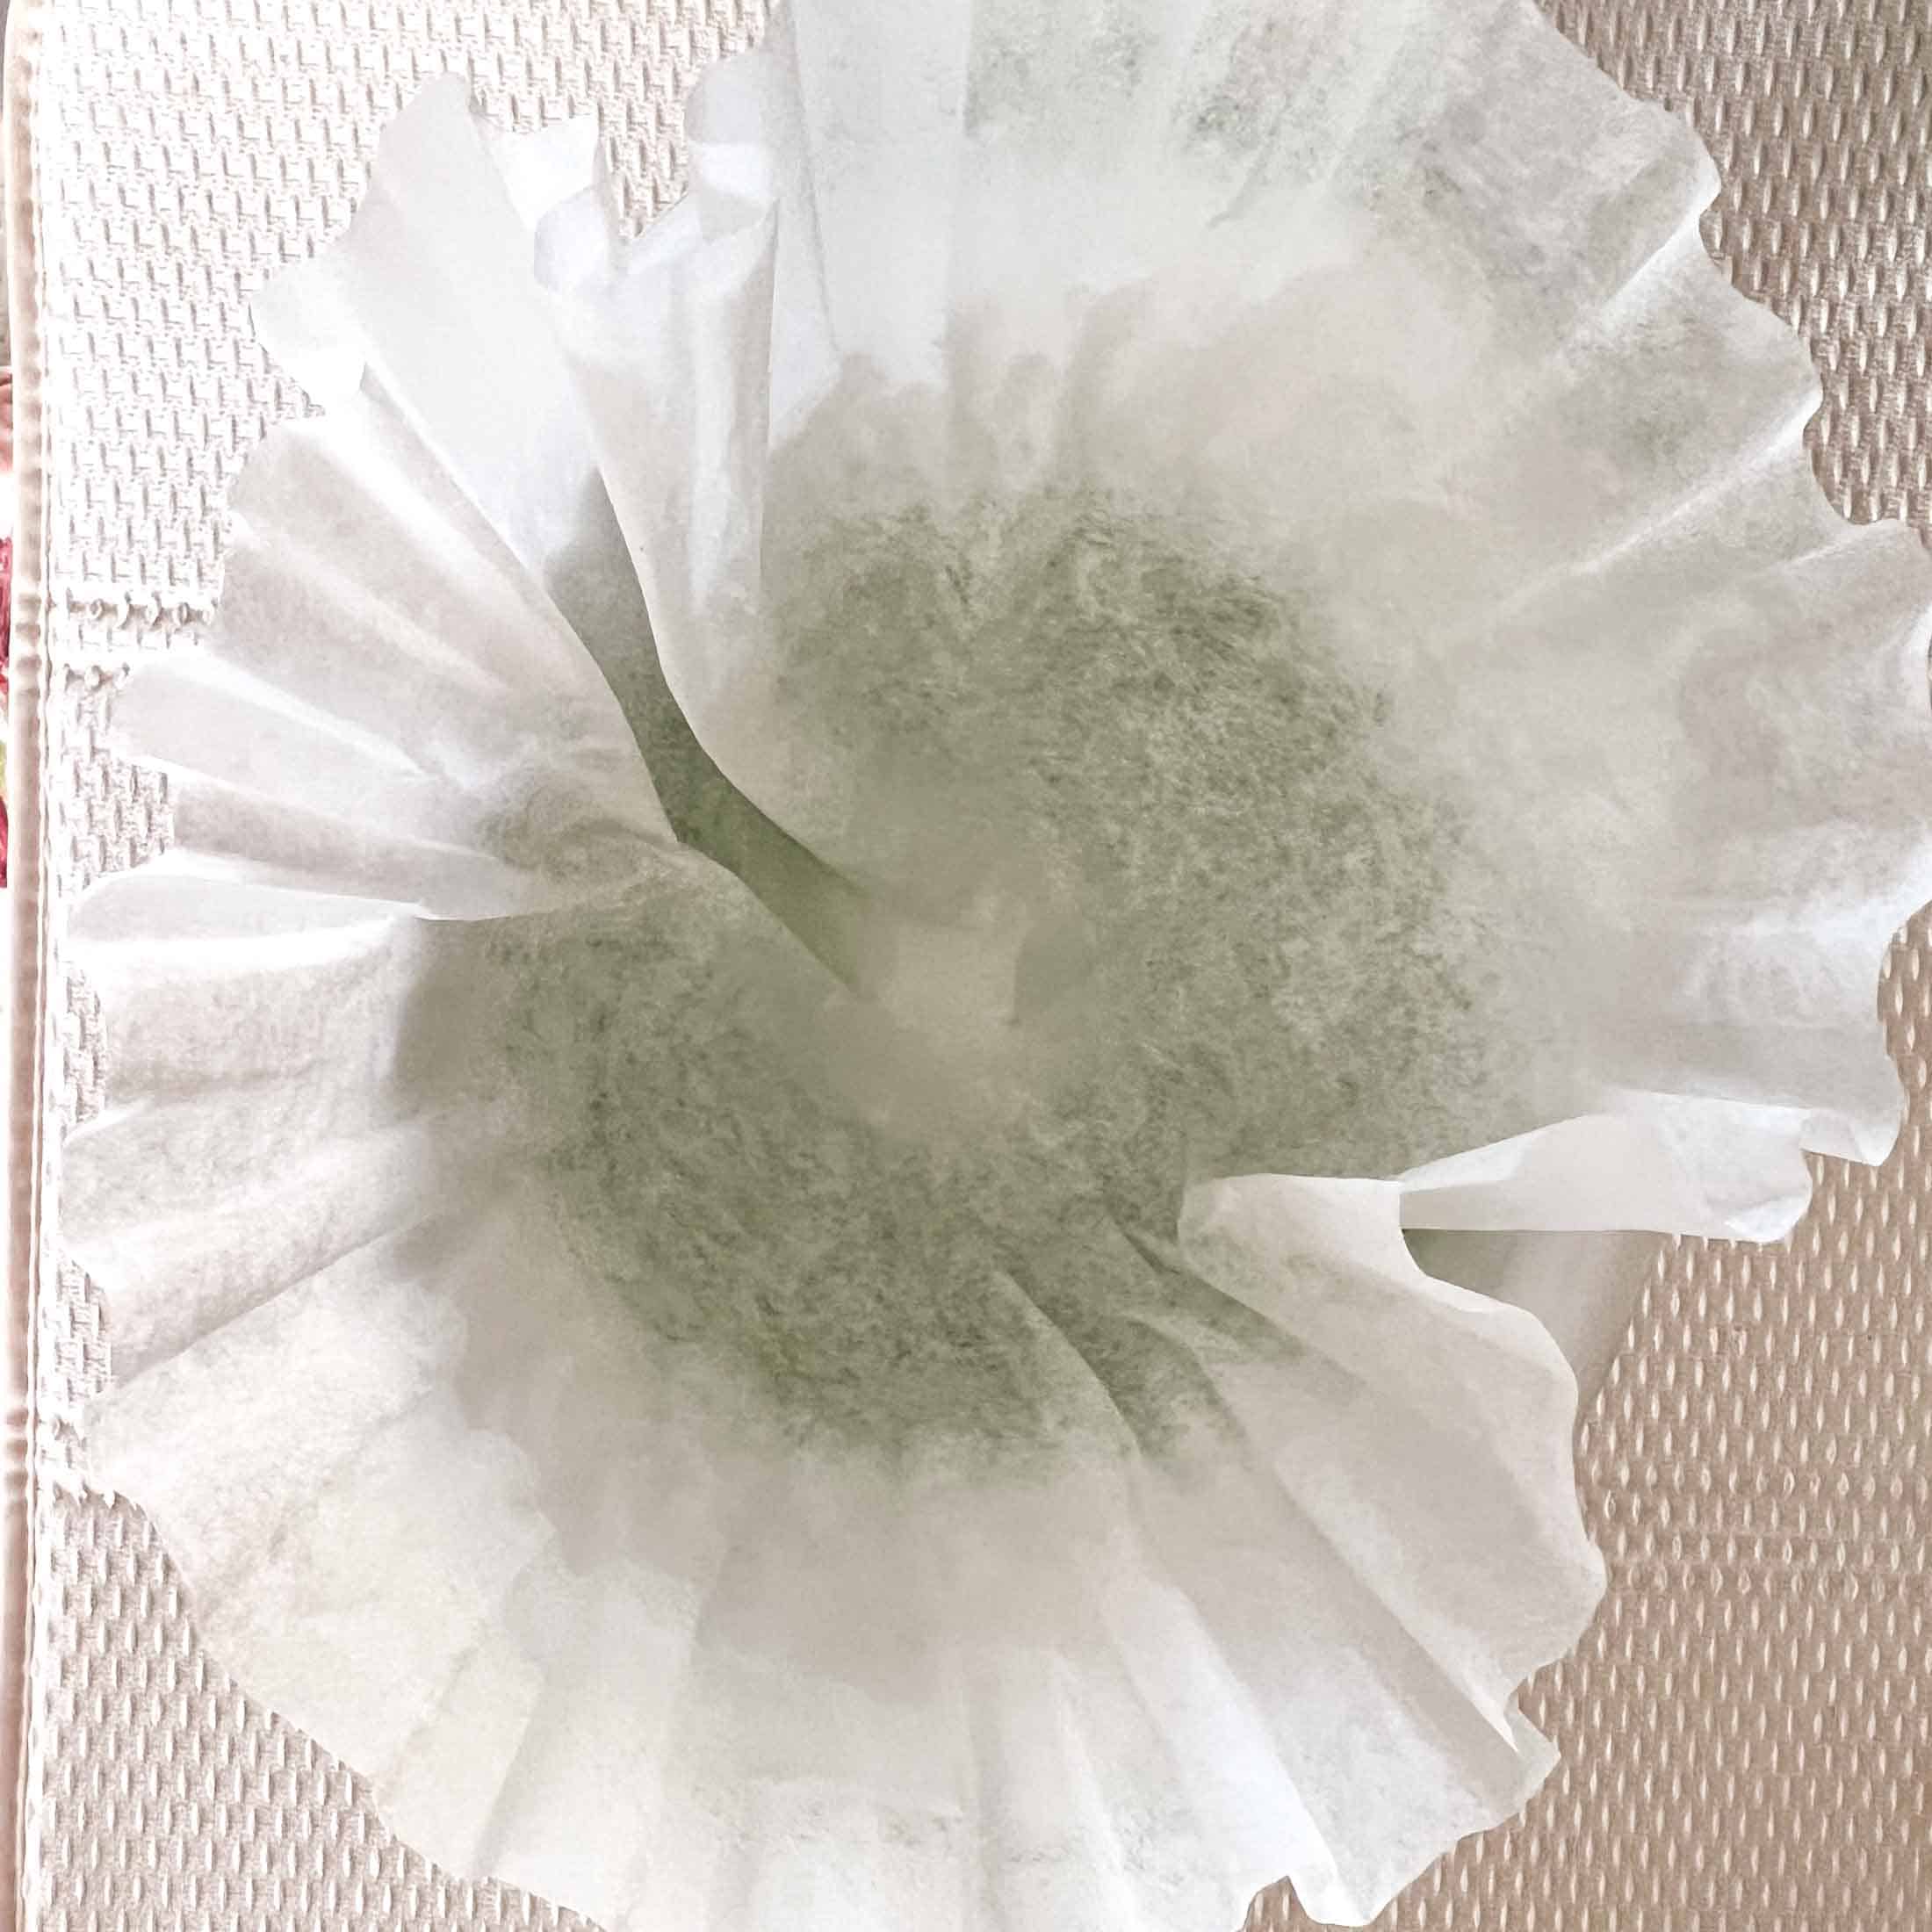
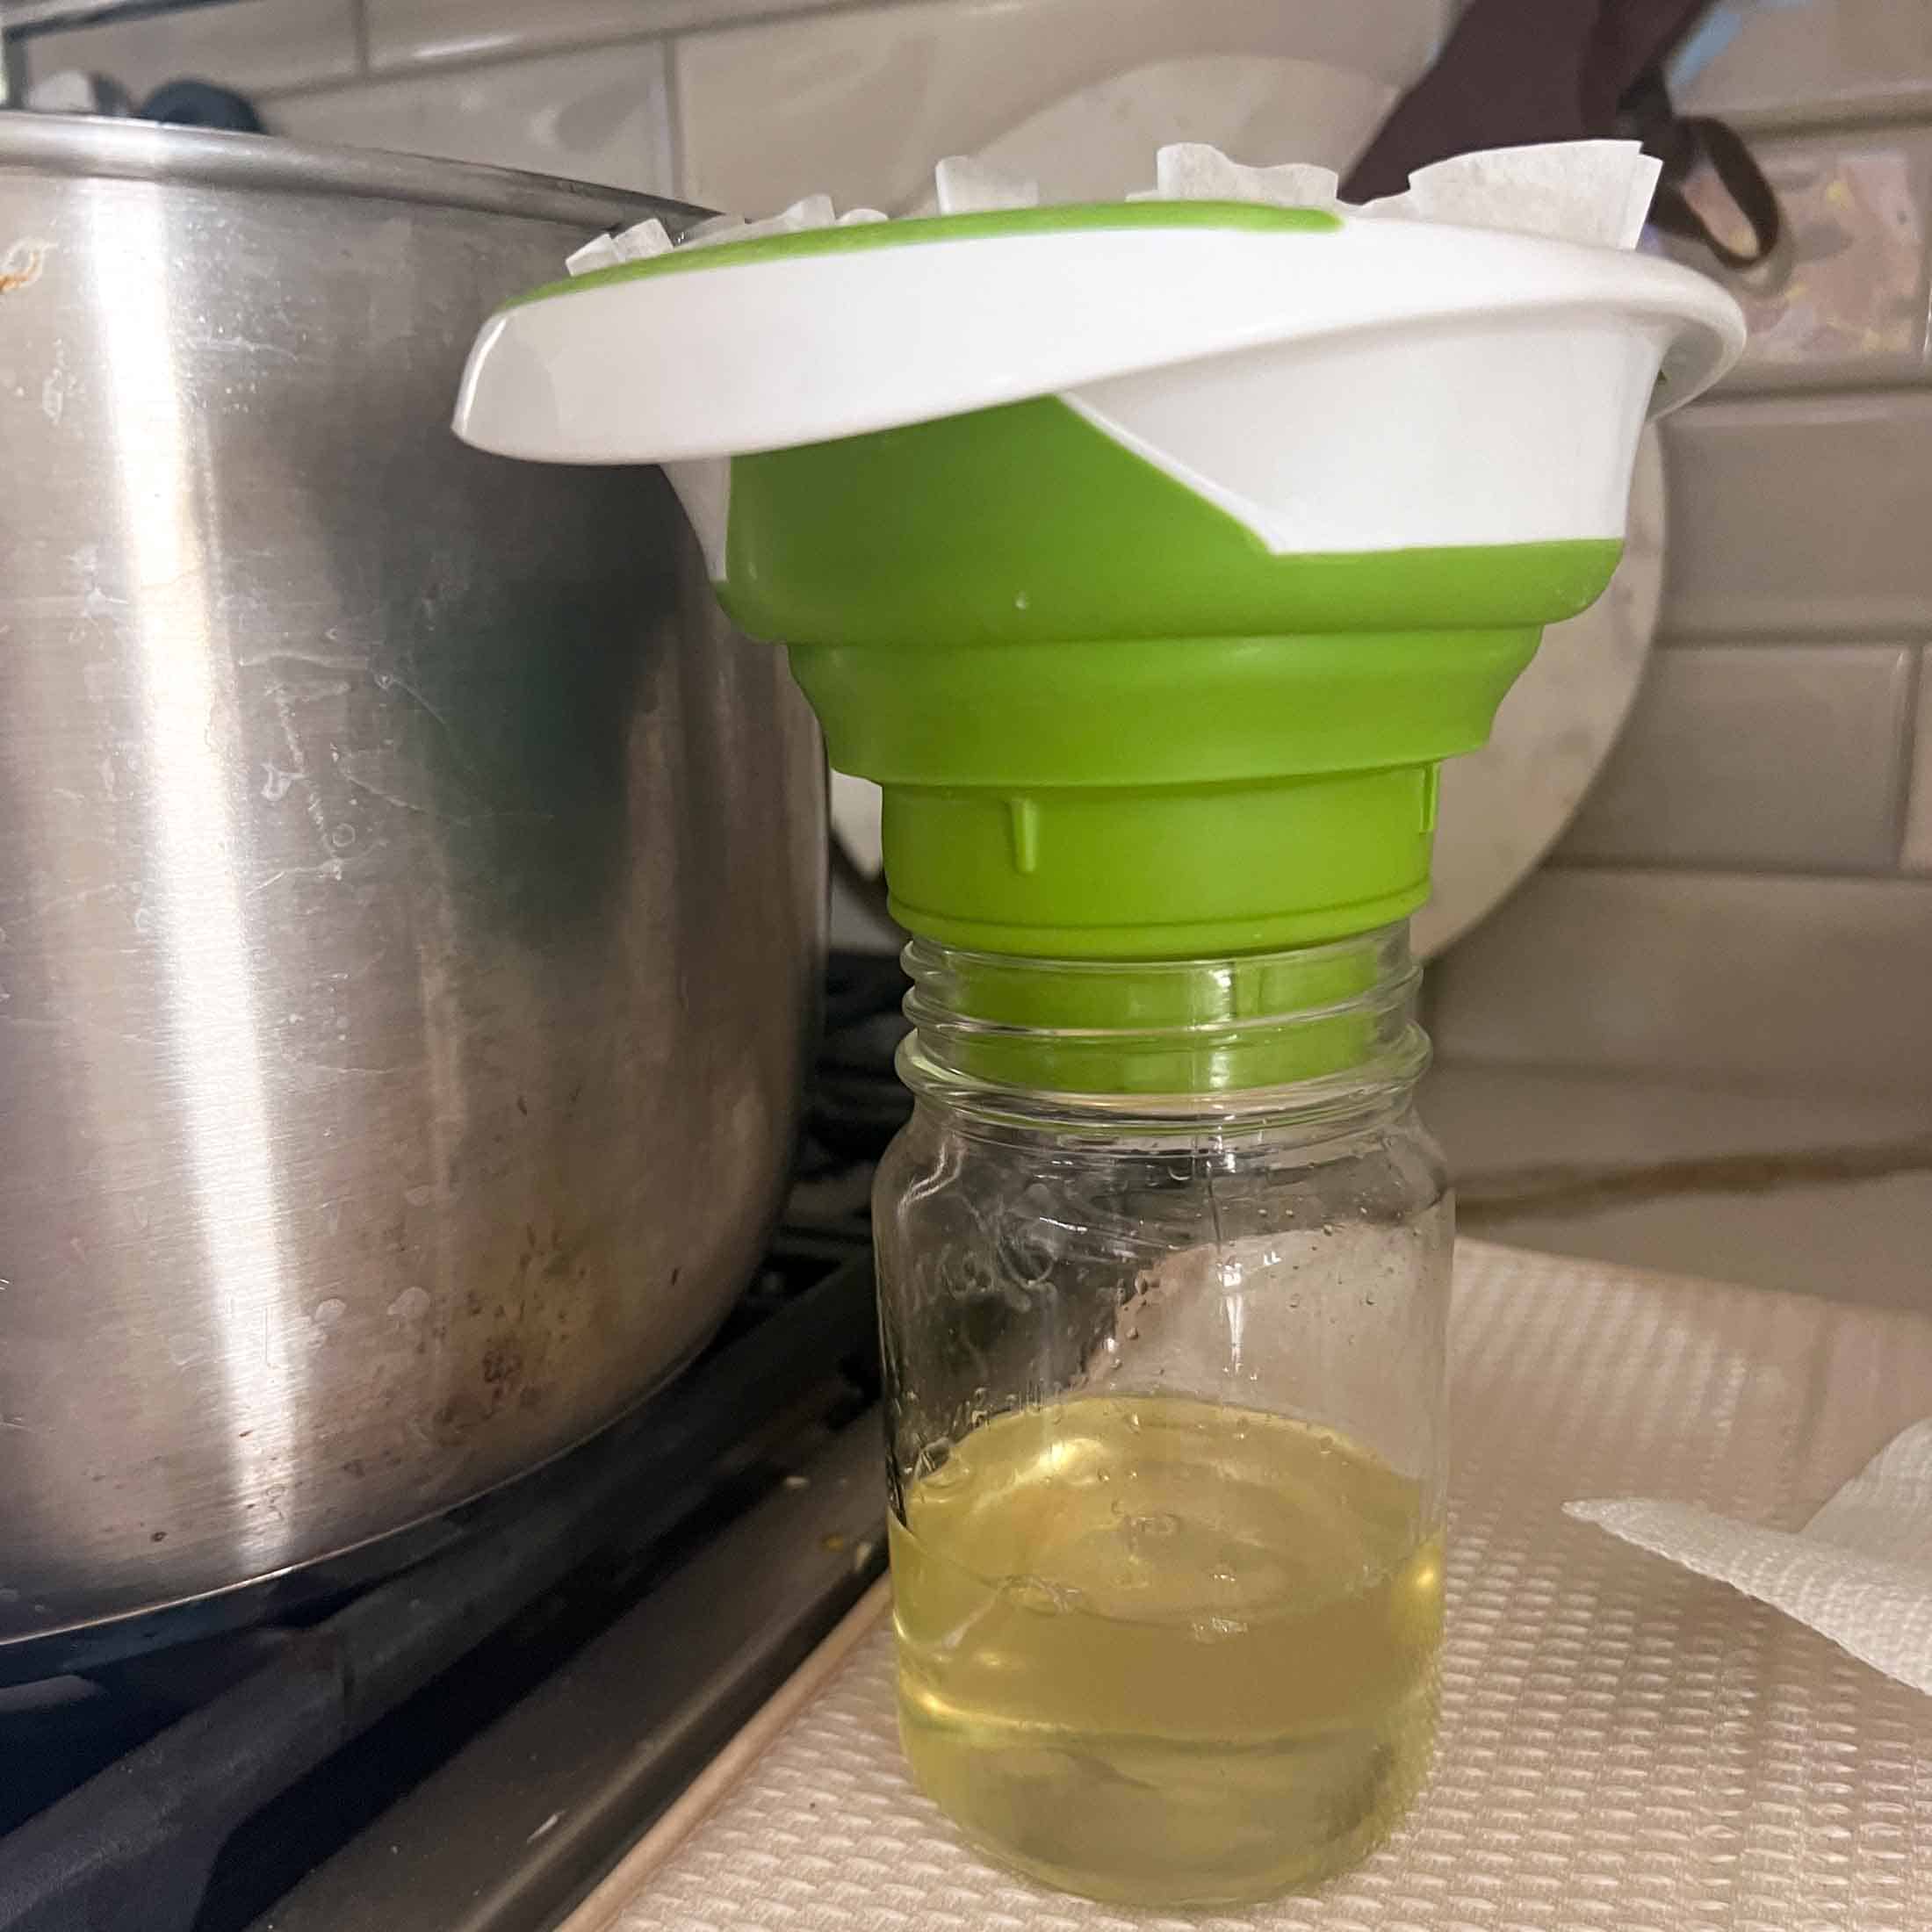
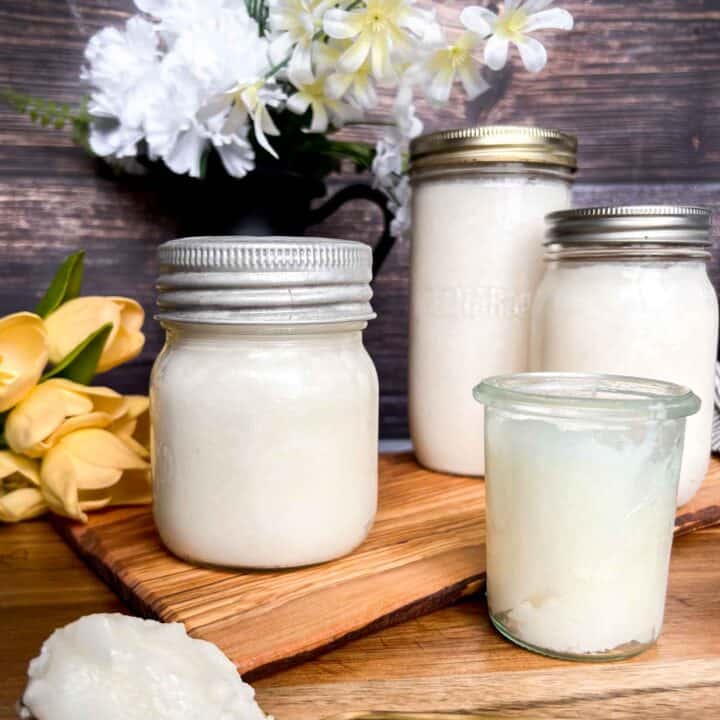
Strain it through a fine-mesh sieve or cheesecloth to remove any remaining solids. I used white coffee filters and changed the filter every jar or two. Lard strains best when it is very warm, straight out of the pot. I used my jar funnel with a fine mesh sieve overtop, followed by the coffee filter. Fill the jar or airtight container, leaving about 1/2 inch headspace. Once the jar is full, place the seal or lid on it and allow it to cool at room temperature for 24-48 hours. In this time, the lard should have transformed into a thick, opaque spread.

Step 6. Store.
Store lard in a cool, dark place. If your cold room is cooler than 10°C or 50°F, the lard will keep on the shelves, any warmer and I recommend keeping it in the fridge or freezer. An opened jar of lard will keep on the counter at room temperature for 1-2 weeks, unopened on the shelf, especially if sealed, it can last up to 6 months (lard is considered shelf stable). In a cold room or refrigerator, lard will last up to 12 months. Frozen, lard can last several years- aim to use it within one year for optimal flavor and texture.
FAQ
Properly rendered lard is considered shelf stable. I recommend using lard within 6 months if keeping it at room temperature, within 1 year if refrigerated, and within two years if stored in the freezer.
I like to remove the cracklings as I render and they turn brown. Leaving them in the lard to cook for longer amounts of time can add extra pork flavor to the lard- not ideal!
Many sources including a registered dietician from prevention.com agree that lard is a good option for cooking, containing less saturated fat than butter. Like all fats, lard should be used in moderation.
Batch + Storage
Batch: 1 lb of pork lard yields about 1 pint (2 cups) of melted lard. This recipe calls for 3 lbs of lard (easily scaled up or down) which will yield about 6 cups of rendered lard. The amount of finished lard that you get will be dependant on a few different factors. Some pieces of lard have more meat left on it (which will subtract from the total), type of fat (leaf or back), how pure the pork fat is, etc…
Storage: I recommend storing rendered lard in an airtight container. My preferred vessel for storing it is a clean mason jar. I like to seal the jar as soon as it is full. Once the lard cools, it should form a seal. It is important to prevent oxygen from getting to your lard if you hope to store it long term. Lard is considered a shelf stable fat. Although it can be kept at room temperature, I recommend using open jars within two weeks. Lard will keep in the fridge for up to 6 months, and in the freezer for 1-2 years.
How Do I Know If My Lard Is Spoiled?
When it comes to stored lard, it’s important to know the signs that indicate it has gone bad. Here is a list of signs to watch out for:
- Off or Rancid Smell: Fresh lard should have a mild, neutral odor. If your stored lard emits a strong, unpleasant, or rancid smell, it’s a clear indication that it has gone bad.
- Discoloration: Pay attention to any significant changes in color. Fresh lard is typically a creamy white or pale yellow. If you notice a darkening or browning of the lard, it may be a sign of spoilage.
- Altered Texture: While fresh lard has a smooth and creamy texture, lard that has gone bad may become grainy, clumpy, or develop an odd consistency. If you notice any changes in texture, it’s best to discard it.
- Unpleasant Taste: Good quality lard adds a delicate flavor to dishes, but if your stored lard tastes bitter, sour, or has an overall unpleasant taste, it’s a clear indication that it is no longer suitable for consumption.
- Presence of Mold: Visible presence of mold is a definite sign of spoilage. If you see any green, black, or fuzzy patches on the surface of your stored lard, it should be discarded immediately.
It’s important to note that stored lard can go bad over time, especially if not stored properly or exposed to unfavorable conditions such as heat, light, or air. Regularly check and use your stored lard within the recommended storage times to ensure optimal freshness and quality.
When in doubt, trust your senses. If you observe any of these signs, it’s best to err on the side of caution and dispose of the lard to avoid any potential risks to your health.
How To Render Lard | Ultimate Lard Rendering Guide
Read on to find out exactly how to render lard for use in cooking, baking, and even skin care.
Ingredients
- 3 lbs pork fat
Instructions
- Gather + Prepare Your Fat. To start off, you'll need high-quality fat such as pork fatback or leaf fat. See the section above about the two kinds of fat, and decide which is best for you. There are also ideas of where to source out the pork fat in the section above. Remove any visible pieces of meat- it is okay to leave some behind (it will end up as cracklings later on)
- Cut/Grind. If you have a meat grinder, I recommend grinding the fat before rendering. If not, slice the pork fat up into small pieces. This process is long, grinding or finely chopping the lard will allow it to render more evenly and ensures that you are able to render all of the impurities out. Your butcher may be able to grind the lard for you to save you time, for a small fee.
- Begin To Heat. Put a small amount of lard (enough to cover the bottom of the pot) into a large heavy-bottomed pot or slow cooker. Turn the burner on to a very low temperature. Watch the lard carefully and once it has fully melted, you can add the remaining lard, keeping the heat on very low. The small layer of melted lard on the bottom of the pot will help to prevent the rest of the lard from burning and adding more pork flavor and darker color. Continue to heat the pot of lard over very low heat, stirring occasionally.
- Remove Cracklings. Continue to heat the melted lard, allowing it to come to a gentle simmer. Using a slotted spoon or mesh sieve, start straining out any pieces of pork that appear. Set them aside in a bowl or zip top bag for use in other savory recipes (think hashbrowns, salad topper, spaghetti + meat sauce, meatballs).
As the mixture simmers, gently stir it from time to time. This helps the fat melt evenly and prevents it from sticking to the bottom of the pot. Additionally, keep an eye out for any impurities that rise to the surface. Skim them off with a slotted spoon or a skimmer to maintain the purity of your lard. - Patience. The process typically takes around 3-4 hours, depending on the amount of fat that you are rendering and the heat level. Remember: LOW AND SLOW.
- Straining/Bottling. By the end of the rendering process, you'll notice the fat has transformed into a beautiful, light colored golden liquid. When it is done, the lard should be clear, there should be far less bubbling, and zero crackling from moisture.
- Strain it through a fine-mesh sieve or cheesecloth to remove any remaining solids. I used white coffee filters and changed the filter every jar or two. Lard strains best when it is very warm, straight out of the pot. I used my jar funnel with a fine mesh sieve overtop, followed by the coffee filter.
- Fill the jar or airtight container, leaving about 1/2 inch headspace. Once the jar is full, place the seal or lid on it and allow it to cool at room temperature for 24-48 hours. In this time, the lard should have transformed into a thick, opaque spread.
- Store. Store lard in a cool, dark place. If your cold room is cooler than 10°C or 50°F, the lard will keep on the shelves, any warmer and I recommend keeping it in the fridge or freezer. An opened jar of lard will keep on the counter at room temperature for 1-2 weeks, unopened on the shelf, especially if sealed, it can last up to 6 months (lard is considered shelf stable). In a cold room or refrigerator, lard will last up to 12 months. Frozen, lard can last several years- aim to use it within one year for optimal flavor and texture.
Notes
- Grind or chop your lard when it is still slightly frozen. This will allow you to manipulate it more easily and it will push through the grinder more efficiently.
- Be mindful not to burn the fat. Adjust the heat accordingly to maintain a gentle simmer throughout the process.
- Avoid over-stirring the pot as excessive agitation can emulsify the fat and water, resulting in a less desirable texture.
Nutrition Information:
Yield: 6 Serving Size: 1 cupAmount Per Serving: Calories: 2046Total Fat: 227gSaturated Fat: 89gTrans Fat: 0gUnsaturated Fat: 128gCholesterol: 215mgSodium: 0mgCarbohydrates: 0gFiber: 0gSugar: 0gProtein: 0g