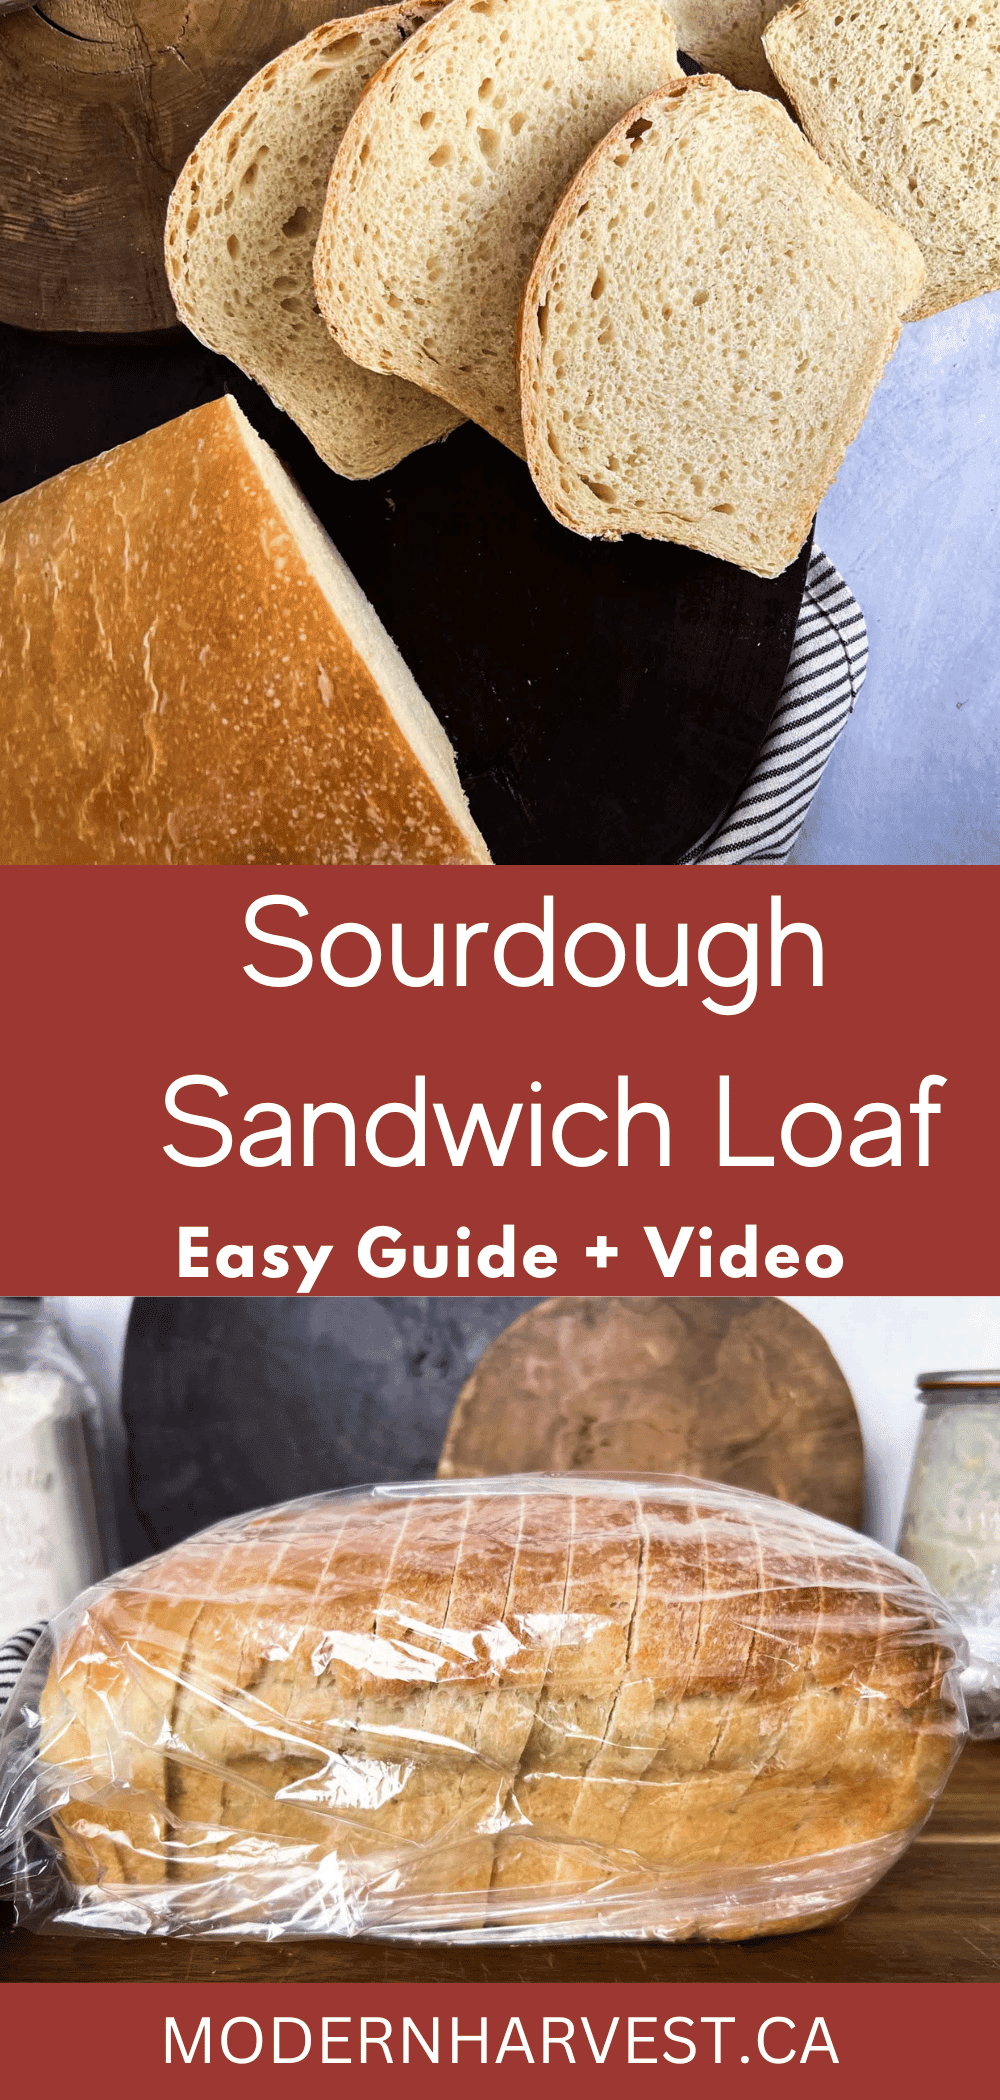
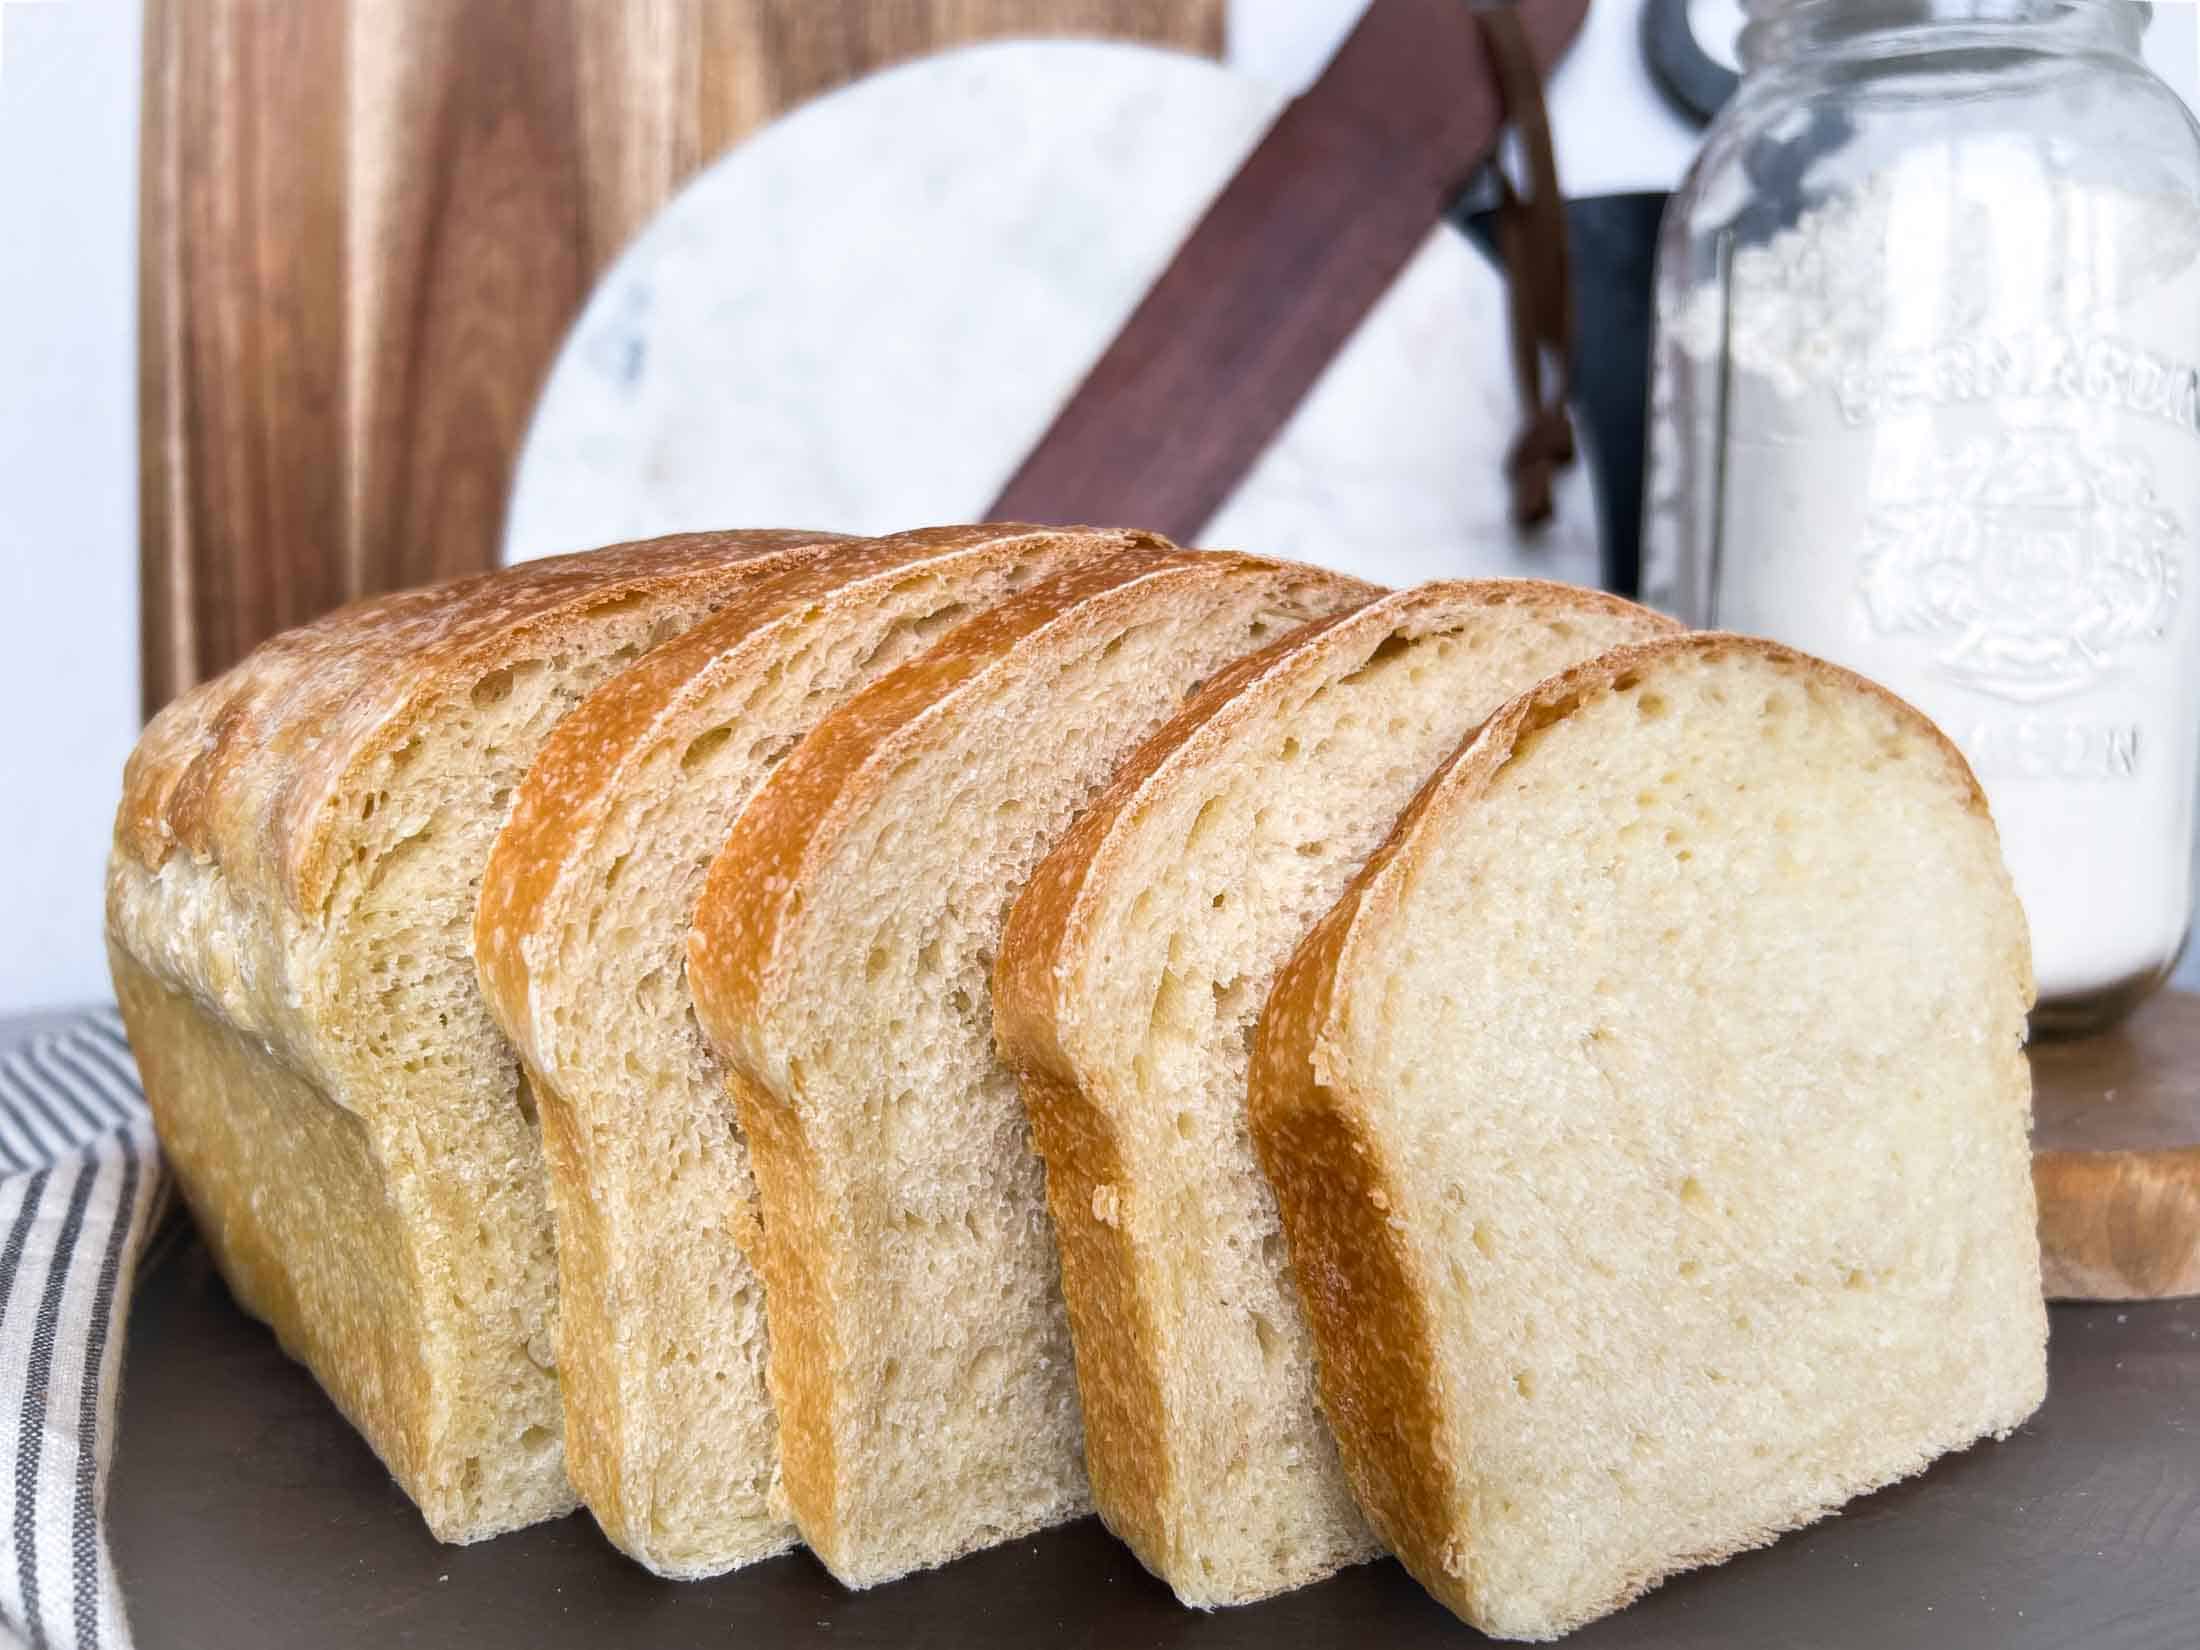
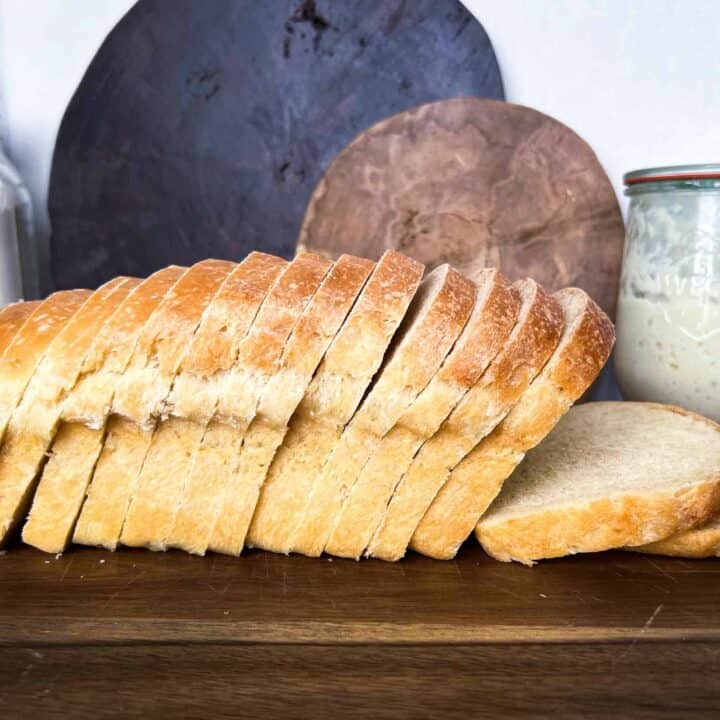
Sourdough Sandwich Loaf | Easy Guide
This sourdough sandwich loaf is soft, buttery, and versatile! Make sourdough sandwich bread fit into your schedule with simple ingredients, a small amount of kneading and an overnight rise followed by shaping and a final rise next day. Perfect for morning toast or a lunchtime sandwich, this sourdough sandwich bread recipe will win over sourdough lovers and skeptics alike.

Why This Sourdough Sandwich Bread Recipe Rocks
Tips + Tricks
- No mixer? No problem! This recipe is very forgiving and can handle hand kneading and kneading with the dough hook of a stand mixer instead of fussy stretching and folding.
- Do your best not to over ferment the dough, it will become deflated and floppy… if you need to stretch out the rise time, stick it in the fridge!
- Choose the right size of loaf pans– a larger pan won’t get as much of that coveted rise.
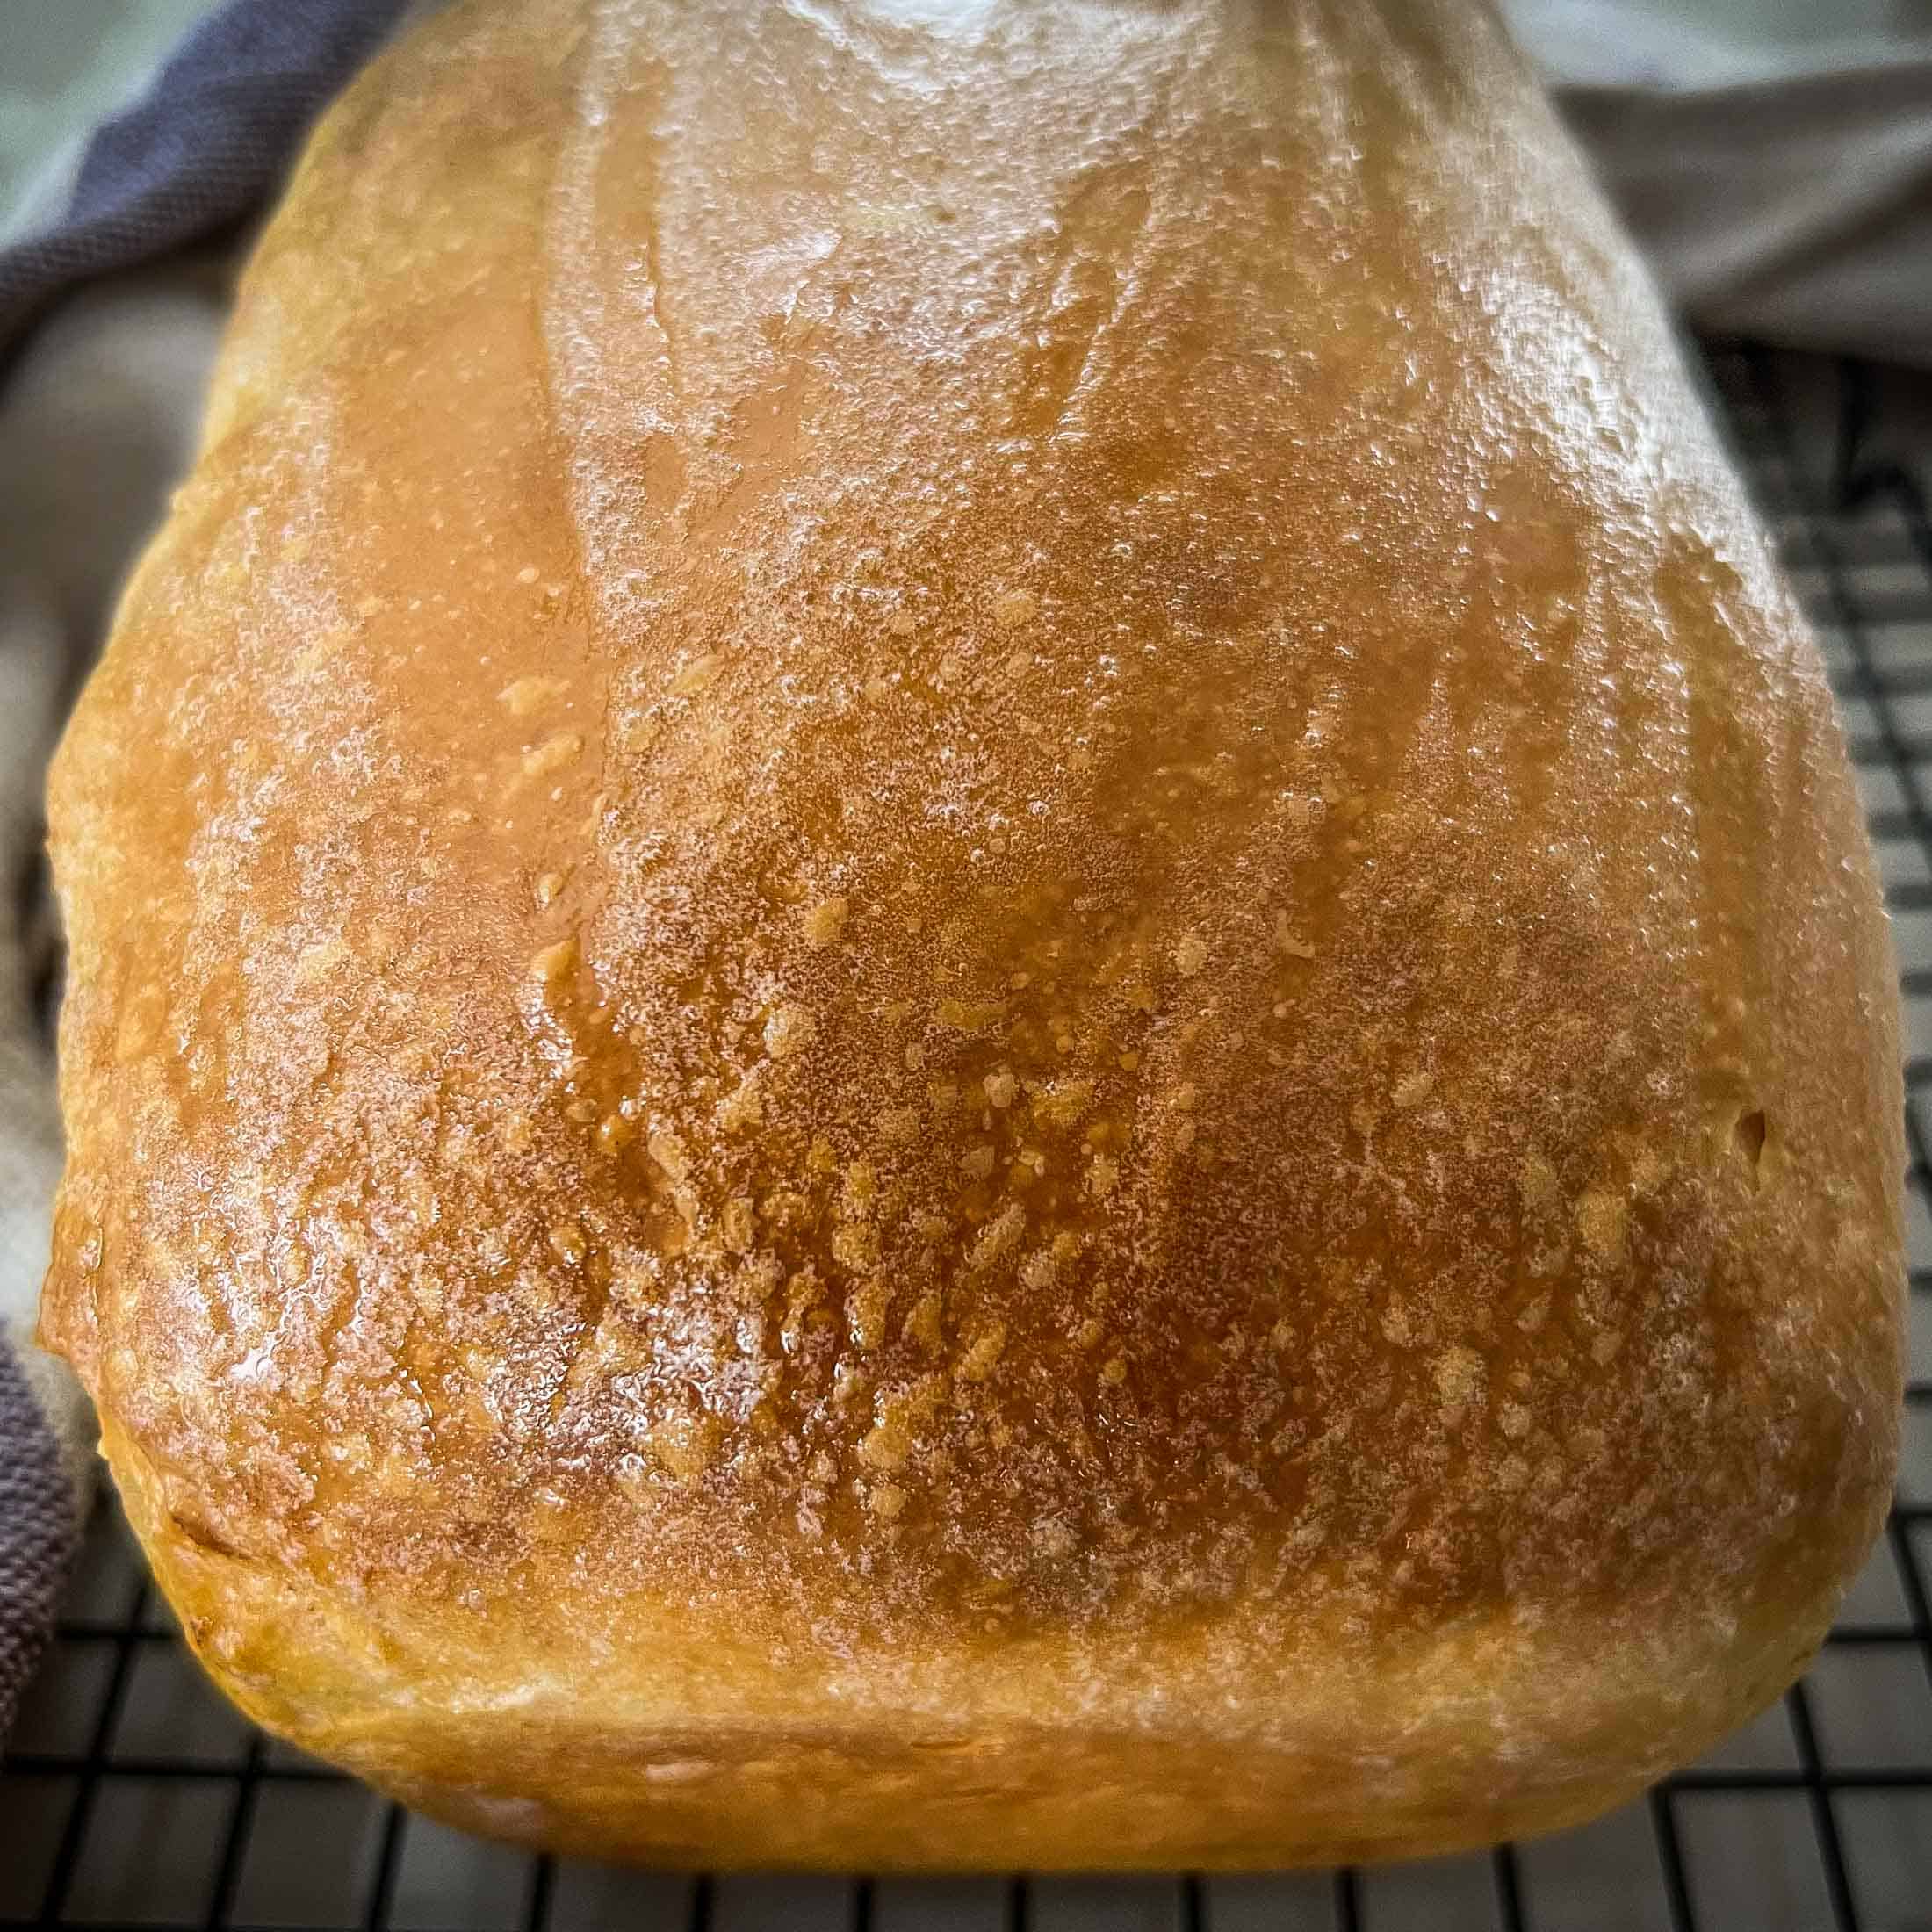
- Get buttery crust- slather two coats of butter on the top of the loaf while it is hot out of the oven. The butter will soak into the crust, making it soft and delicious.
- Swap the fat component in this loaf to make it vegan or to suit your dietary needs! Crisco, margarine, olive oil, and other non-dairy substitutes can easily be made at a 1:1 ratio. I have also tried this recipe with home rendered lard (so tender).
- Speed up the rising time by placing your loaf in a warm place, proofing box, or oven with the light on. Slow down by placing in the refrigerator.
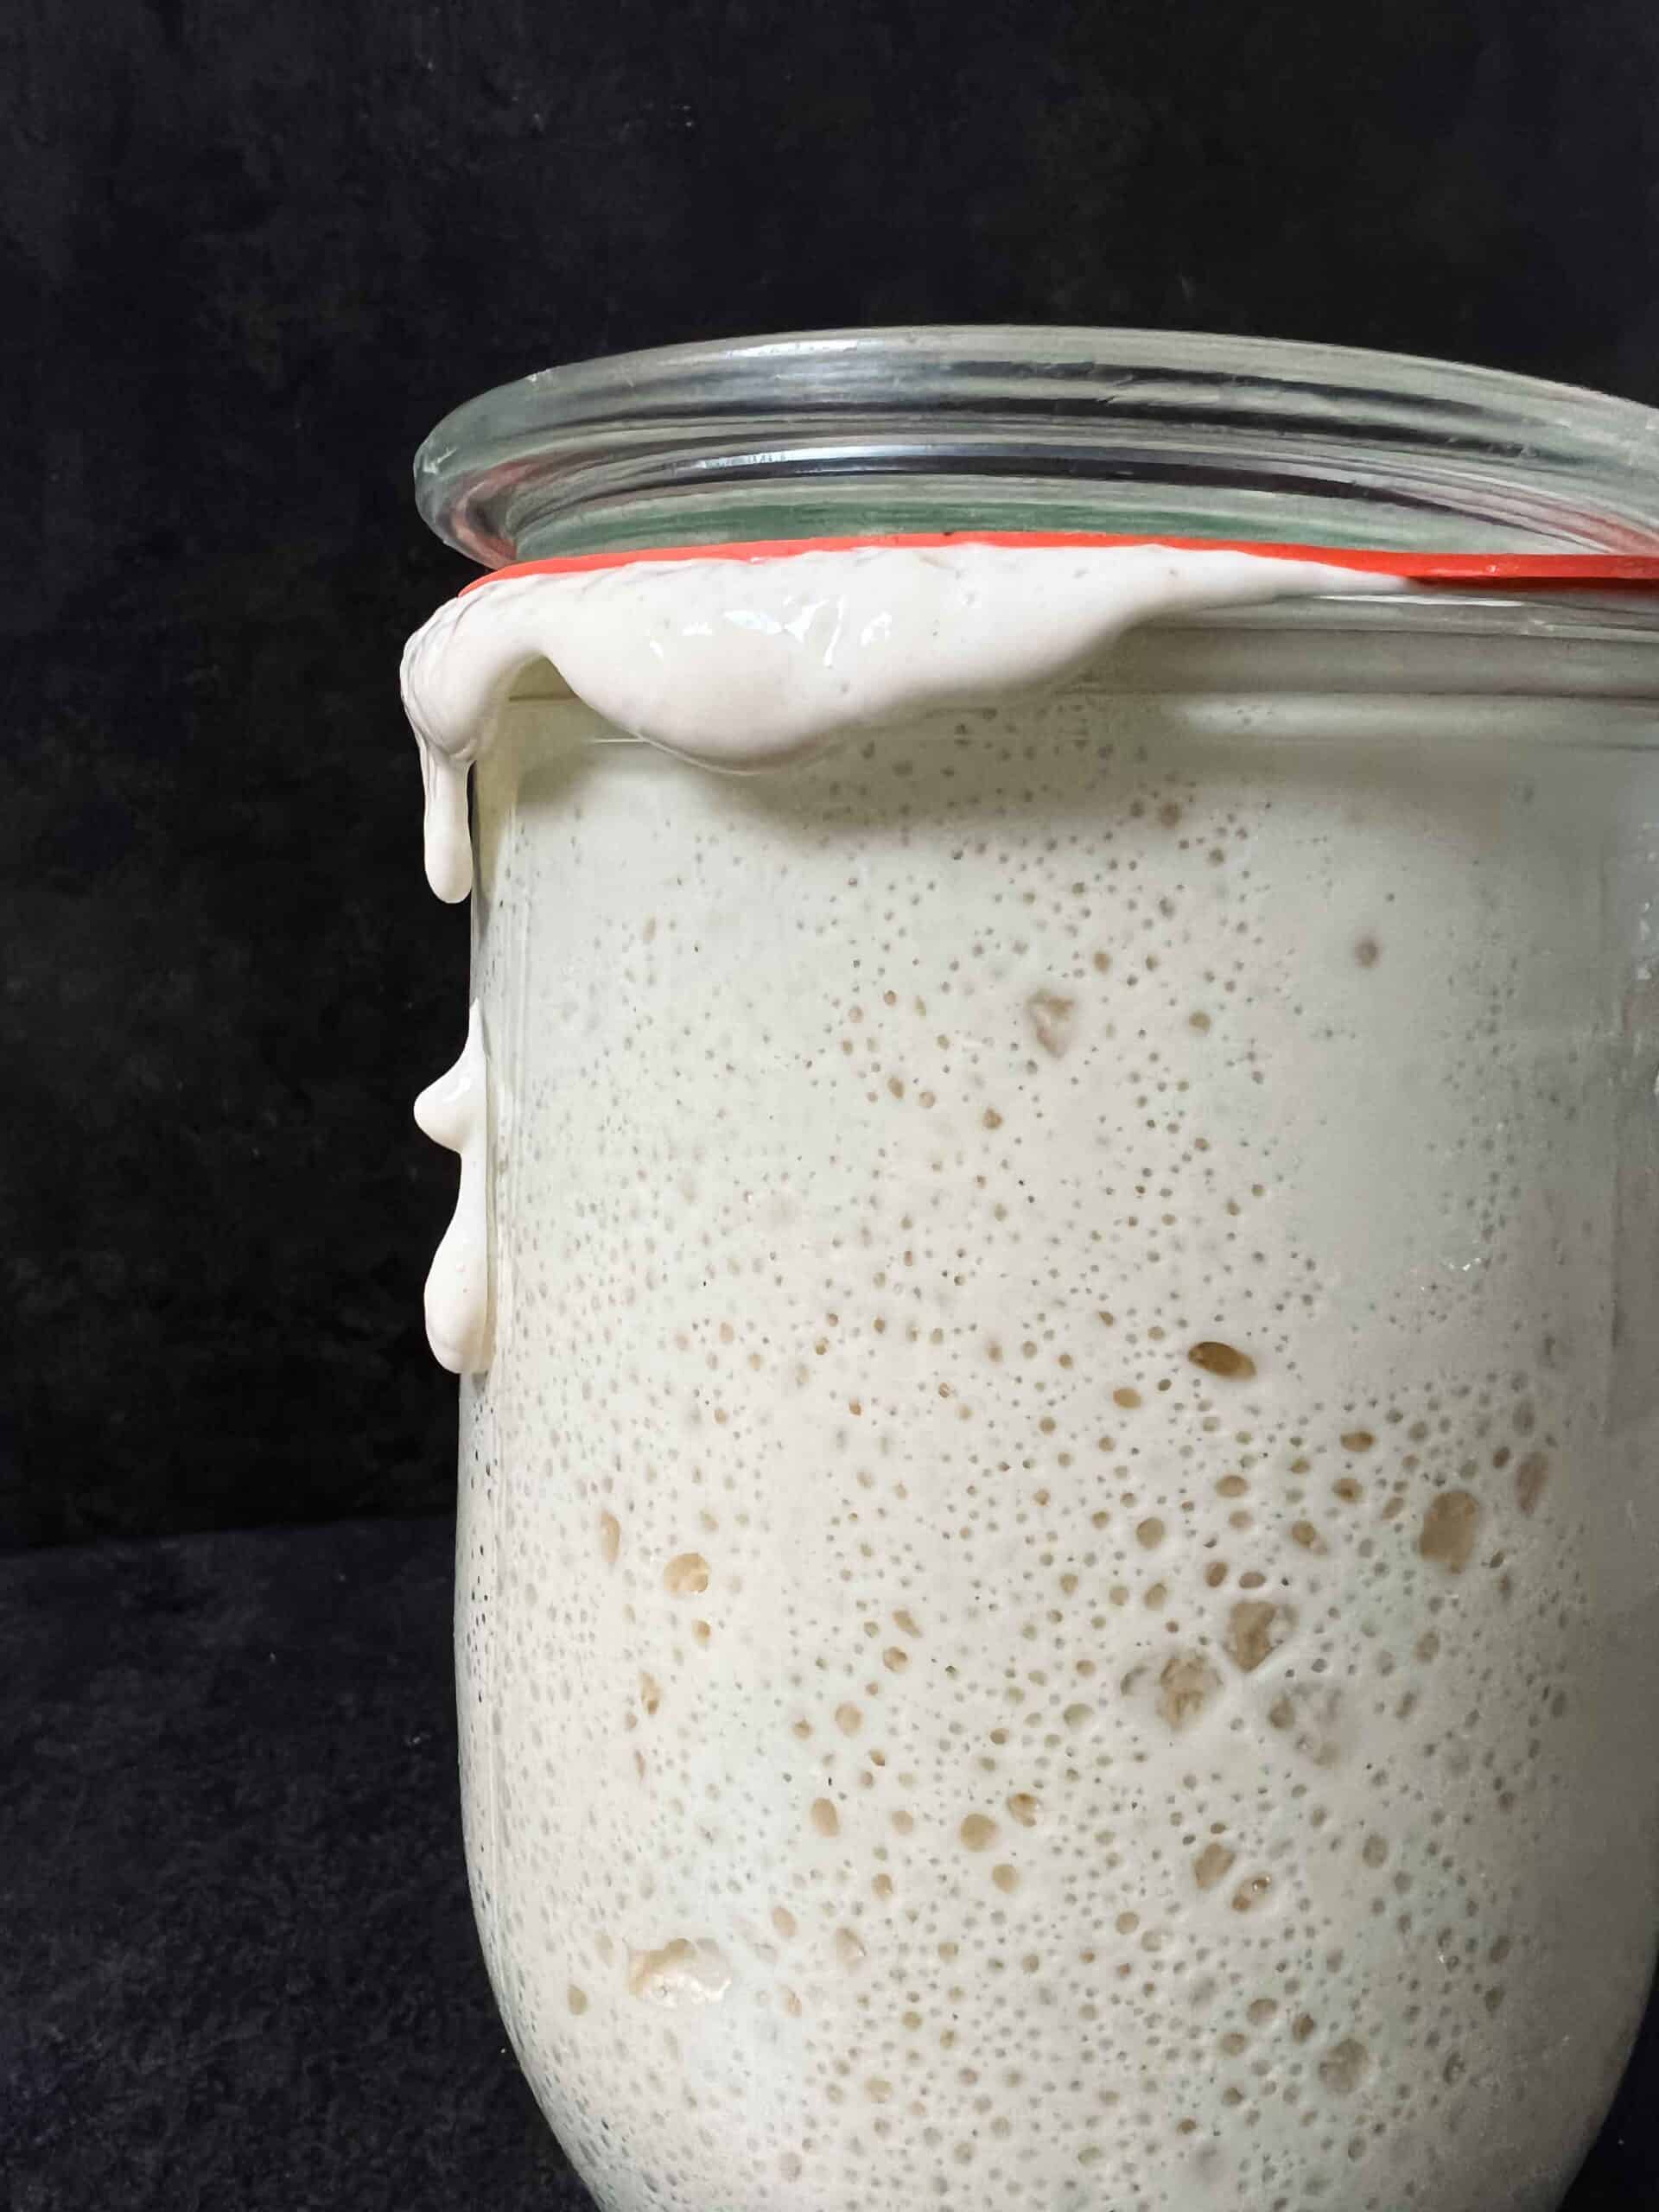
- If you haven’t used your starter in a few days or more, it is a good idea to feed it frequently once or twice back to back (every 12-24 hours) before baking with it. A sluggish starter can have devastating effects on your soft sourdough sandwich bread. Your active sourdough starter should pass the “float test” and float when placed in water. If it floats, it is ready!
Key Ingredients + Equipment
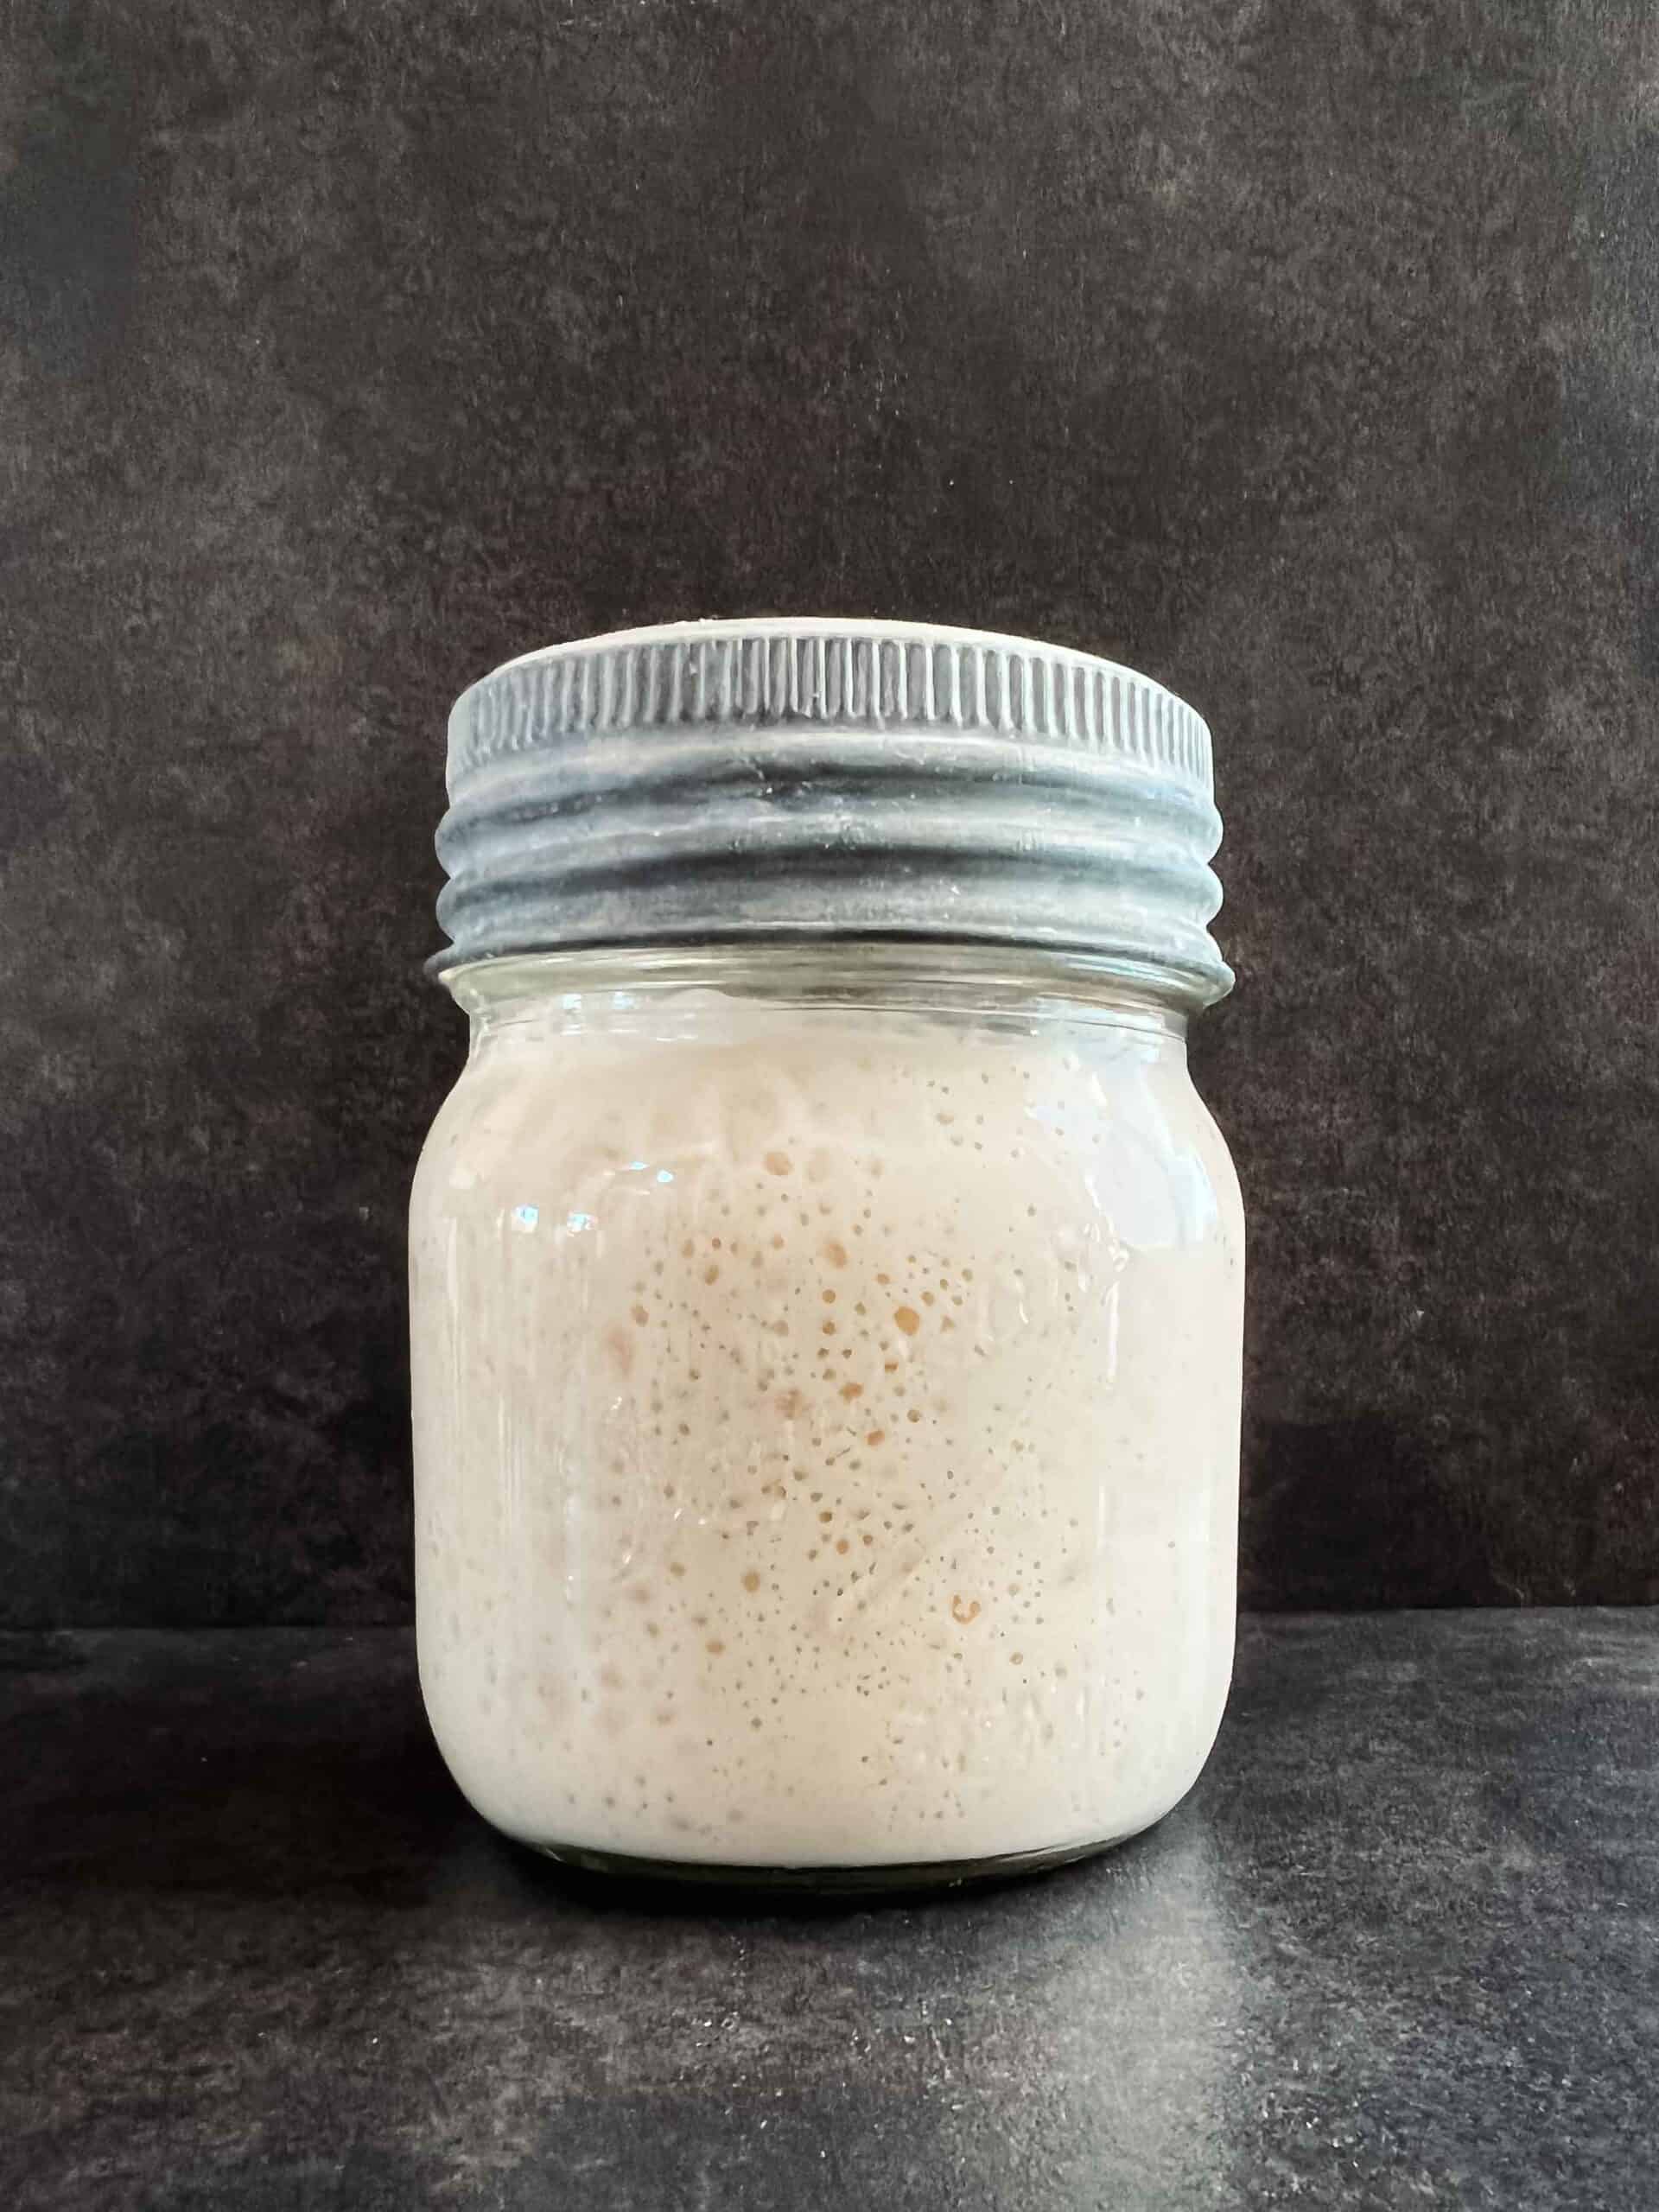
Active Sourdough Starter- Your starter is considered active when it has been “fed,” has doubled in size, is visibly bubbly. If you are unsure, do the “float test” and put a small spoonful of starter into a bowl of room temperature water– if it floats, it is ready!
Bread Flour– If you are in Canada you can use all purpose flour instead of bread flour because of the higher gluten content when compared to US flour or “plain flour” from the UK.
Sea Salt- Choose fine sea salt or kosher salt for this recipe. If using table salt, consider reducing the amount by half.
Honey- I love using honey in my baking but it can be replaced with white sugar or maple syrup in a pinch.
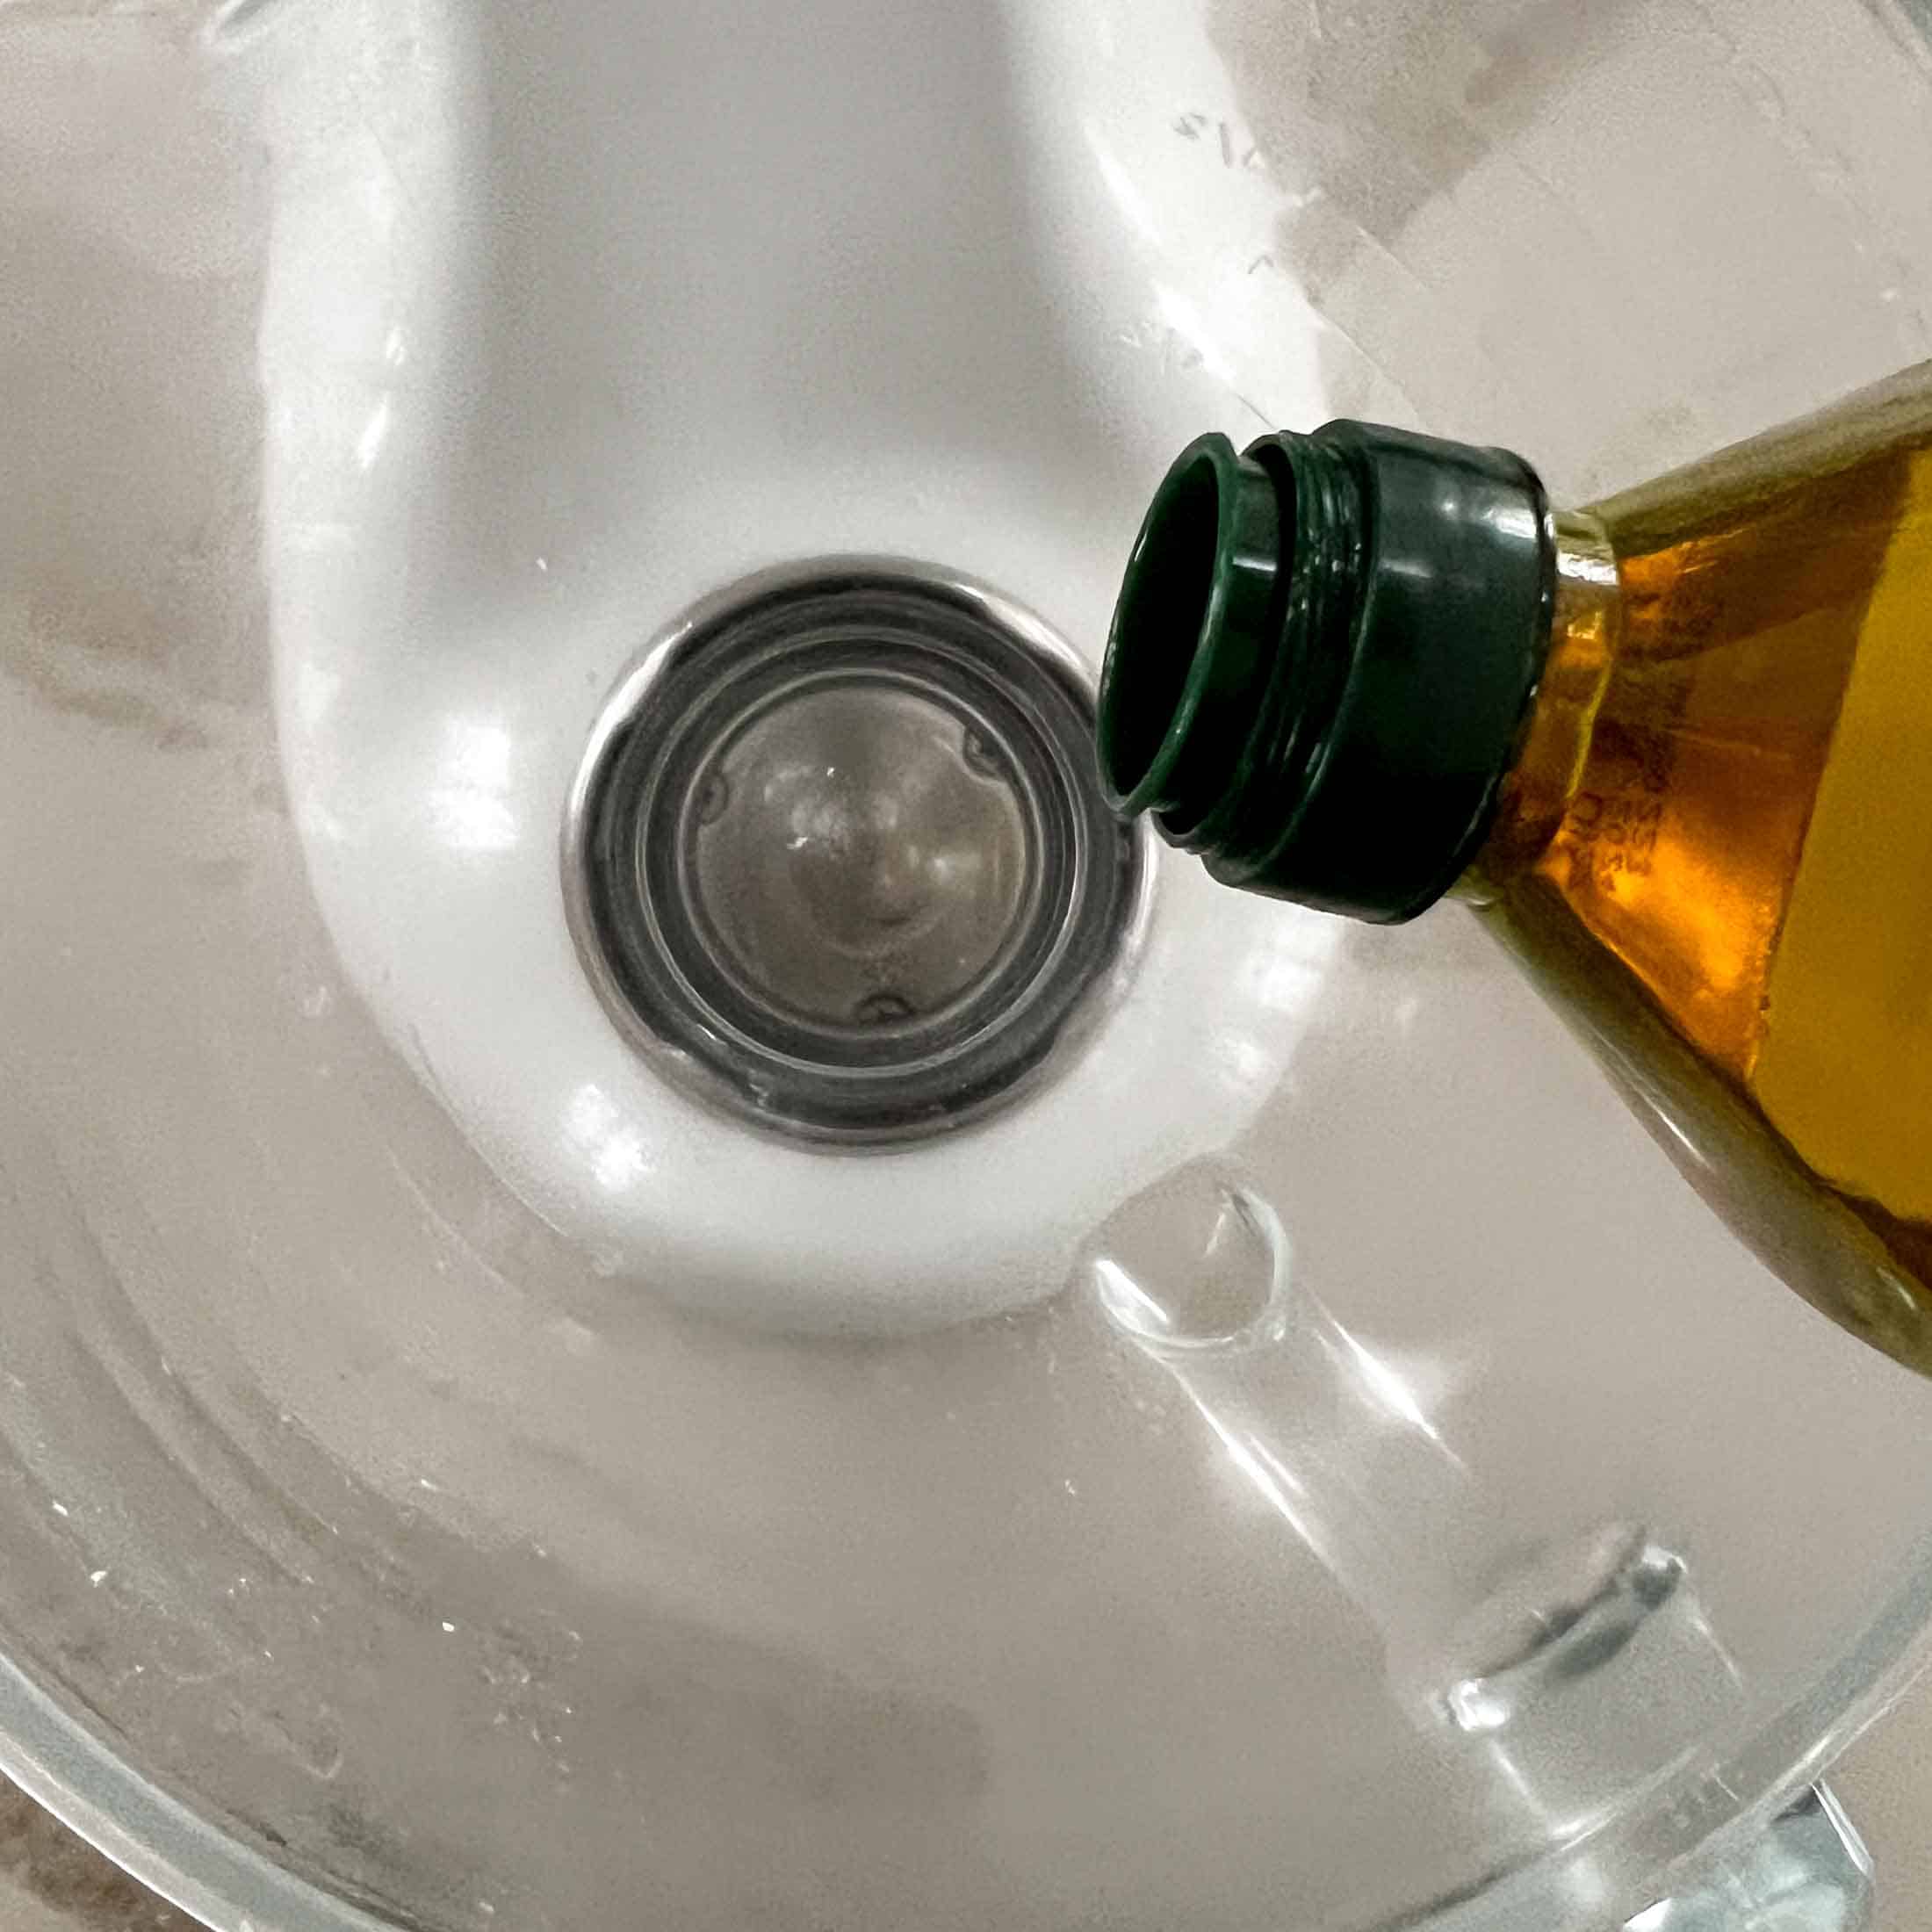
Butter Or Other fat- Softened, cubed butter works perfectly in the dough. Other fats that you can consider using include olive oil, crisco or lard, or a non-dairy butter substitute like margerine.
Warm Water- warm water helps this bread rise faster than cold or room temperature would.
Kitchenaid Stand Mixer– If you’ve never used a stand mixer to mix your dough, try it! My Artisan mixer with the dough hook handles this sourdough sandwich loaf with no issues.
Scale- When baking sourdough, you need a good food scale! Check out this high capacity food scale– small enough to fit in a drawer but big enough to handle the weight of heavy bowls and large amounts of ingredients.
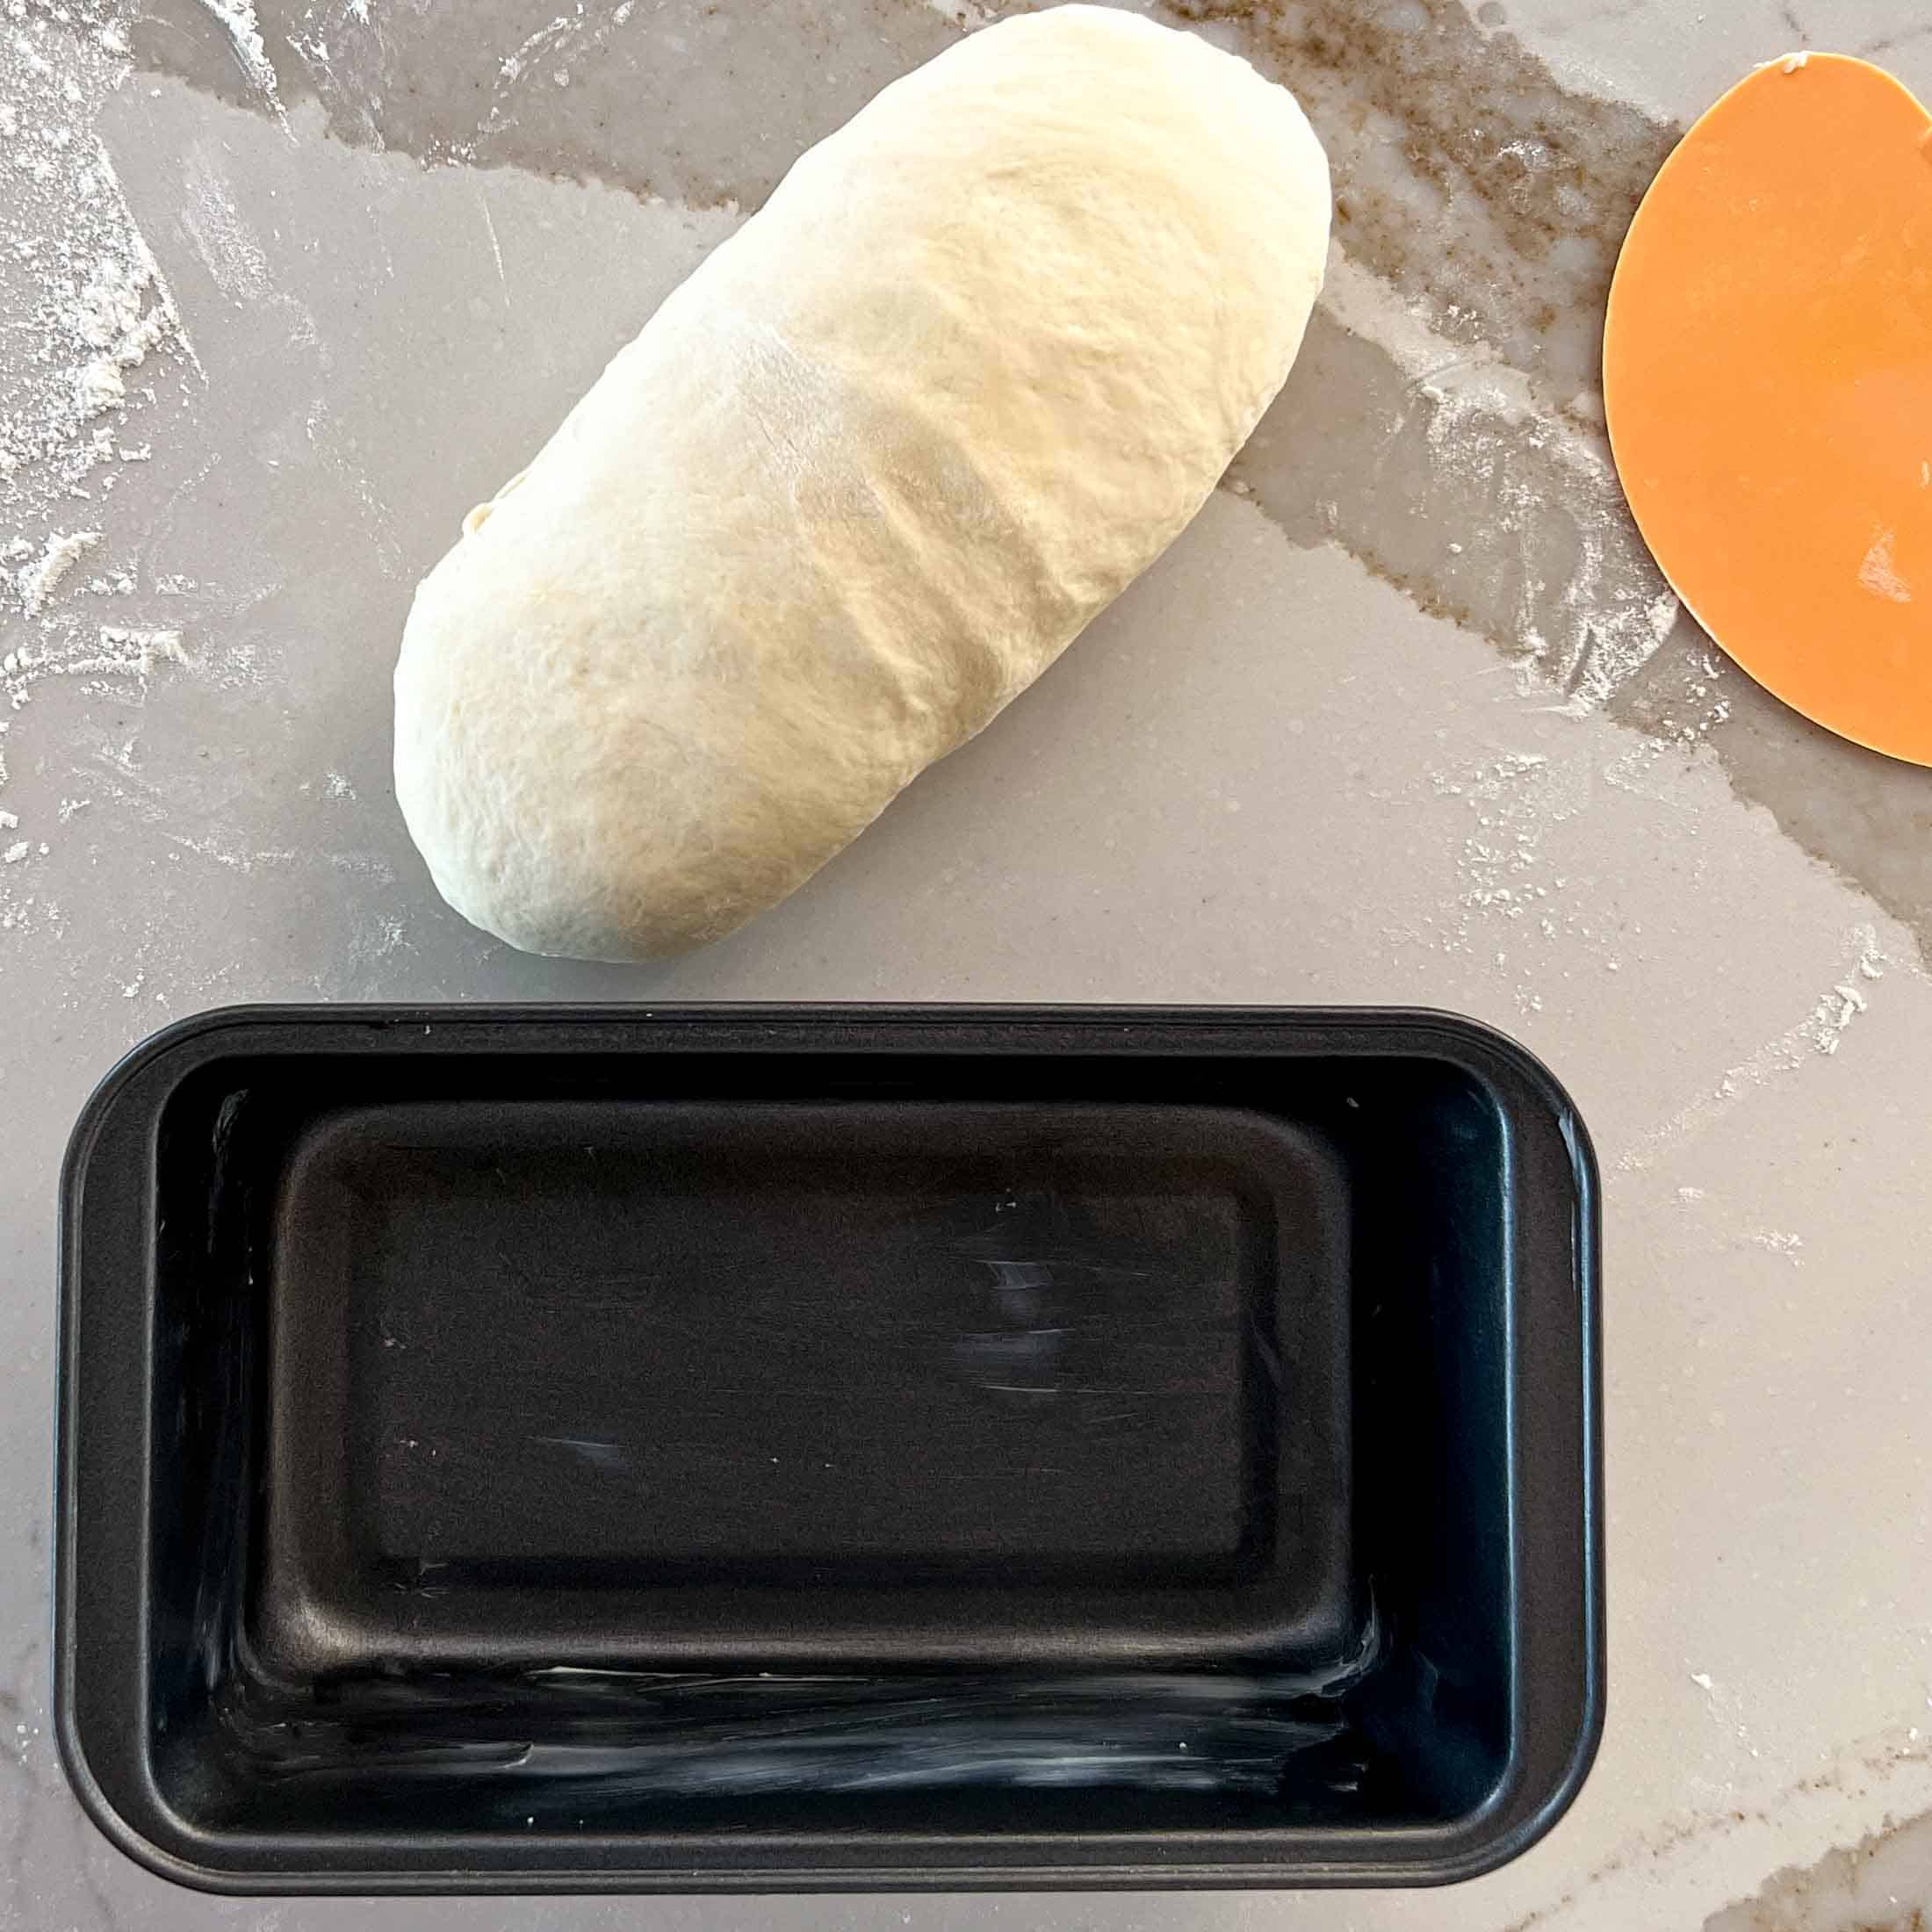
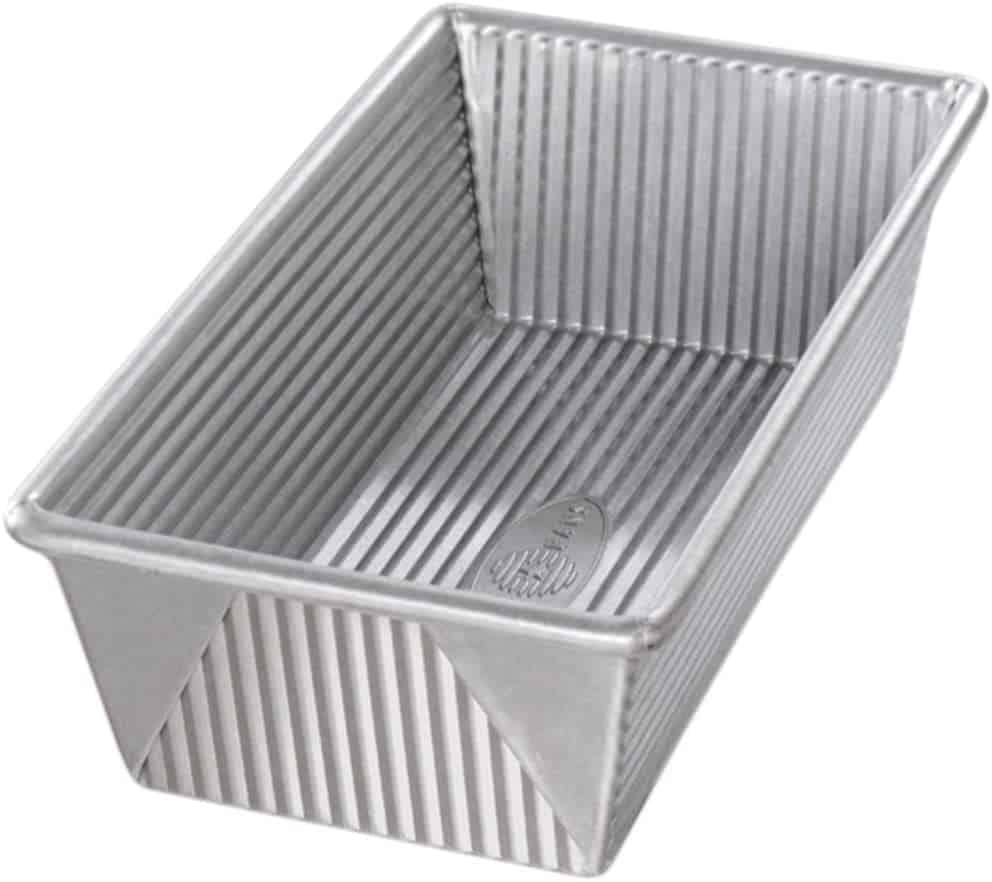
Loaf Pans- Try to choose a 9×5 inch loaf pan for the best rise and shape. These USA Pan loaf pans are non-stick, light in color, and perfect to cook this sourdough sandwich loaf recipe.
Why You Should Weigh Your Ingredients Vs. Measuring for Sourdough
Have you ever made a recipe and wondered why it was so wet or so dry when compared to the last time you have made it? ME TOO! Weighing ingredients vs. measuring by volume is especially important for accurate and consistent results. Flour amounts in particular can differ up to 25% depending on how it was scooped, packed, and swished during the measuring process. I have included volume measurements for this post but they serve as more of an approximation than an exact science.
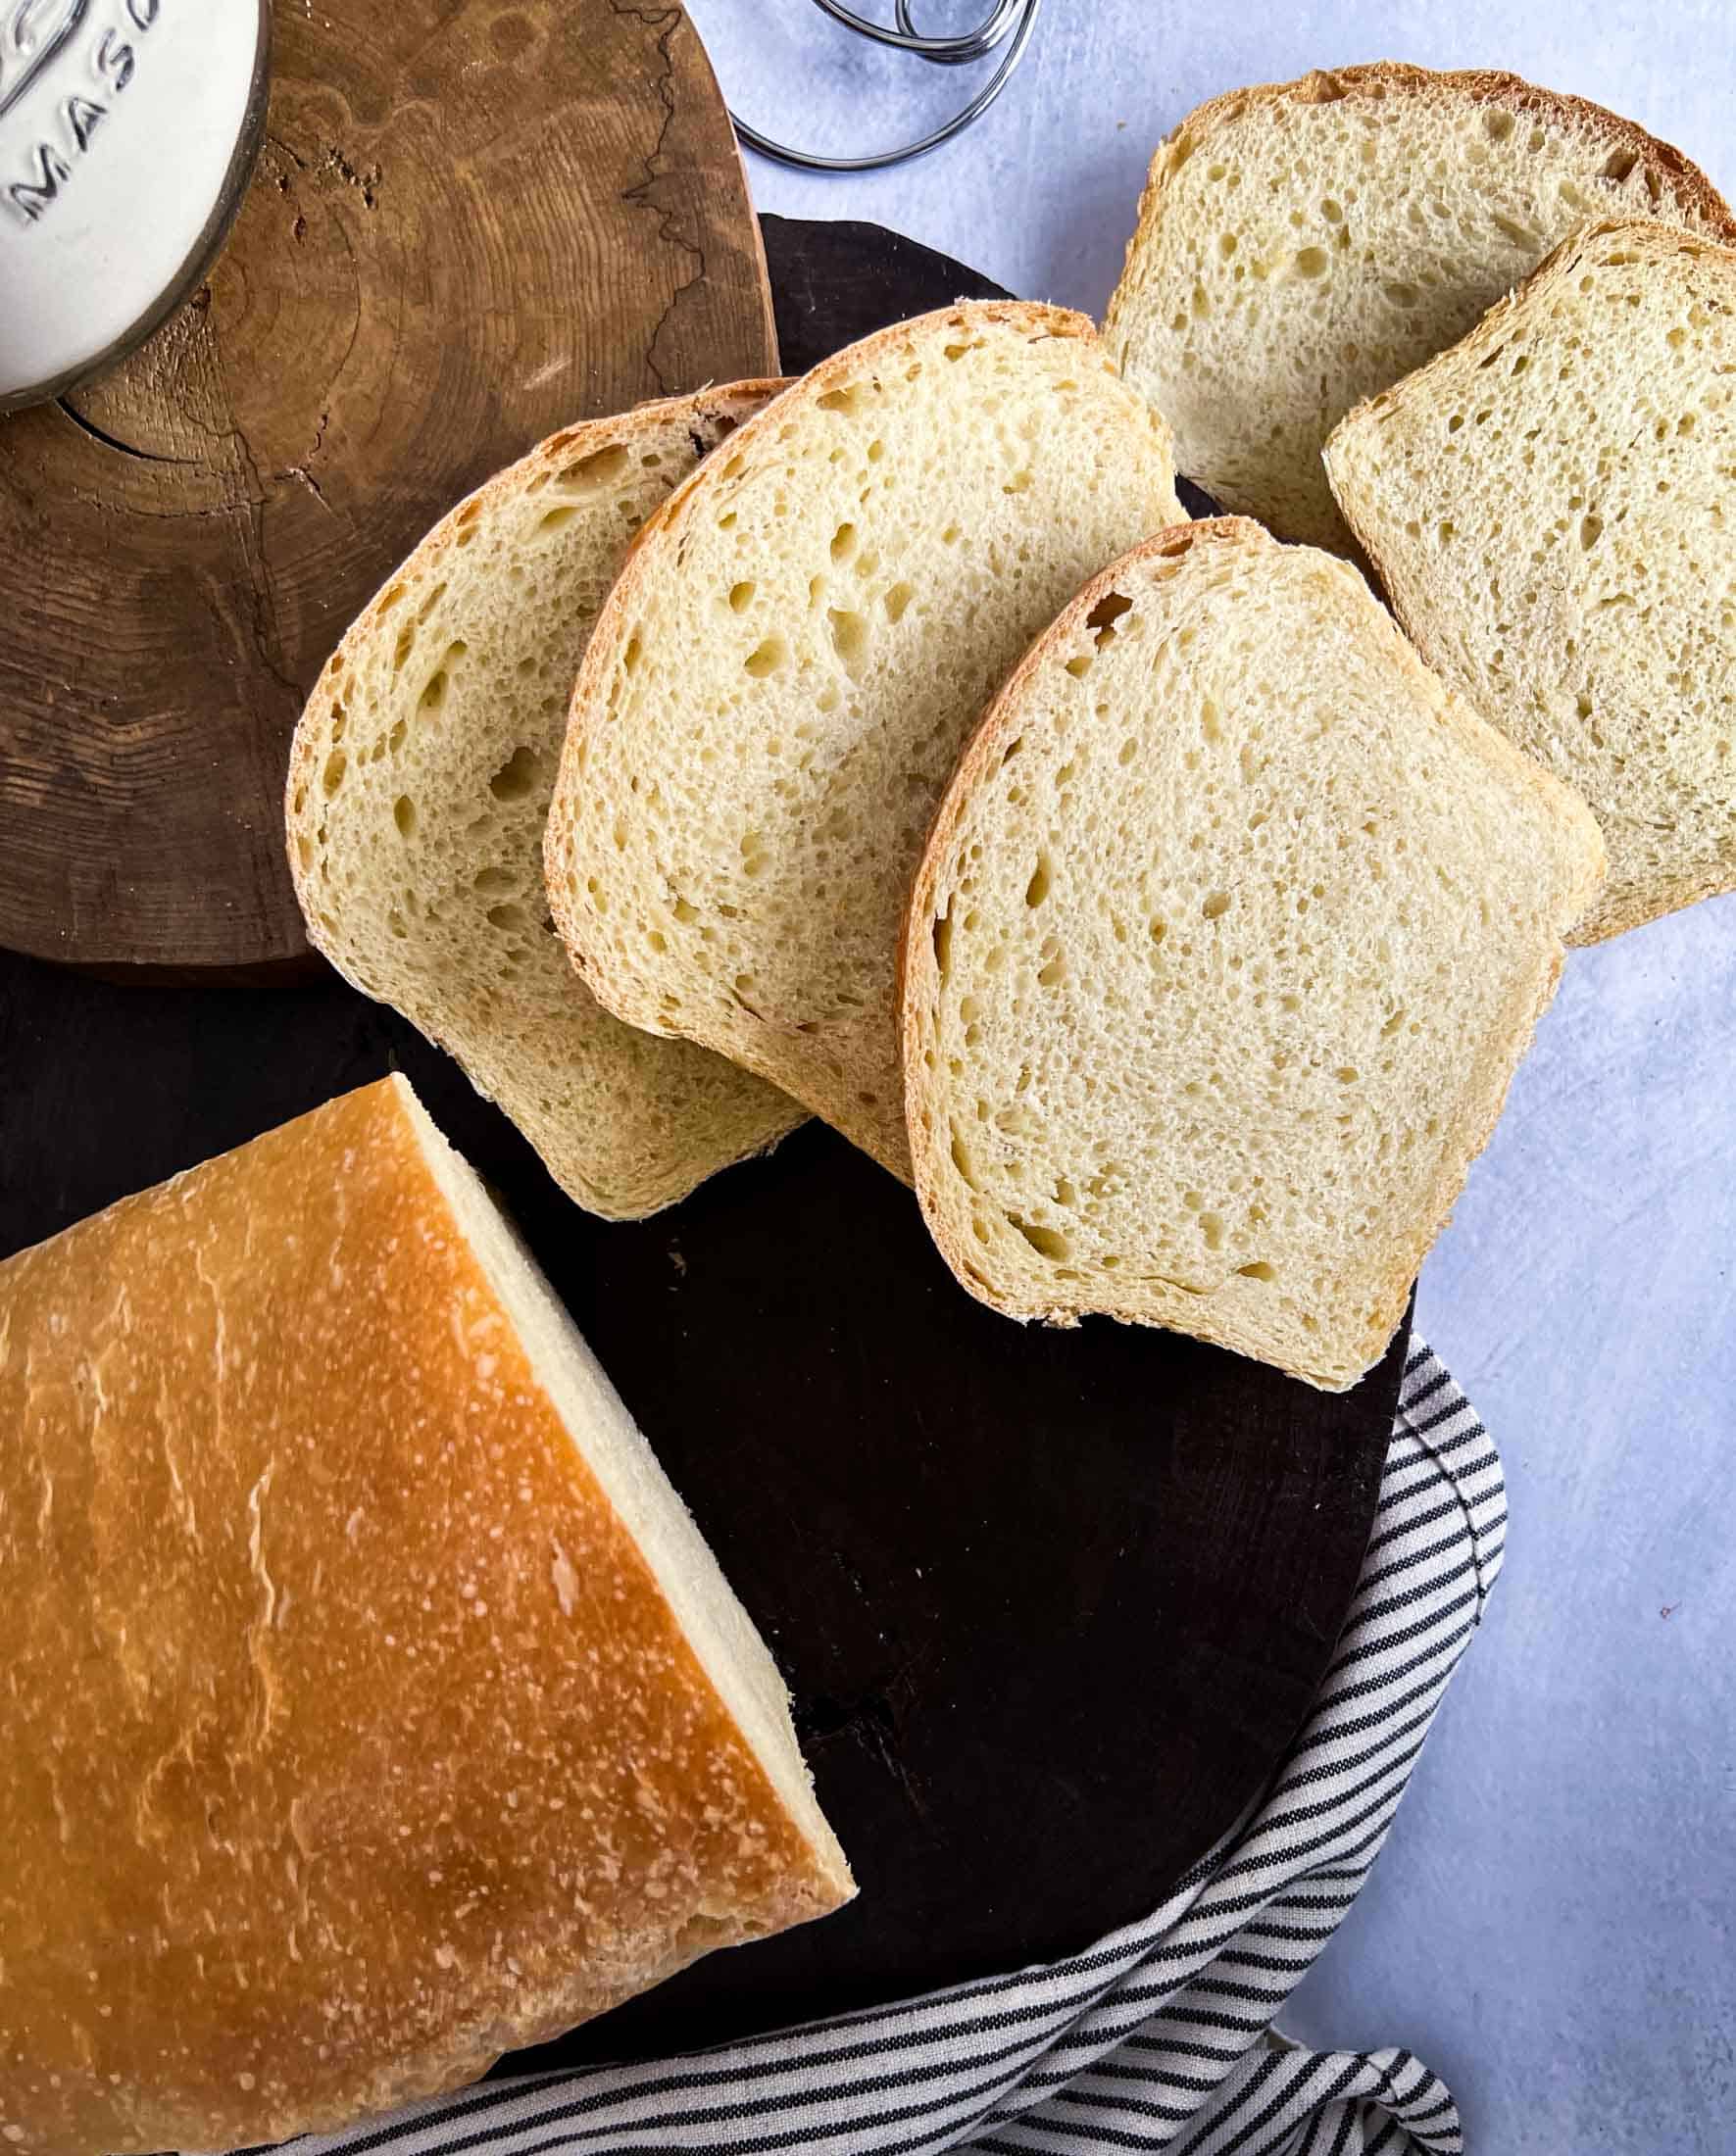
How To Shape Sourdough Sandwich Bread
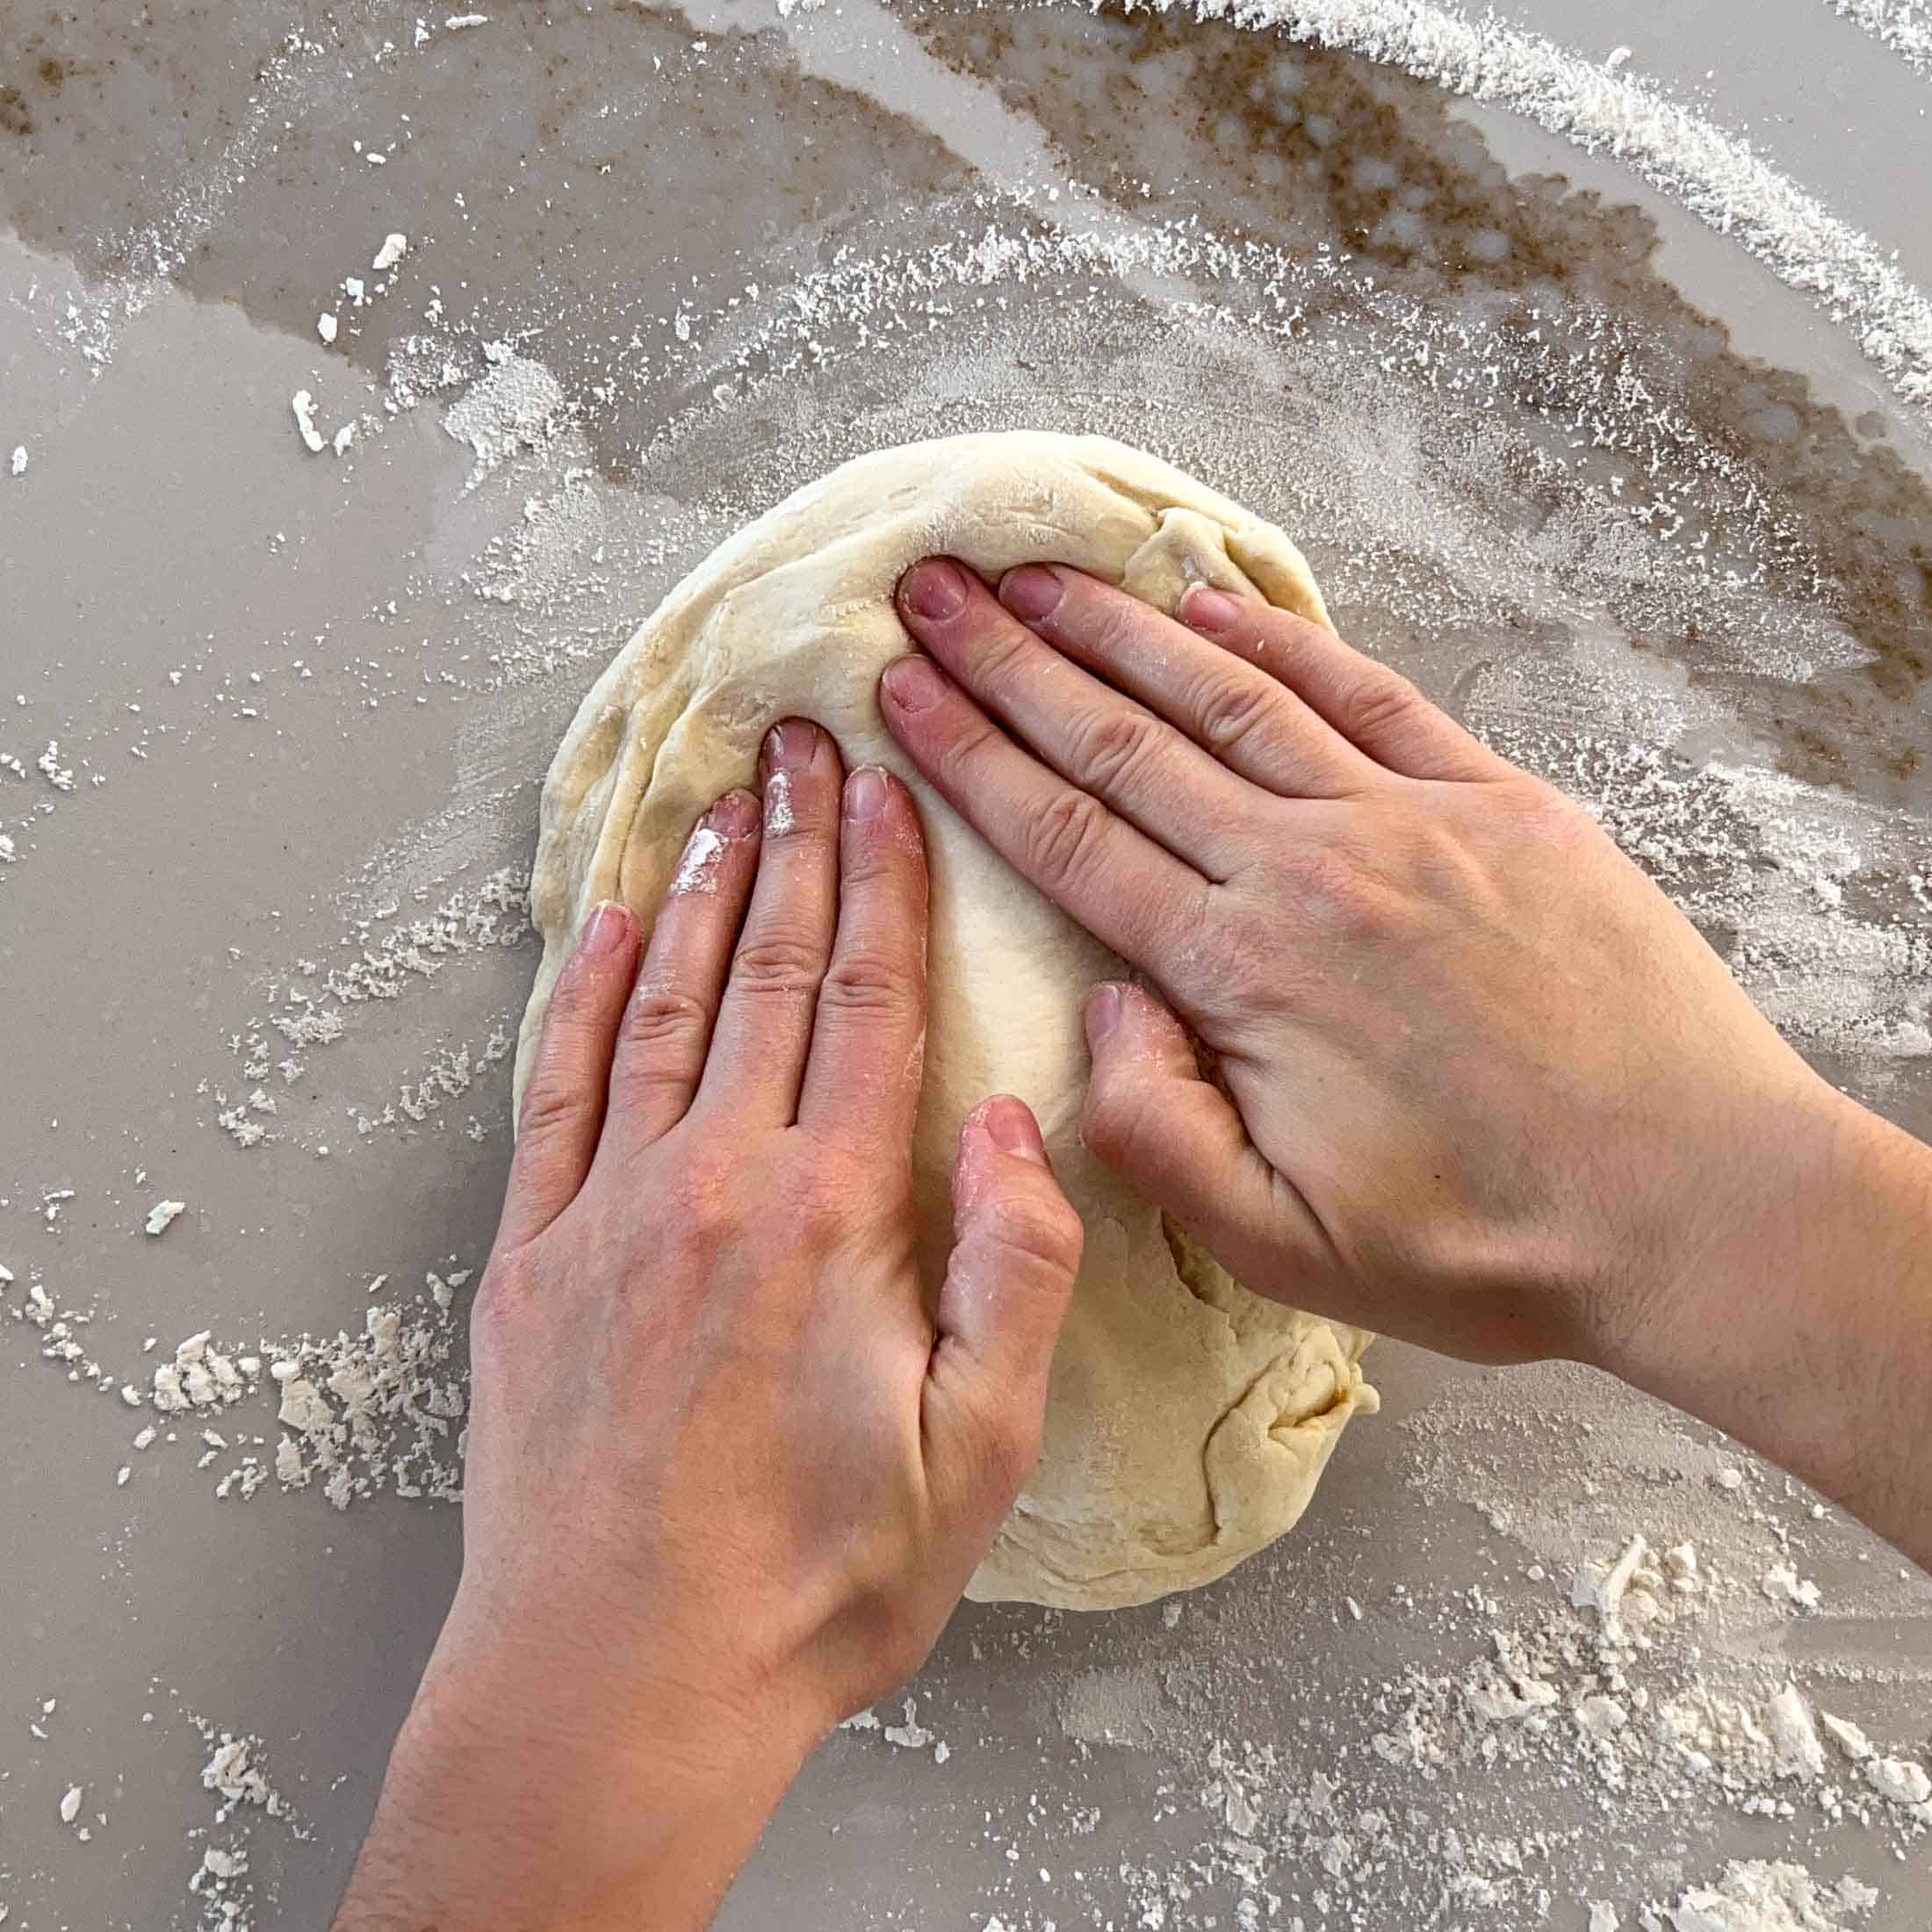

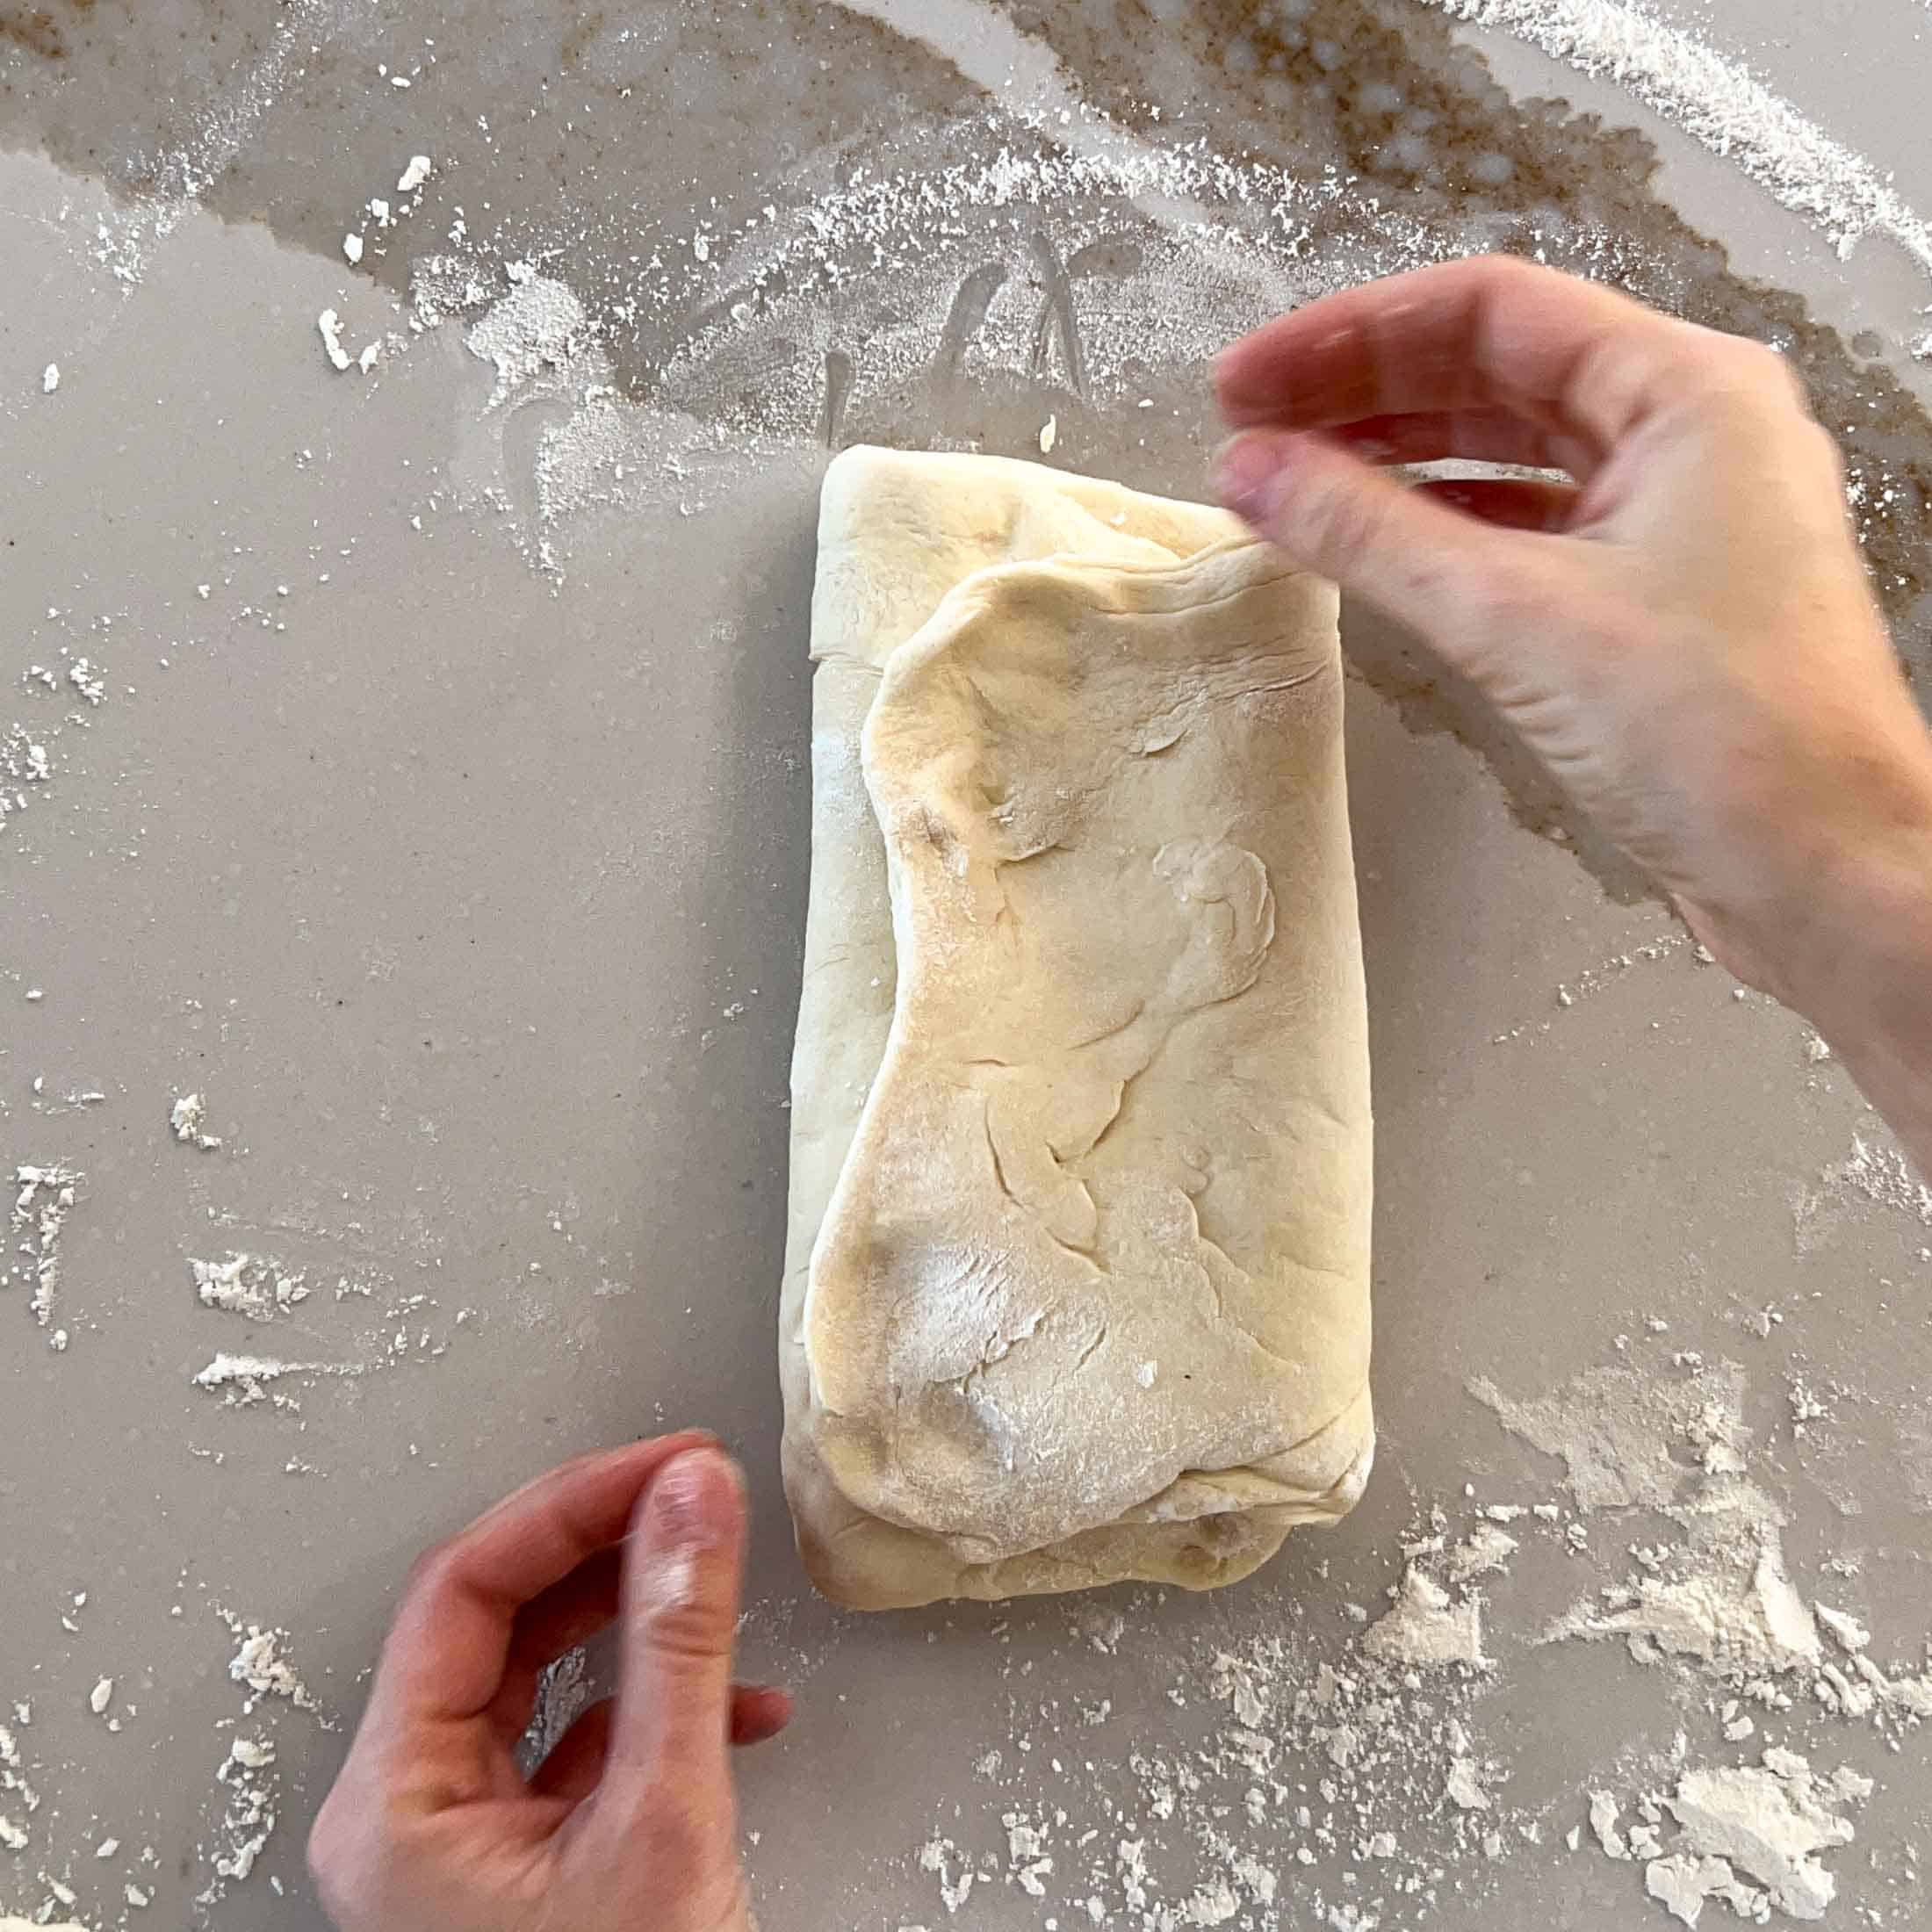
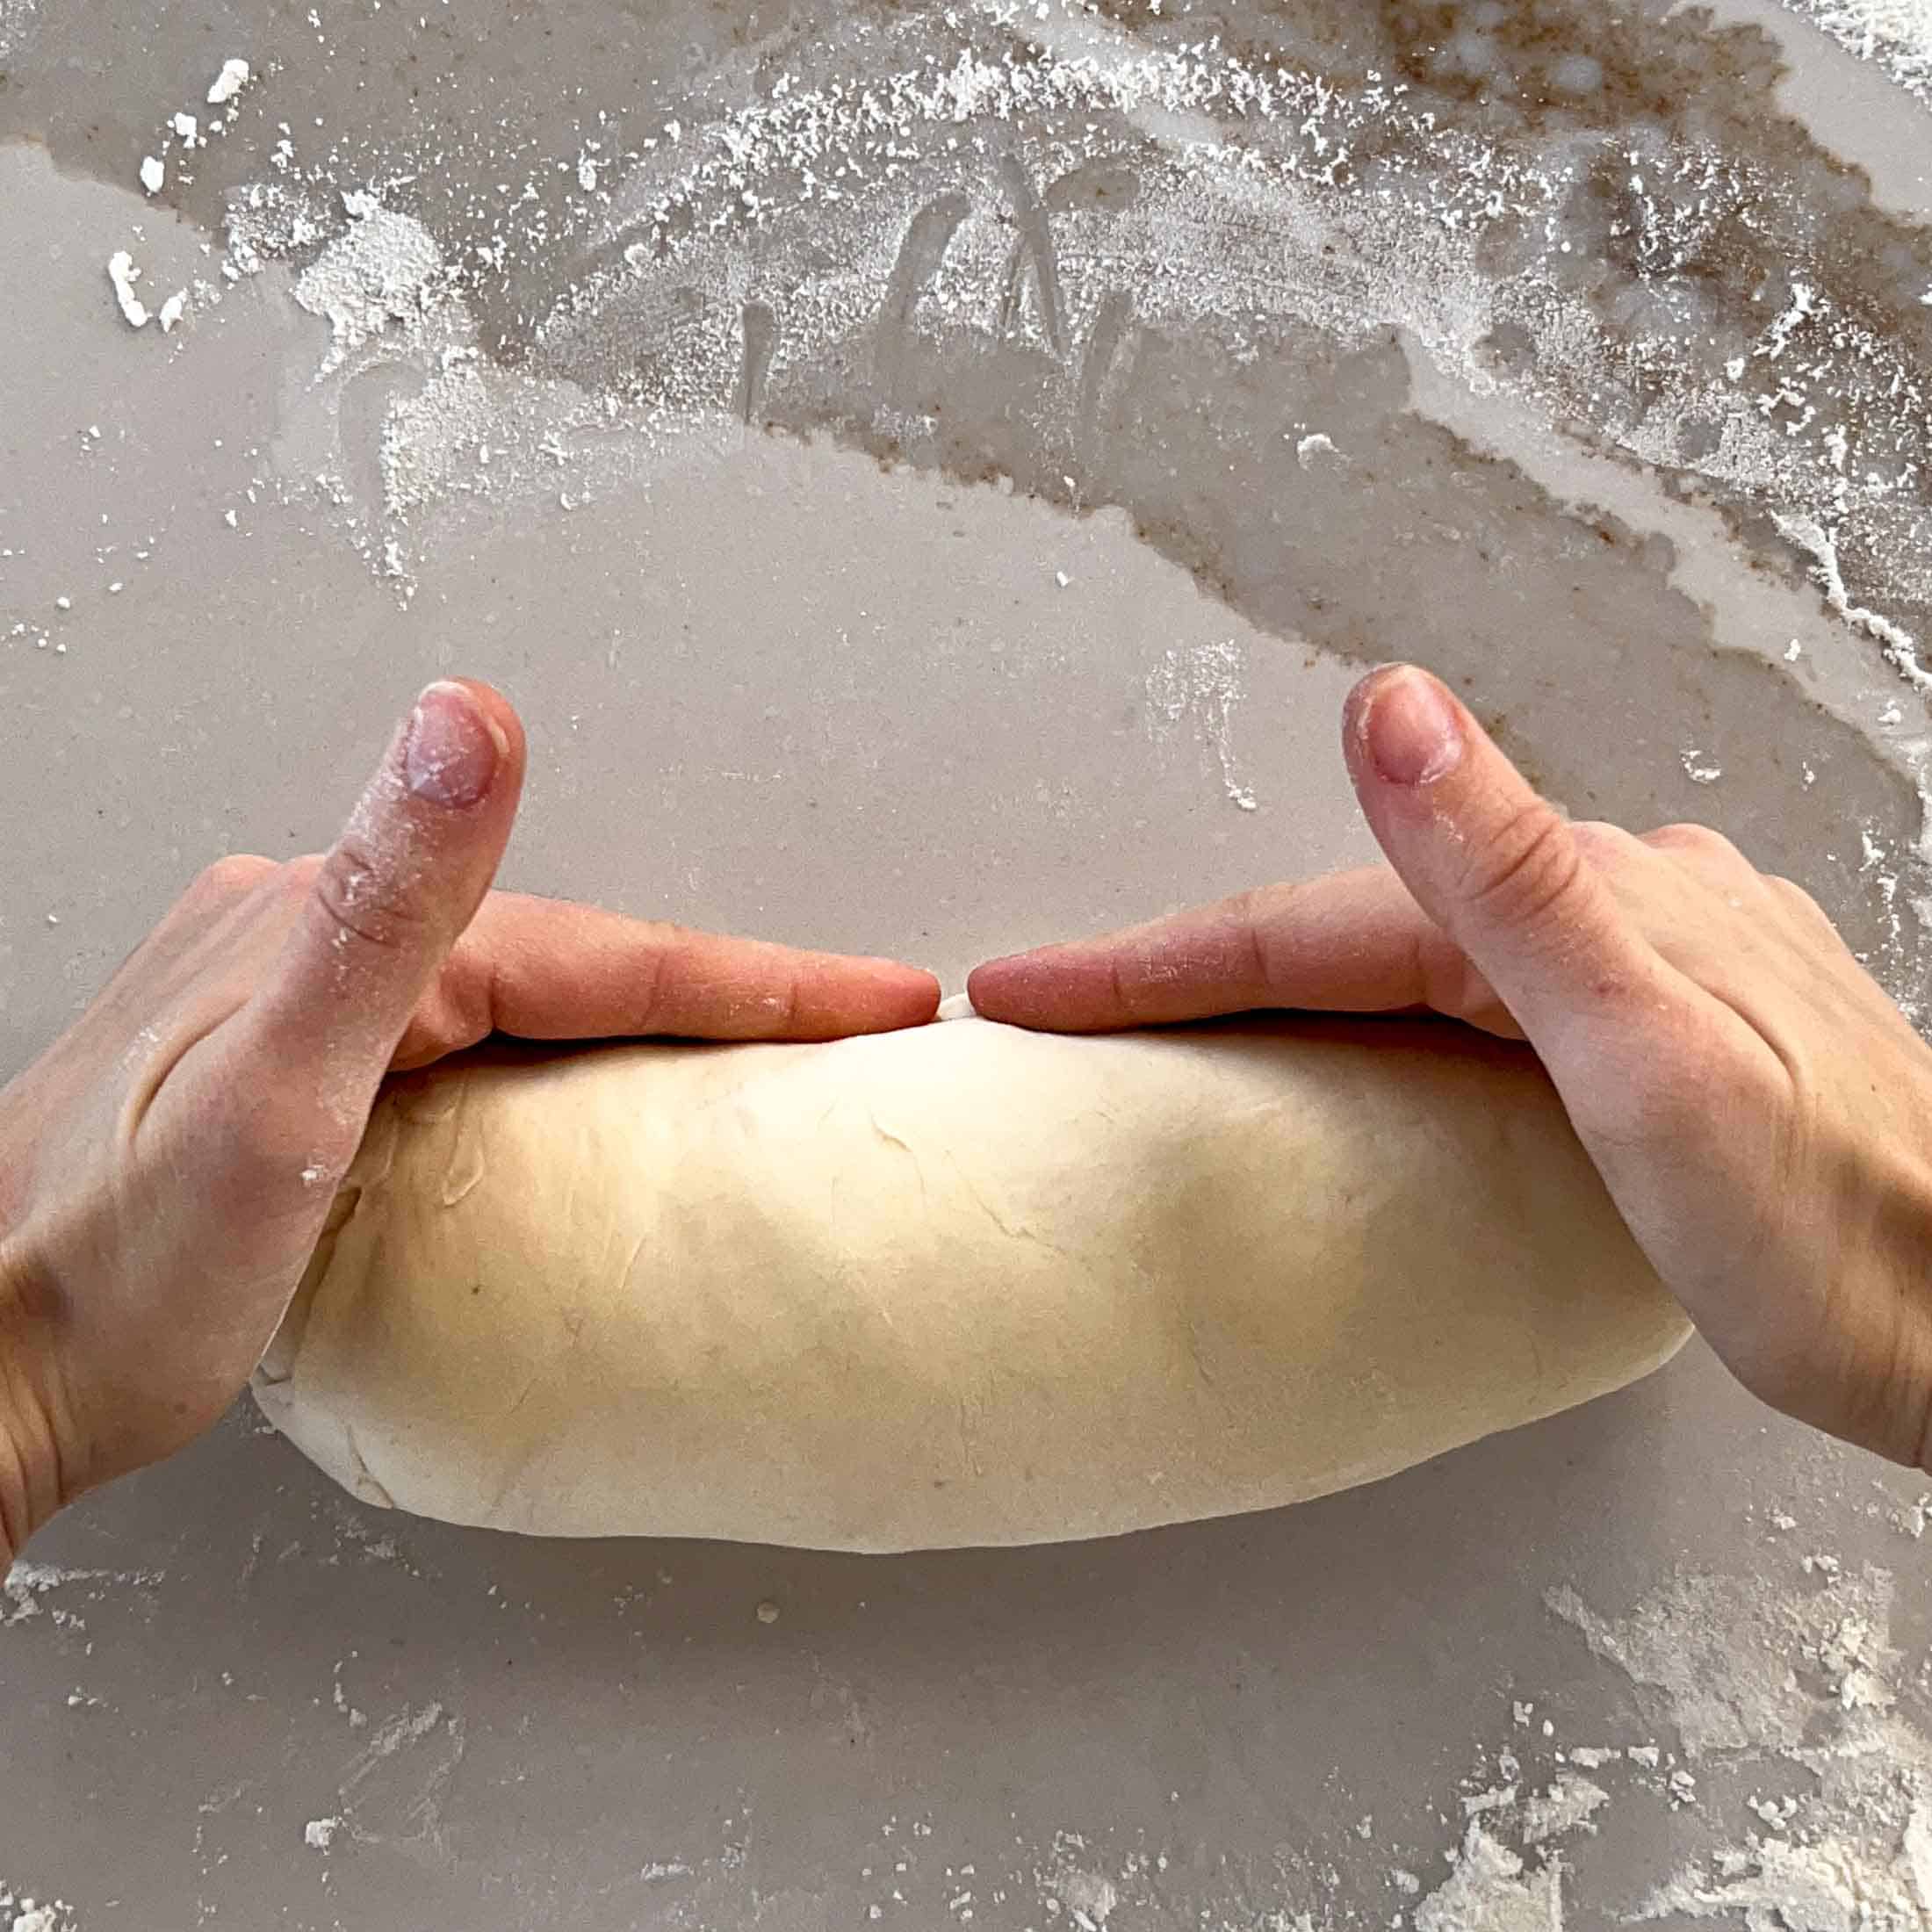
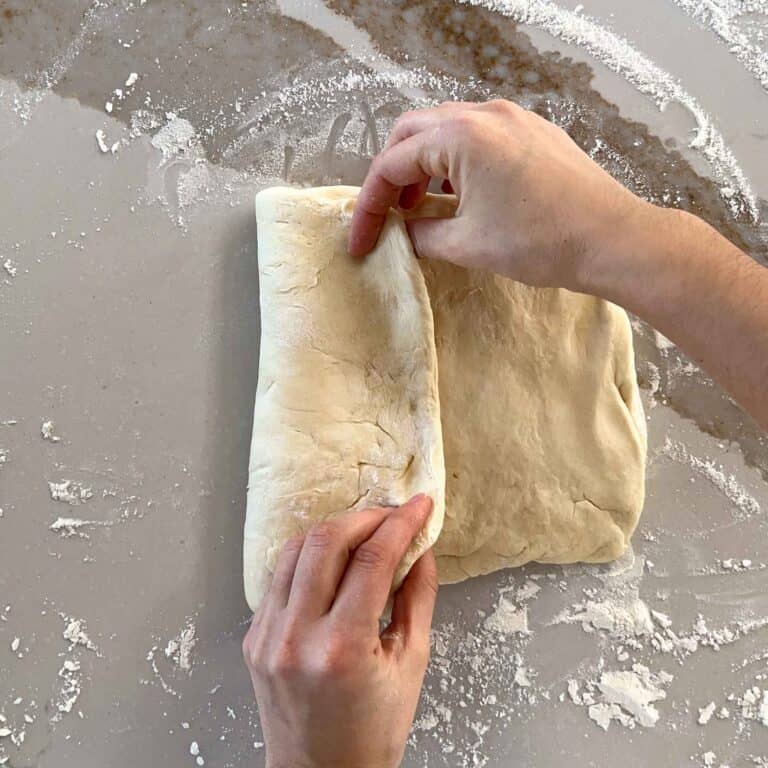
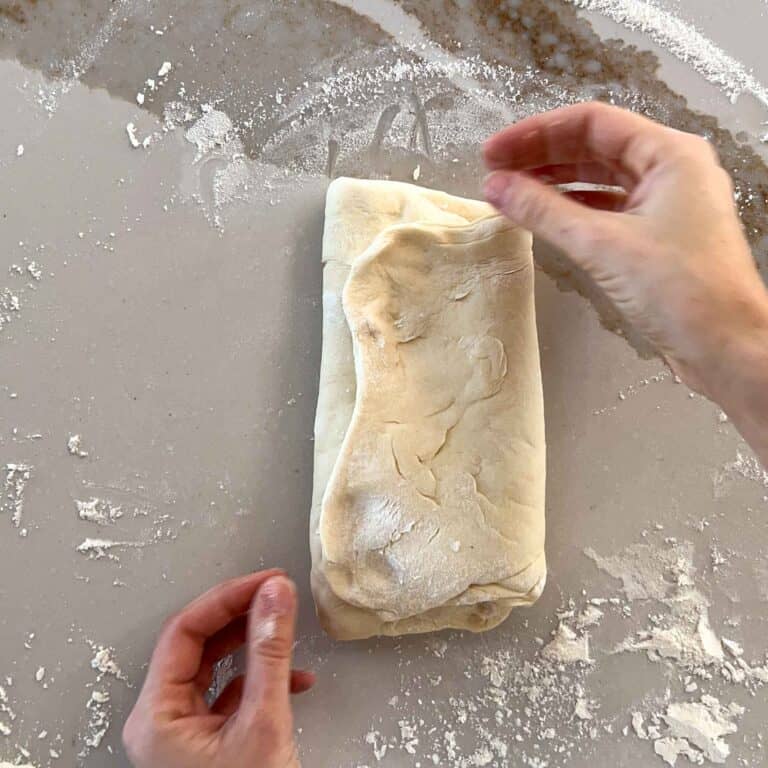
Gently flour your work surface. Too much flour will cause your loaf to slide around and can make it difficult to produce surface tension. Press the dough out into a rectangular shape running from left to right. Fold the left edge into the middle , fold the right edge toward the middle, overlapping the left edge. Tuck the ends in and turn it over. Using two hands, gently pull the loaf toward you to create surface tension. Continue to tuck and pull until your loaf is tight and uniform. You may choose to tear any large bubbles that surface.
Exactly How To Make Sourdough Sandwich Bread
Sample Baker’s Schedule
Day 1.
- 12pm- feed sourdough starter
- 5pm- Mix all dough ingredients in your mixer
- 5:30pm- Use the dough hook on your mixer to knead once more. Cover with plastic wrap and let sit overnight at room temperature.
Day 2.
- 7:00am- Shape your loaves and allow them to do their final rise in greased loaf pans.
- 12:00pm- Once doubled in size, bake loaves in preheated oven. Allow to cool for at least 20 minutes before slicing into the loaves. Enjoy!
Step 1. Sourdough Starter Feed your starter with 50g starter, 50g water, 50g all purpose flour. Cover and let sit for 3-4 hours or until bubbly and doubled in size.
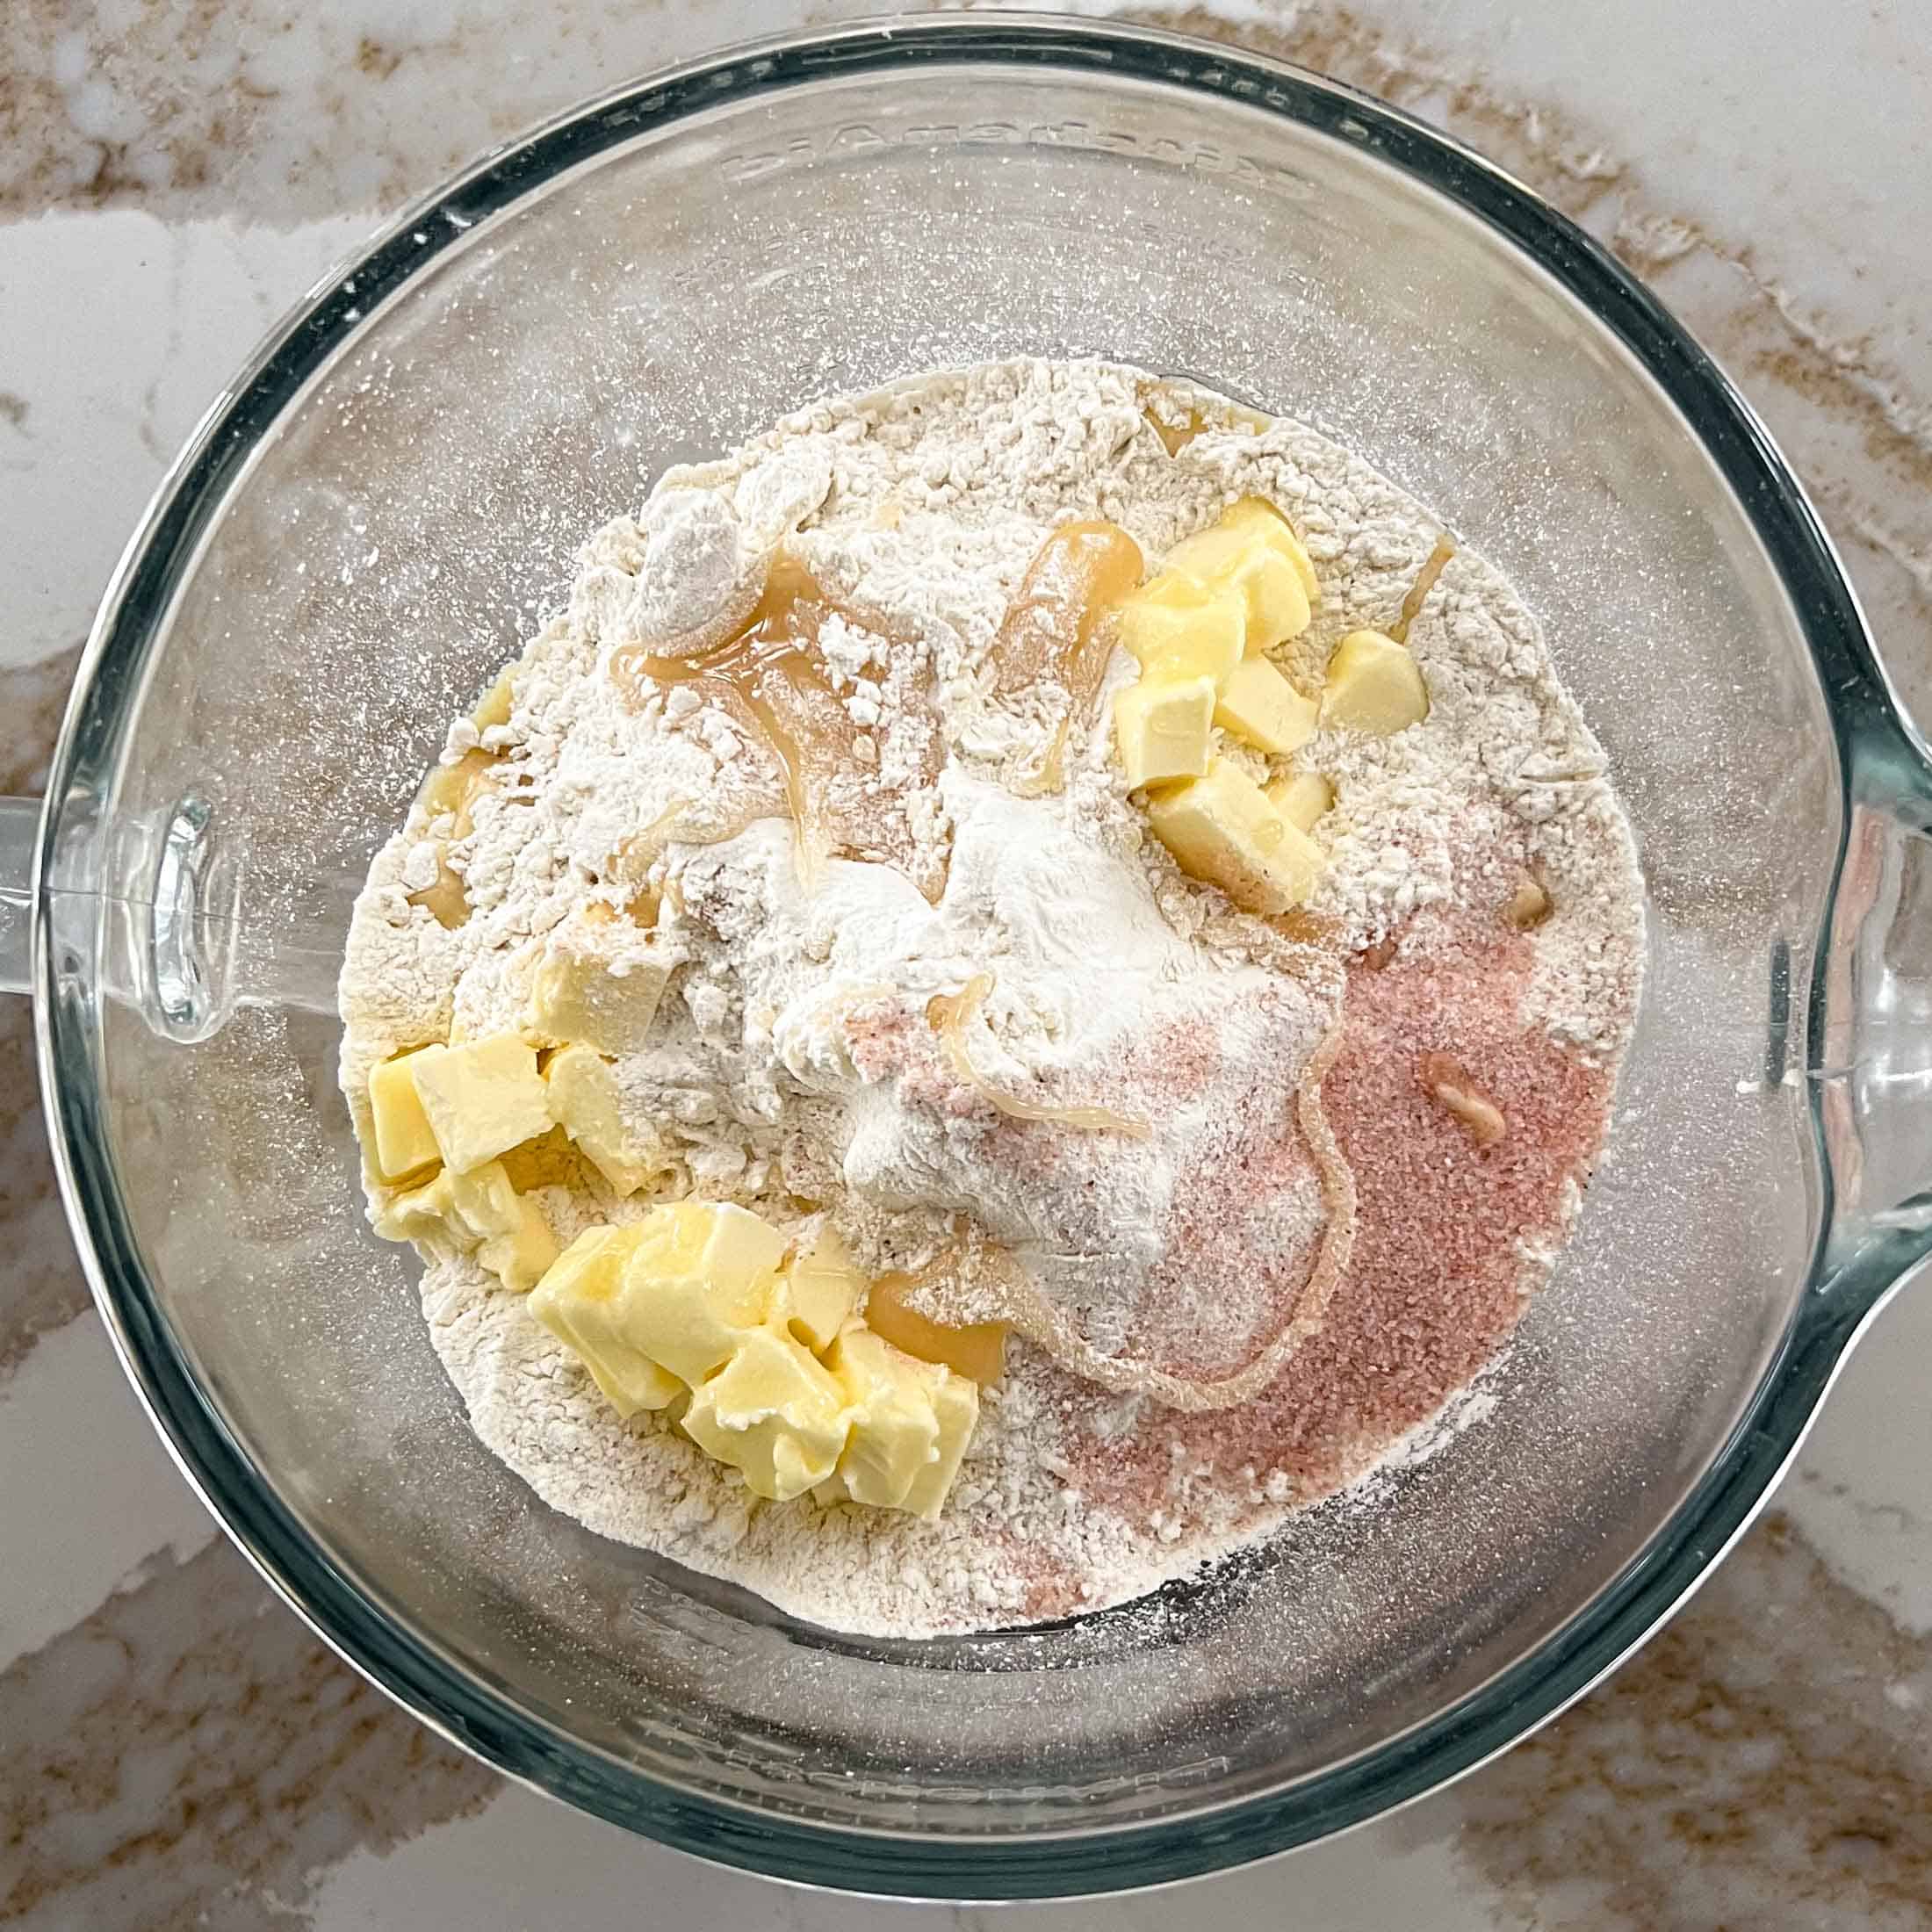
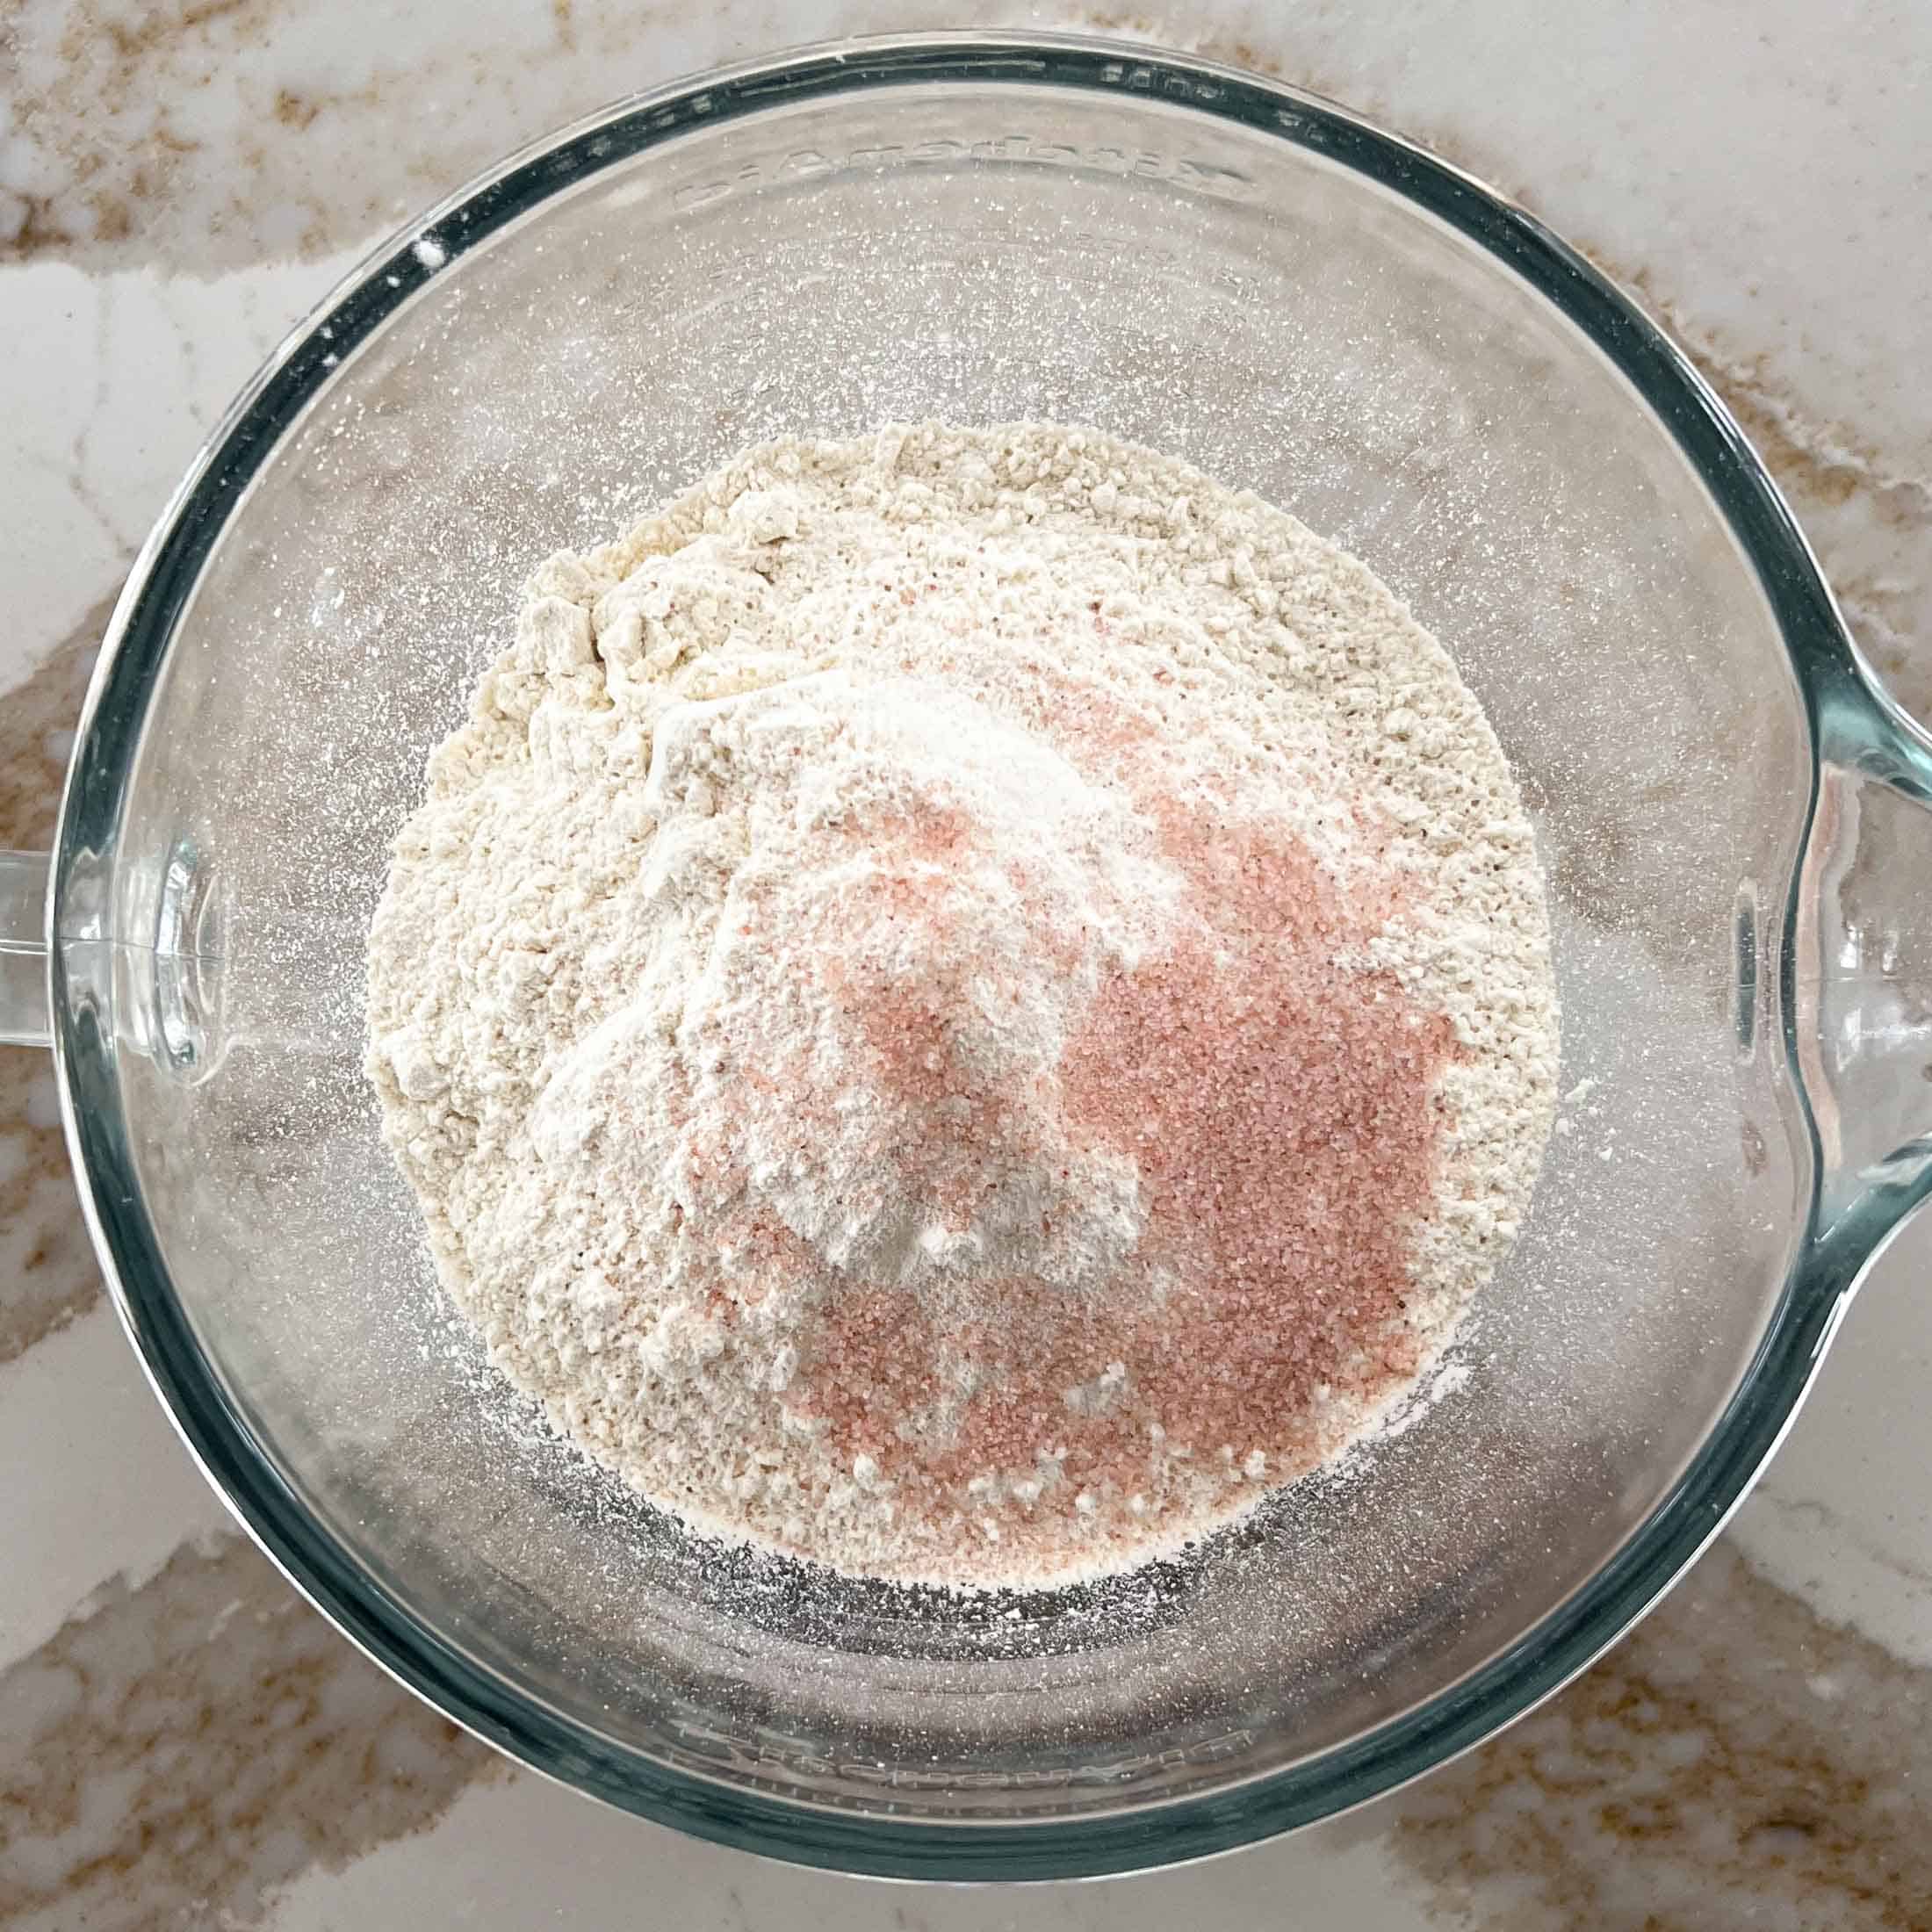
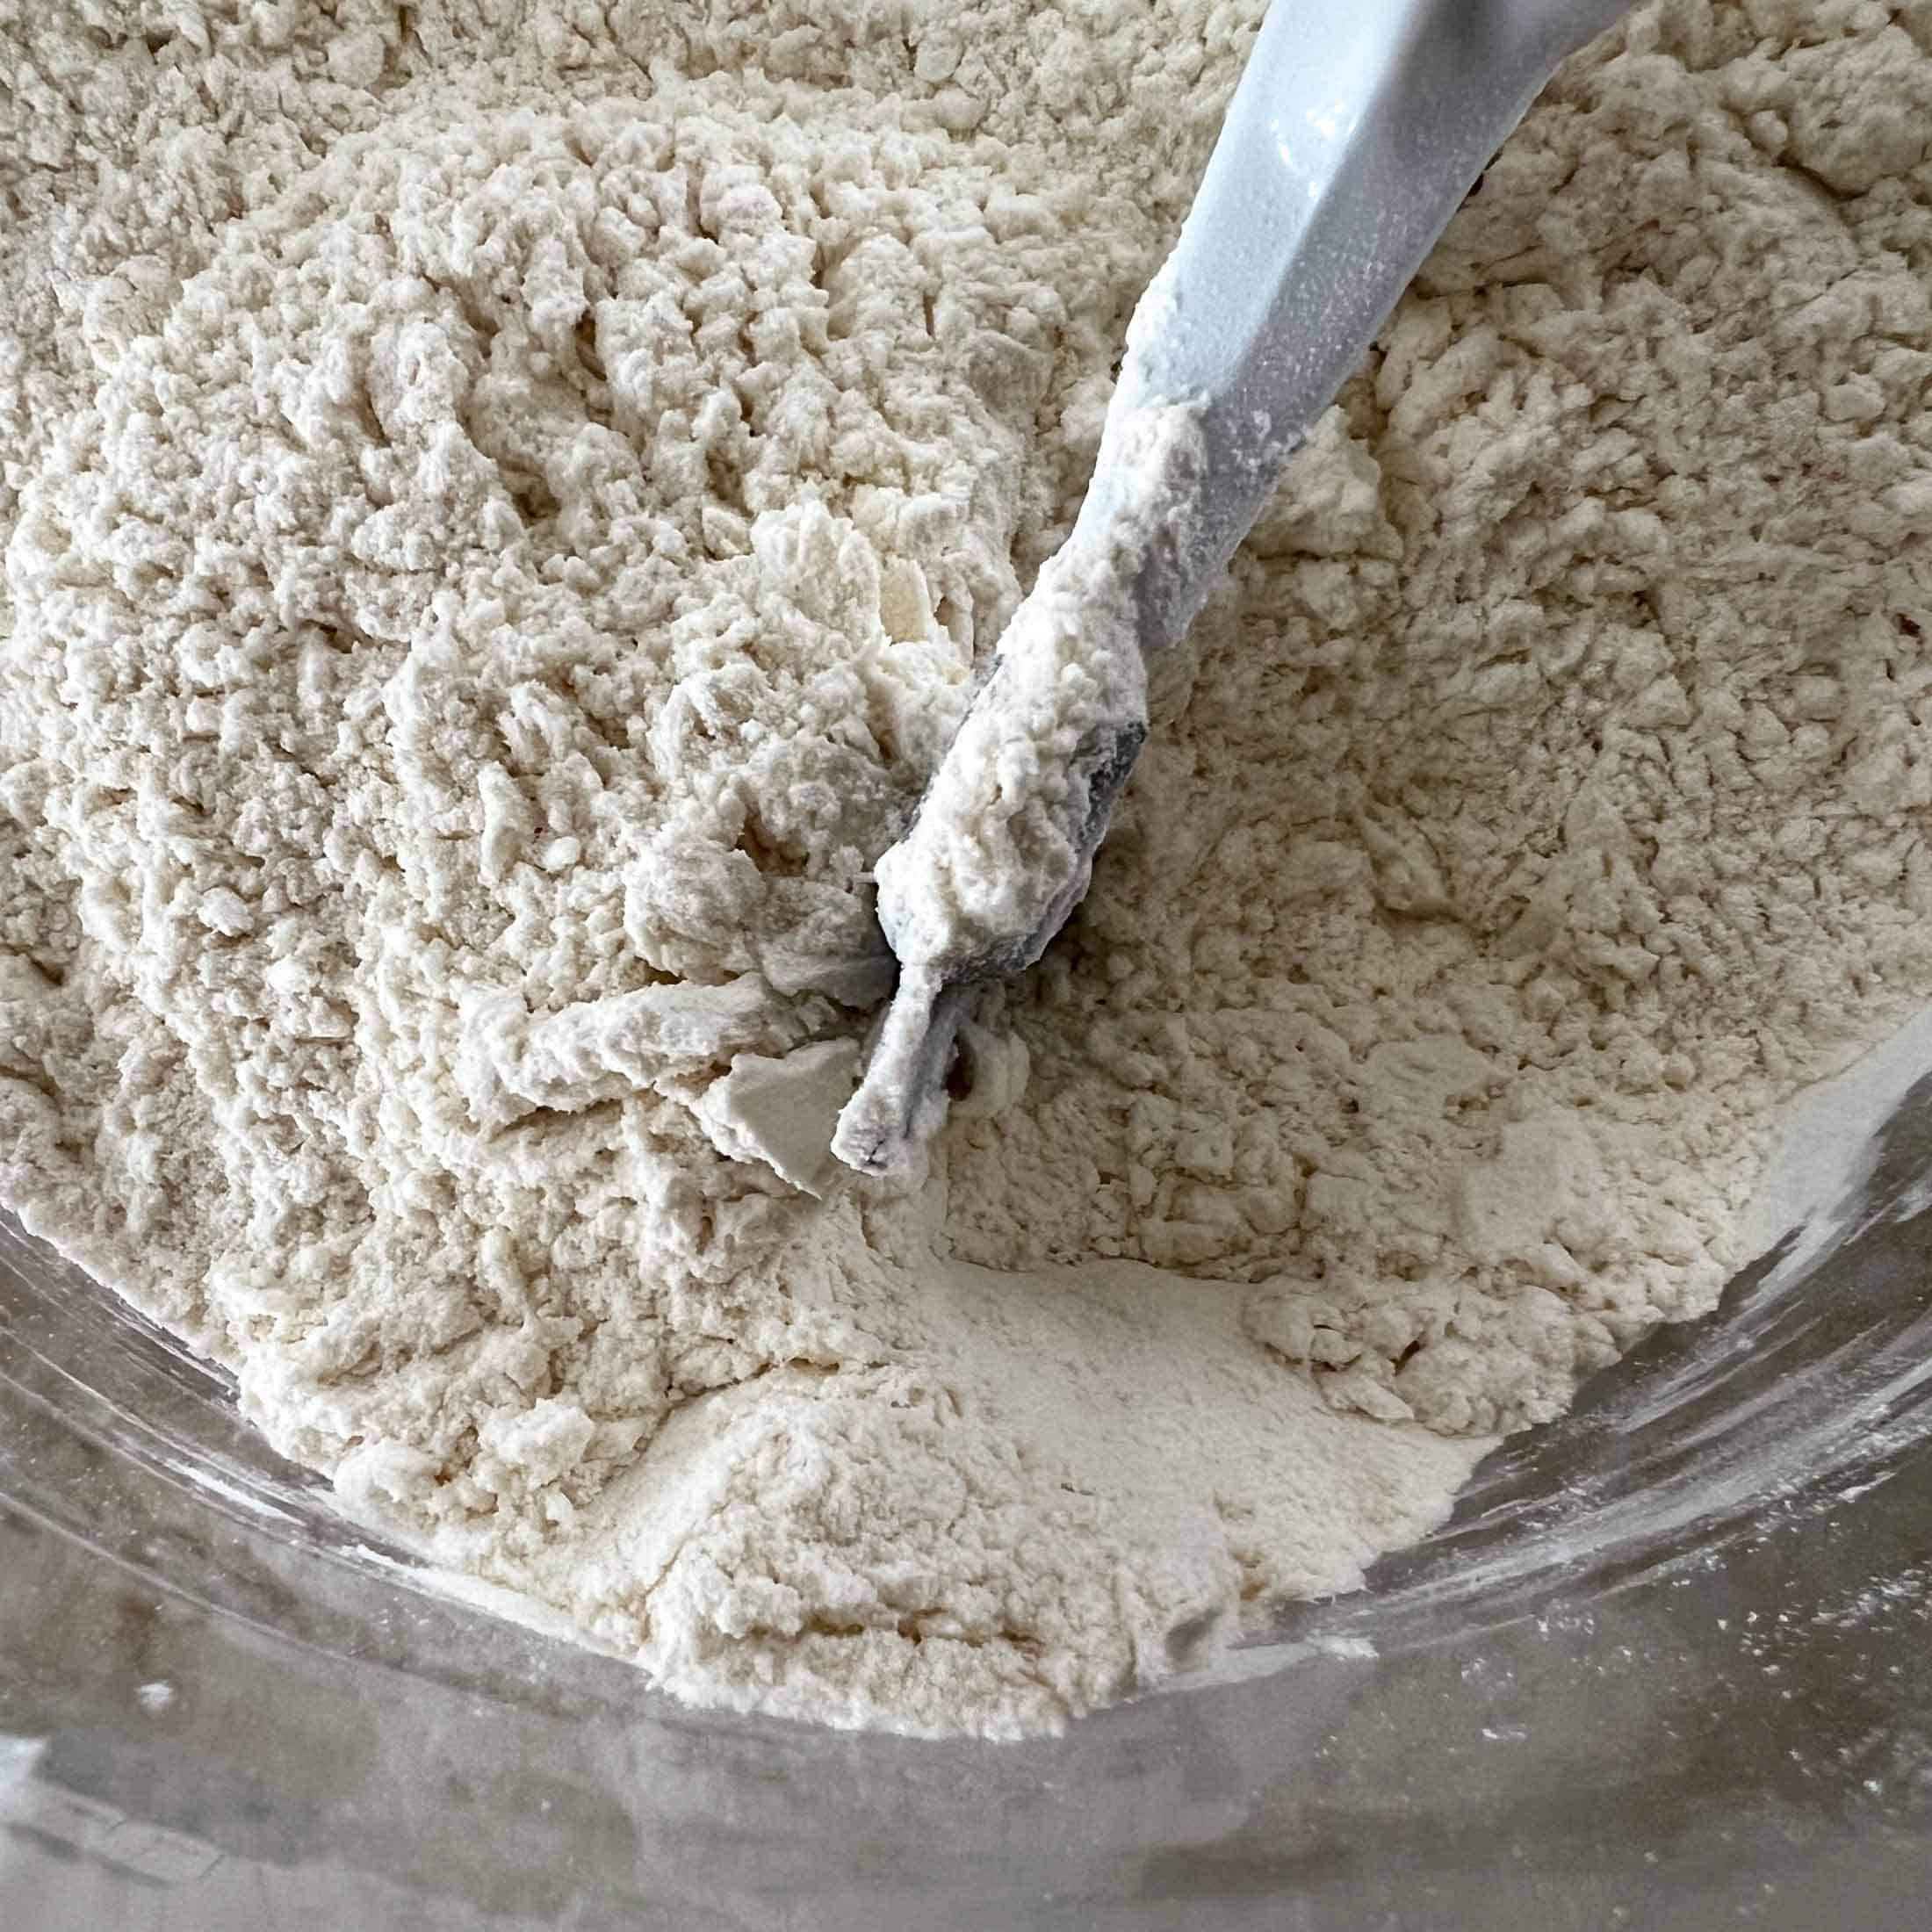
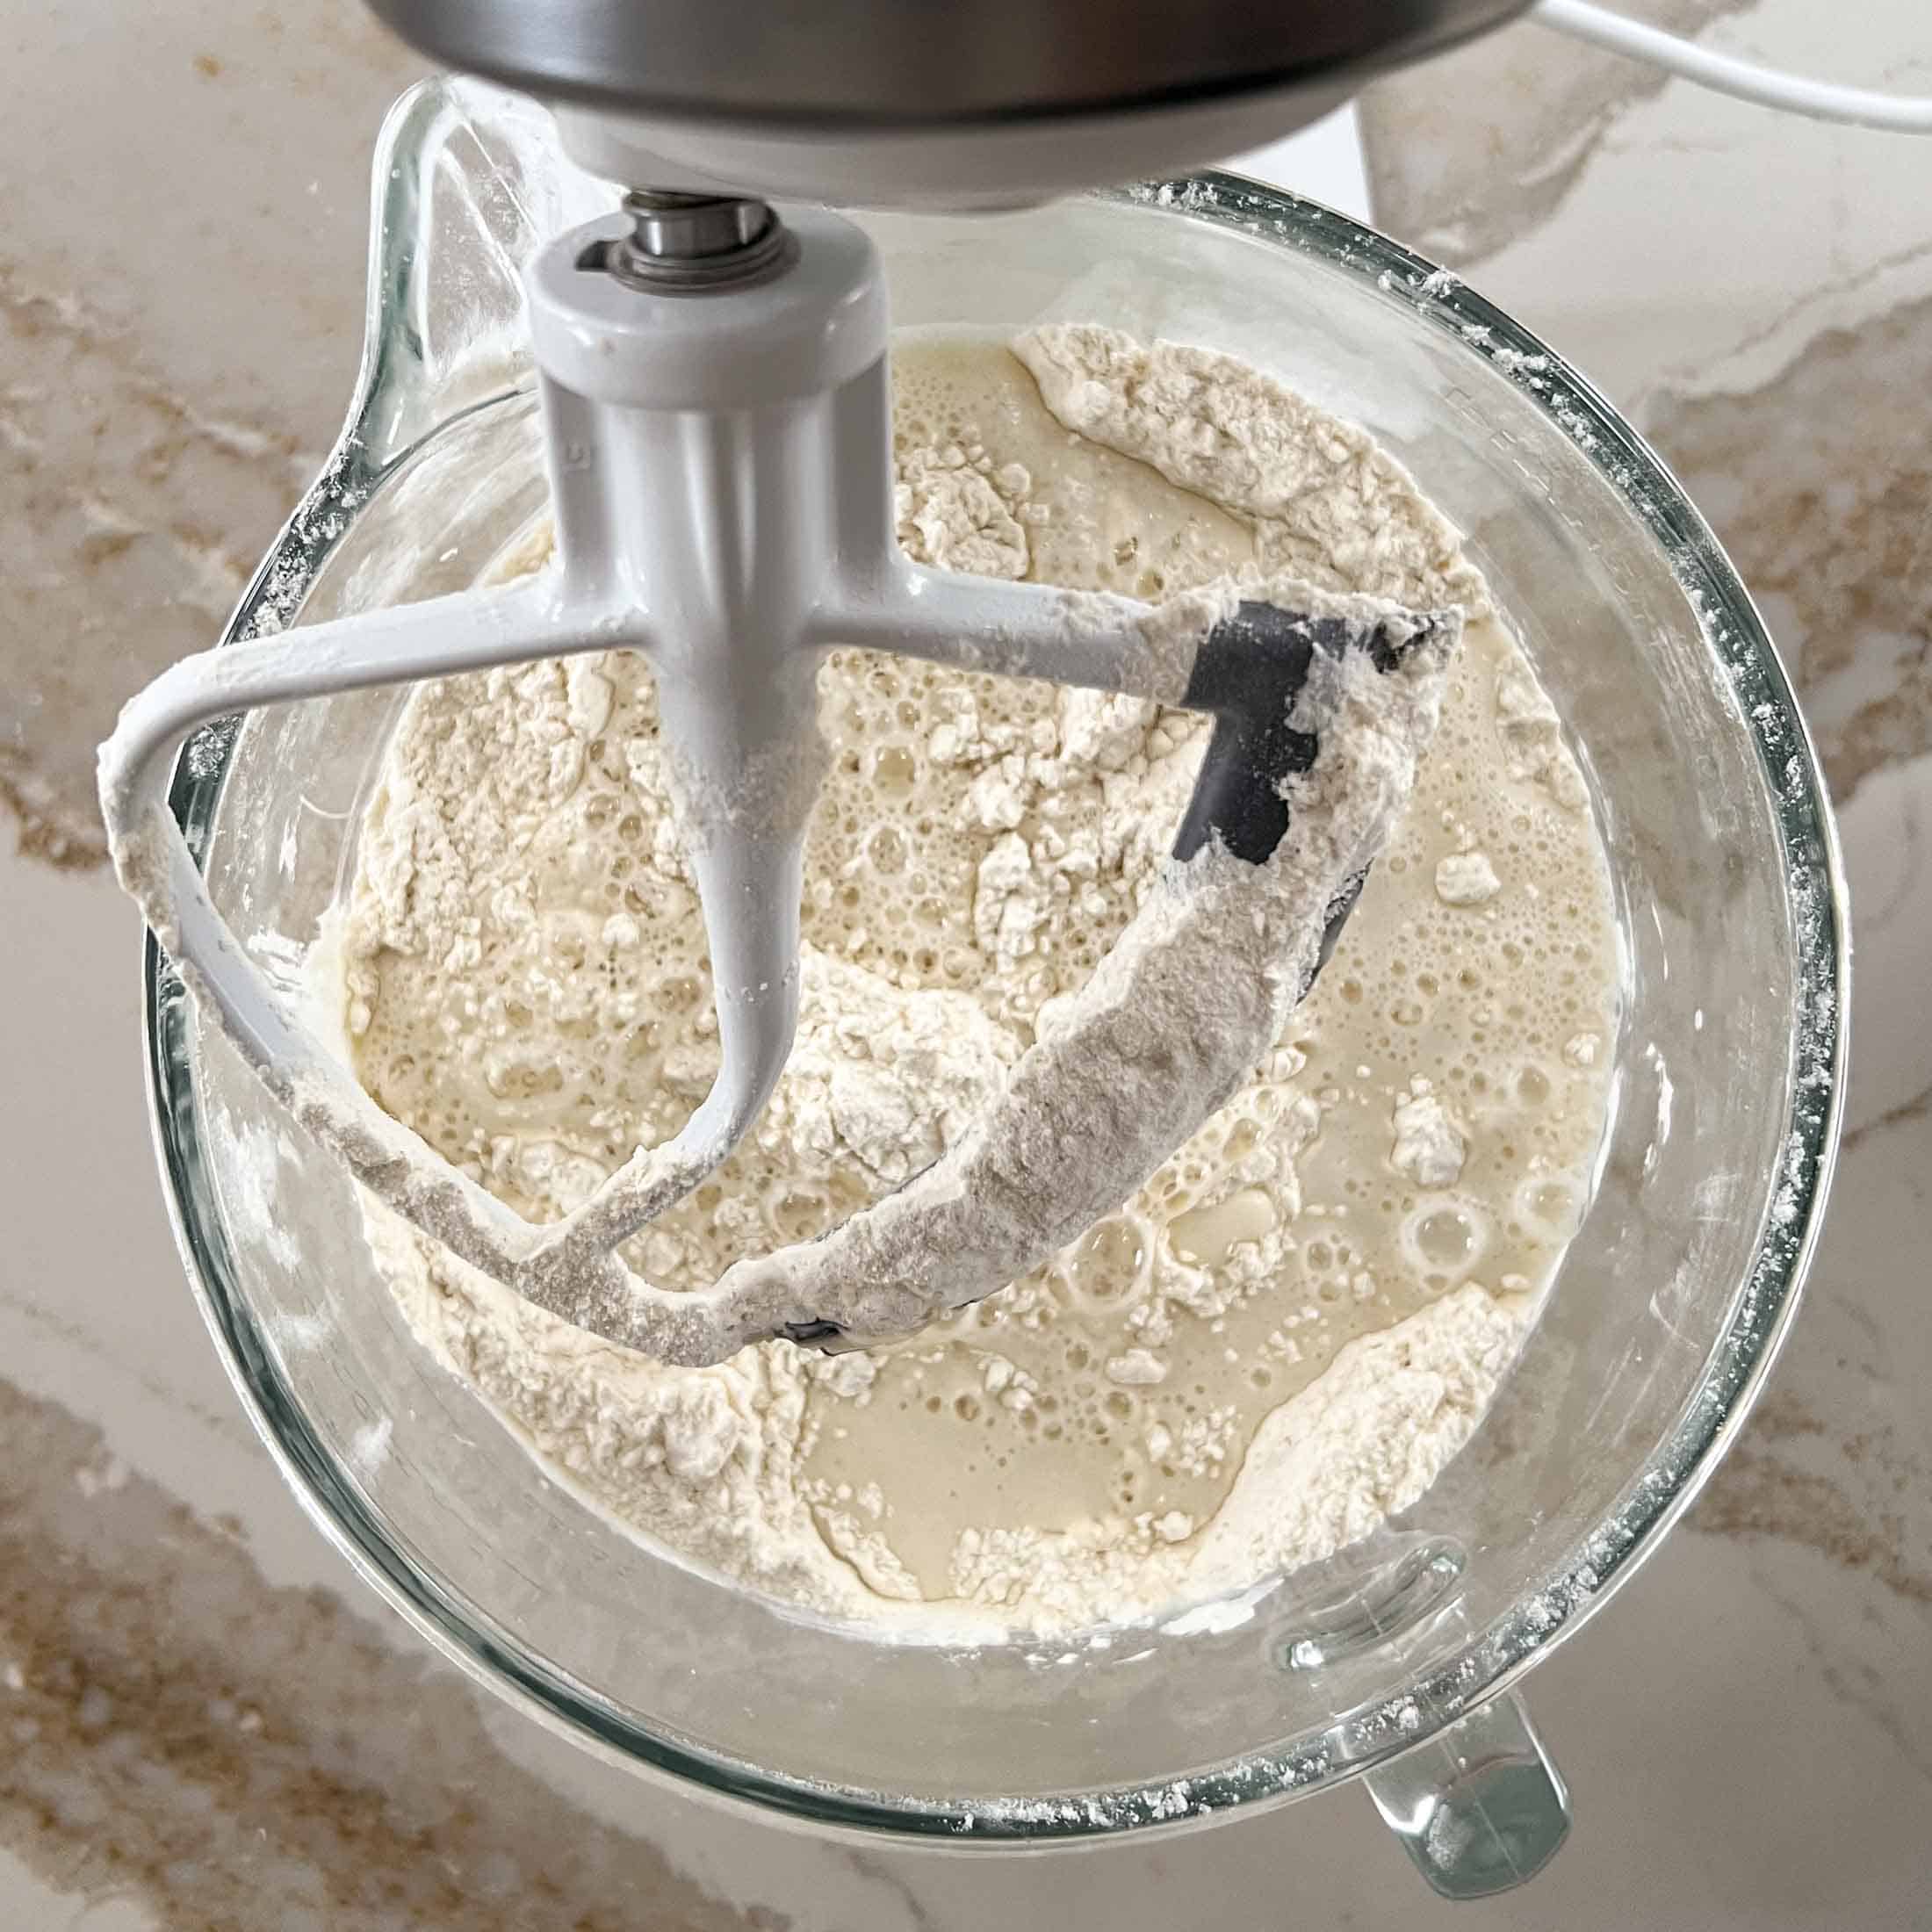
Step 2. Autolyse + Rest In the bowl of a stand mixer with the paddle attachment, combine 750g (6 cups) flour, 90g (1/2 cup) room temperature butter (sliced in small squares), 21g honey(1 tablespoon) , (13g) 2 teaspoon fine sea salt. Mix until completely incorporated- it should be nice and crumbly. In a small bowl, measure out 405g (1 2/3 cup) warm water and 75g (1/4 cup + 2 tablespoons) active sourdough starter. Lightly mix and add to the flour mixture in your mixing bowl. Switch to the dough hook attachment, turn on the mixer and allow it to mix on a low speed until fully incorporated (3-4 minutes). Turn off the mixer, cover the bowl with plastic wrap, and let the dough rest + gluten relax for 30 minutes.
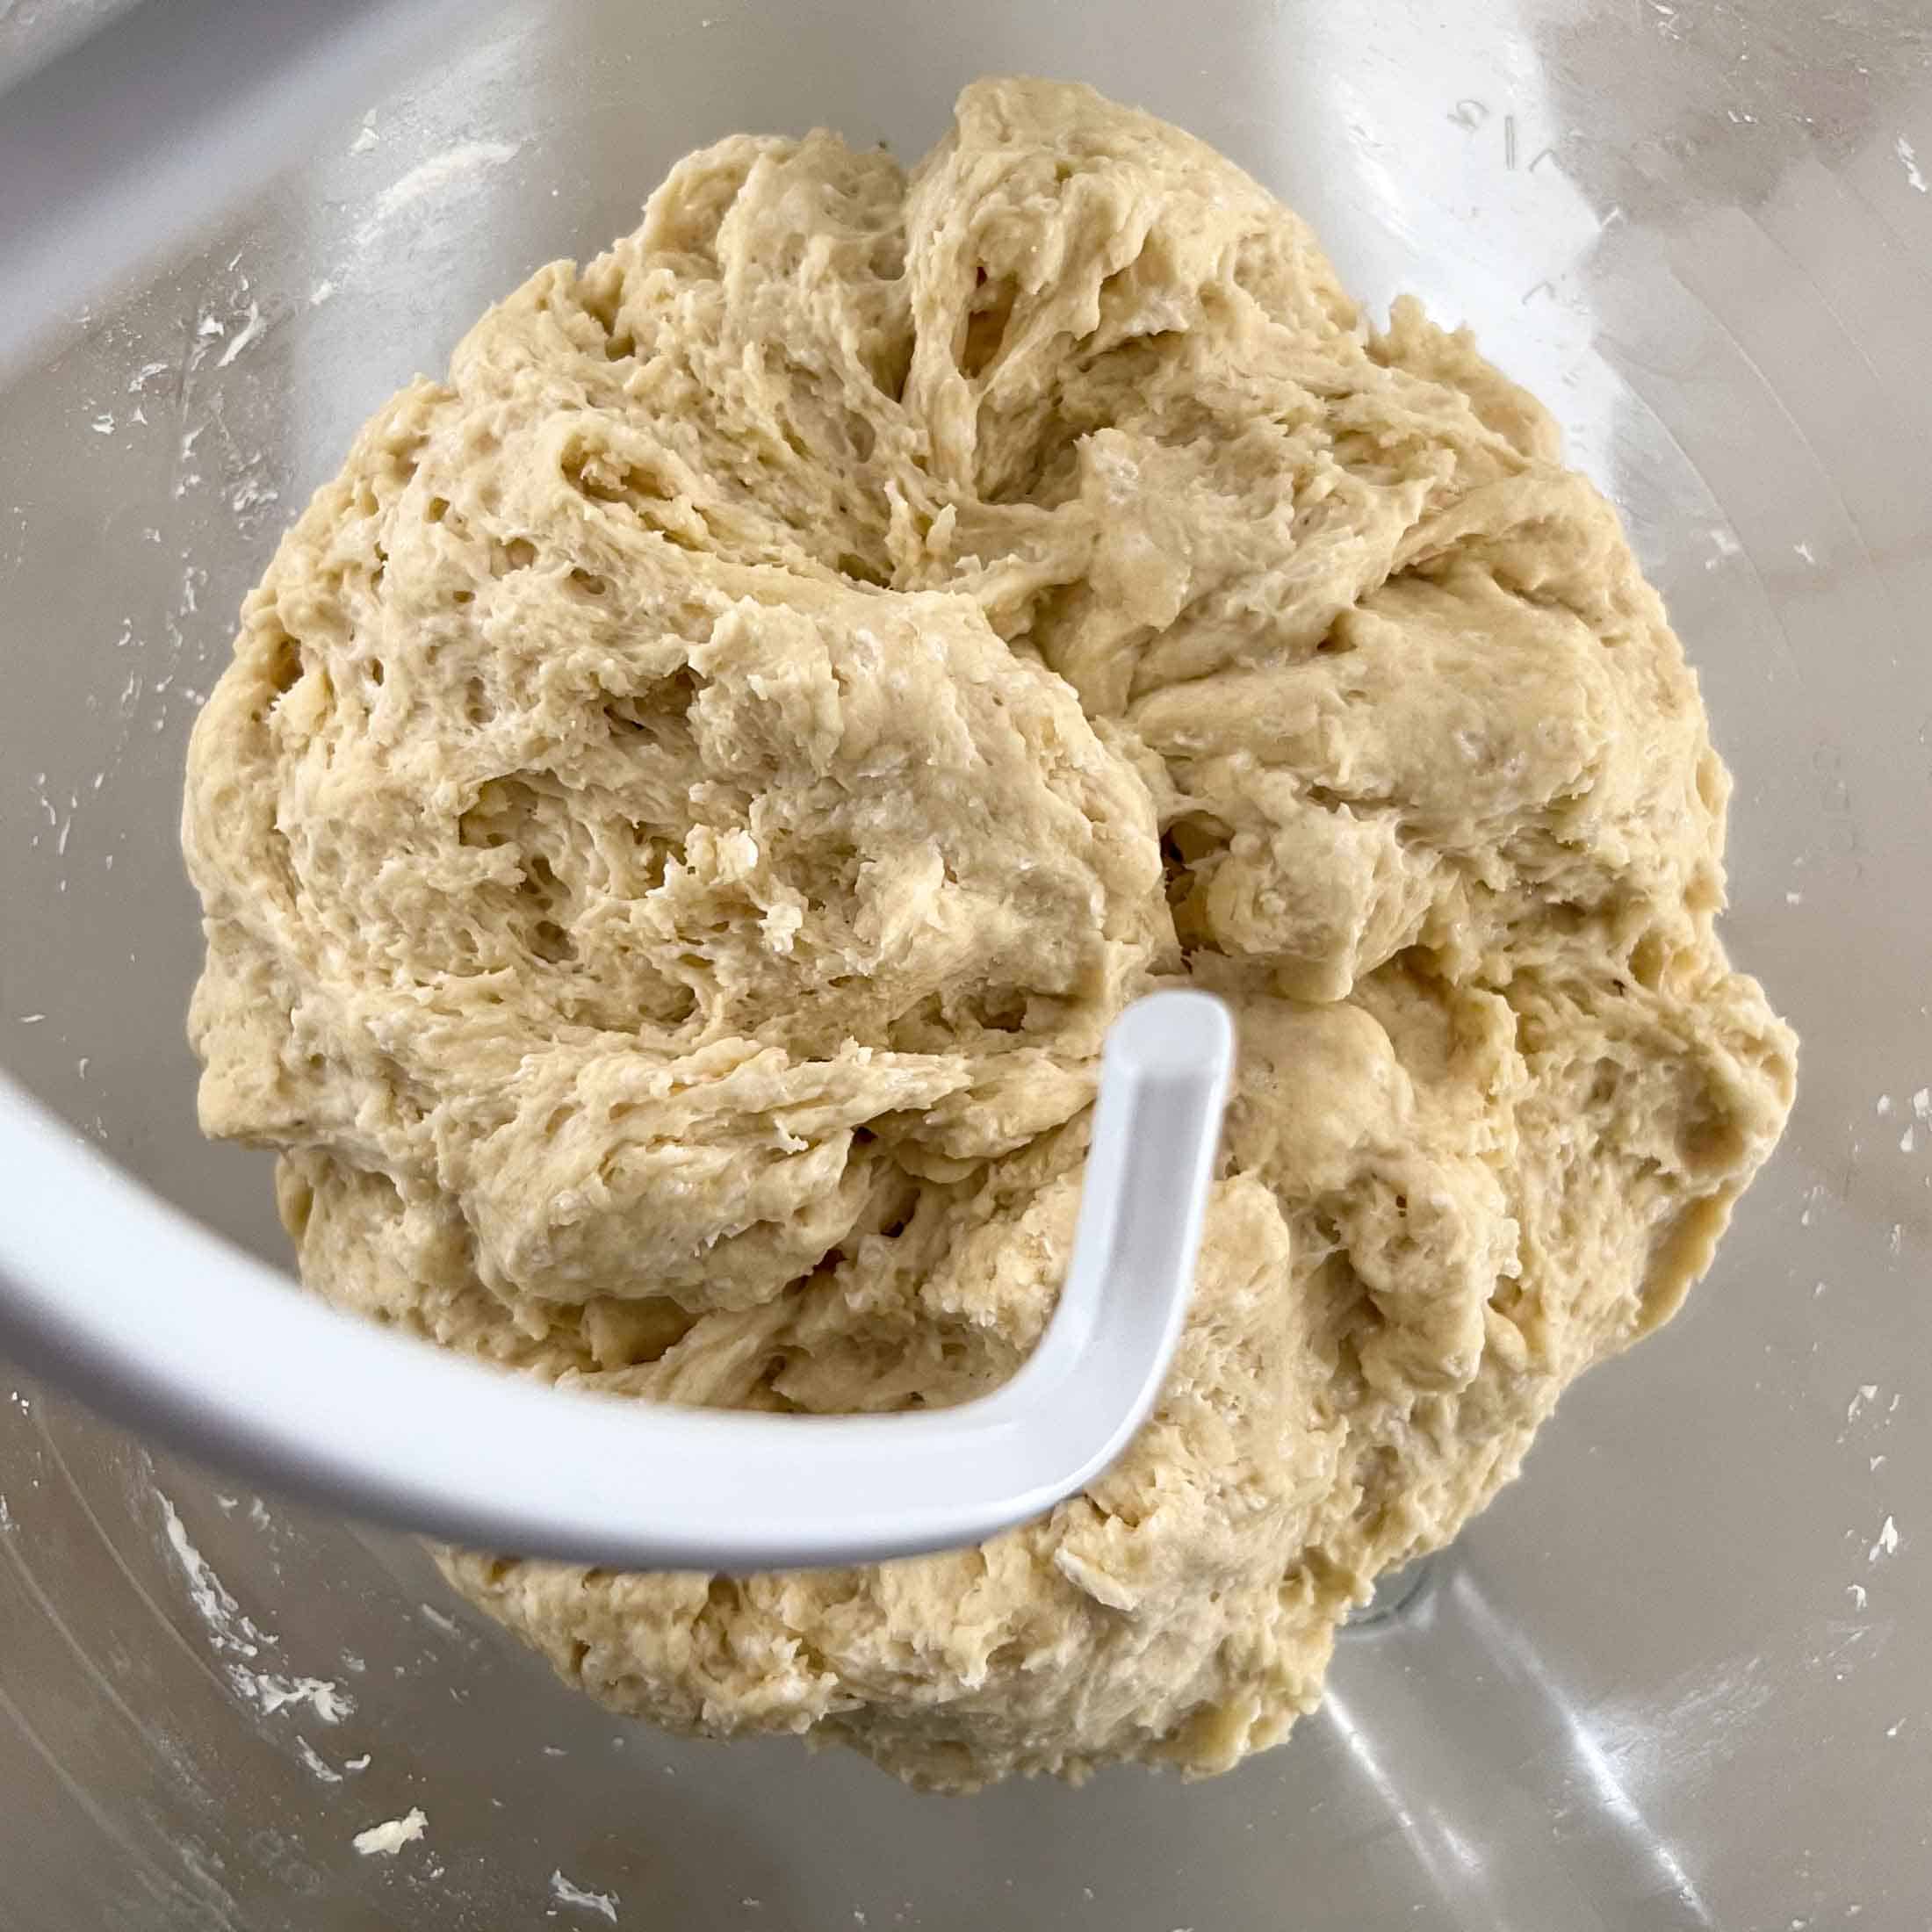
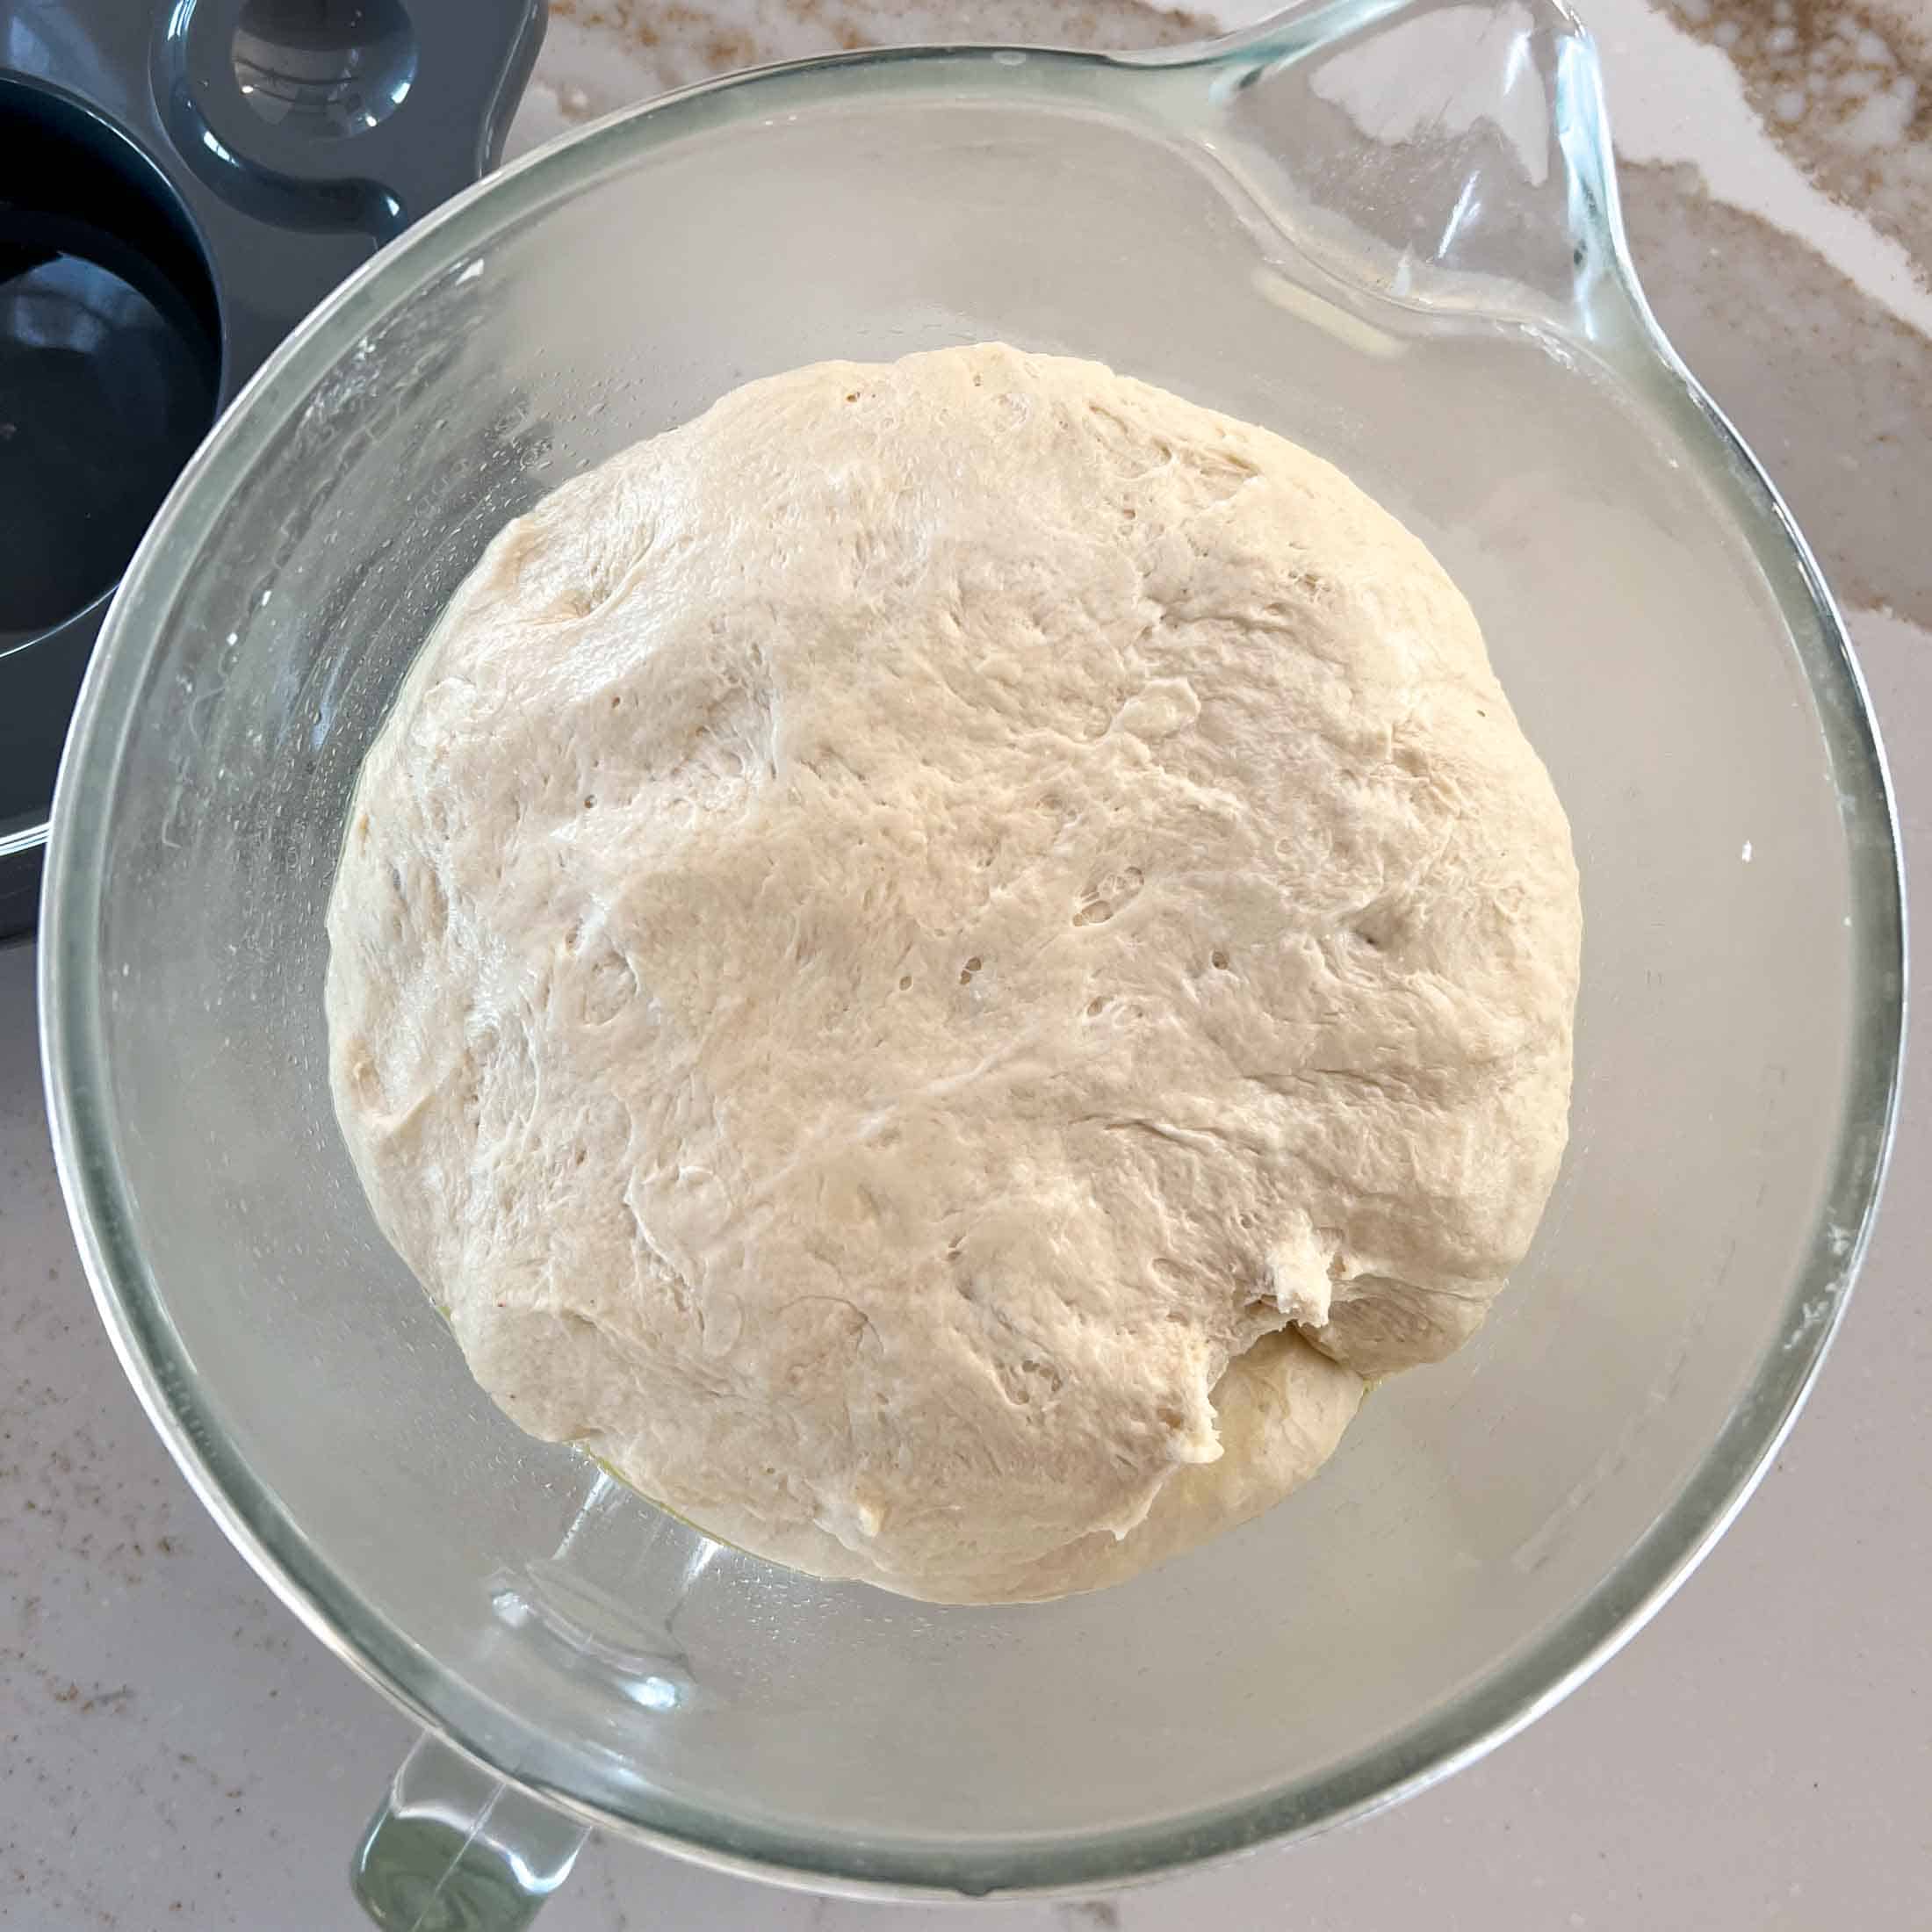
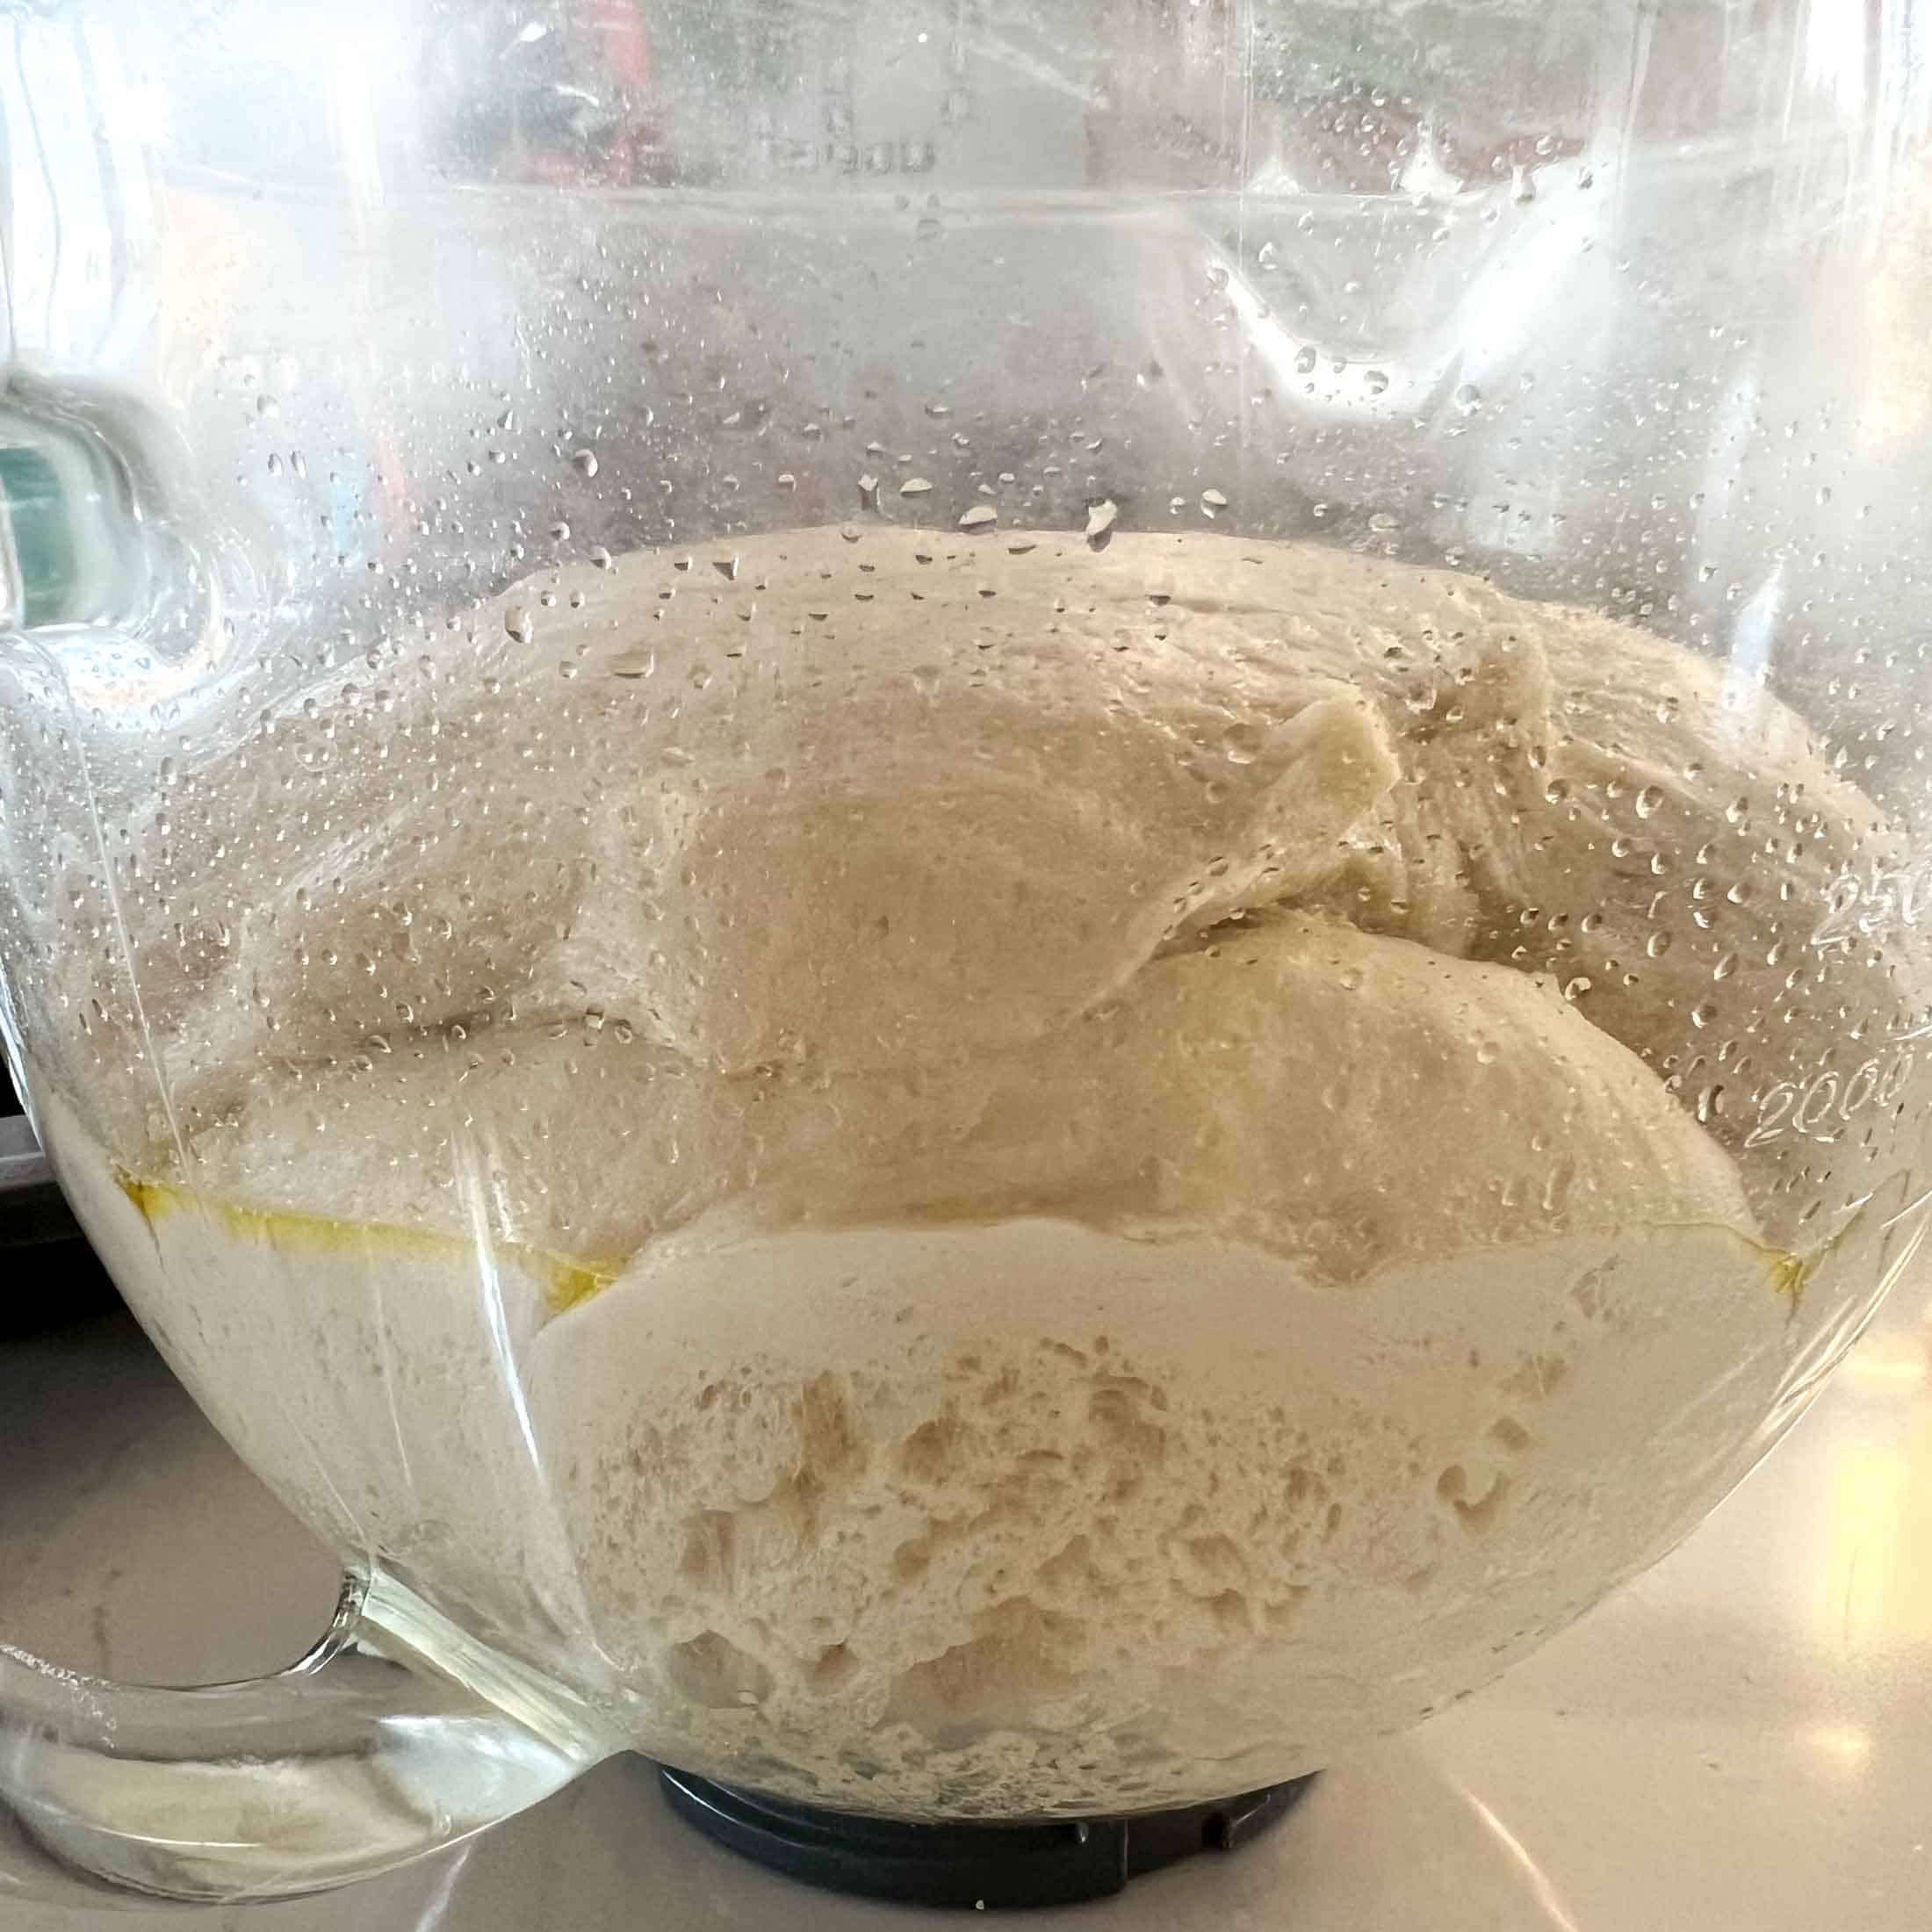
Step 3. Mix + Bulk Rise Replace the dough hook on your mixer and mix for another 3 minutes. Remove the dough, lightly oil or grease the bowl, replace the dough and cover with plastic wrap. Let the dough sit on the counter overnight for the first rise (bulk fermentation) to take place.
Step 4. Shape Next morning, first thing, turn the dough out onto a very lightly floured surface. Gently press out the dough into a rectangle (approximately 12×8 inches) and pop any large bubbles. Fold the two short edges into each other like an envelope. Tuck the ends in and turn it over so that the smooth side is facing up. Using two hands, gently pull the loaf toward you to create surface tension. Pick the loaf up to make sure that the smooth side is still facing up and continue to tuck and pull until your loaf is tight and uniform. You may choose to tear any large bubbles that surface.


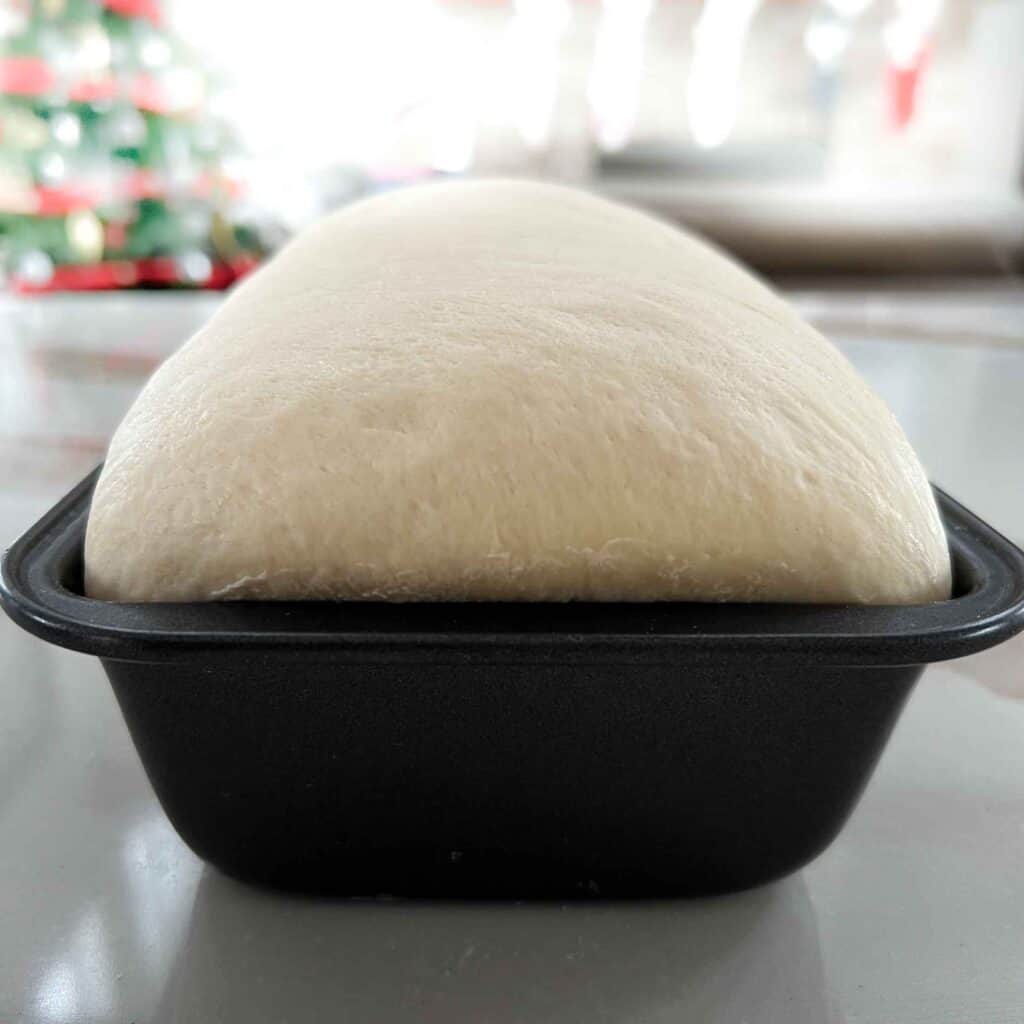
Step 5. Final Rise Place the shaped loaf into a greased 9×5 bread pan, seam side down. Sprinkle with a light dusting of flour and cover loosely with plastic wrap or a damp tea towel for the second rise. Place the covered dough in a warm spot in your kitchen for 2-3 hours (or more) until it has risen about 30%. Your loaf should be domed around an inch above the edge of your loaf pan. Check out the tips + tricks section for ideas on how to make your dough rise faster. Alternately, if you have errands to run or places to be, you can refrigerate during this step (before any rising has occurred) and the loaf will be safe from over fermenting for up to 18 hours.
Step 6. Bake Preheat your oven to 375°F. Place the loaf on the middle rack and bake for 40-45 minutes. Cooking time depends on a few variables including pan color and oven hot spots. Darker pans tend to cook and brown faster than lighter colored pans . Glass/ceramic pans tend to take slightly longer to warm but brown the edges of the bread faster creating a slightly thicker crust. If you are using a glass pan, consider lowering the oven temperature to 350°F.
Remove the loaf from the pan immediately after cooking and place it on a wire rack to cool. Generously rub the top of your hot loaf with butter to promote a soft crust and allow it to cool for 20 minutes before slicing and stowing in a plastic bag or other air tight container.
Batch + Storage
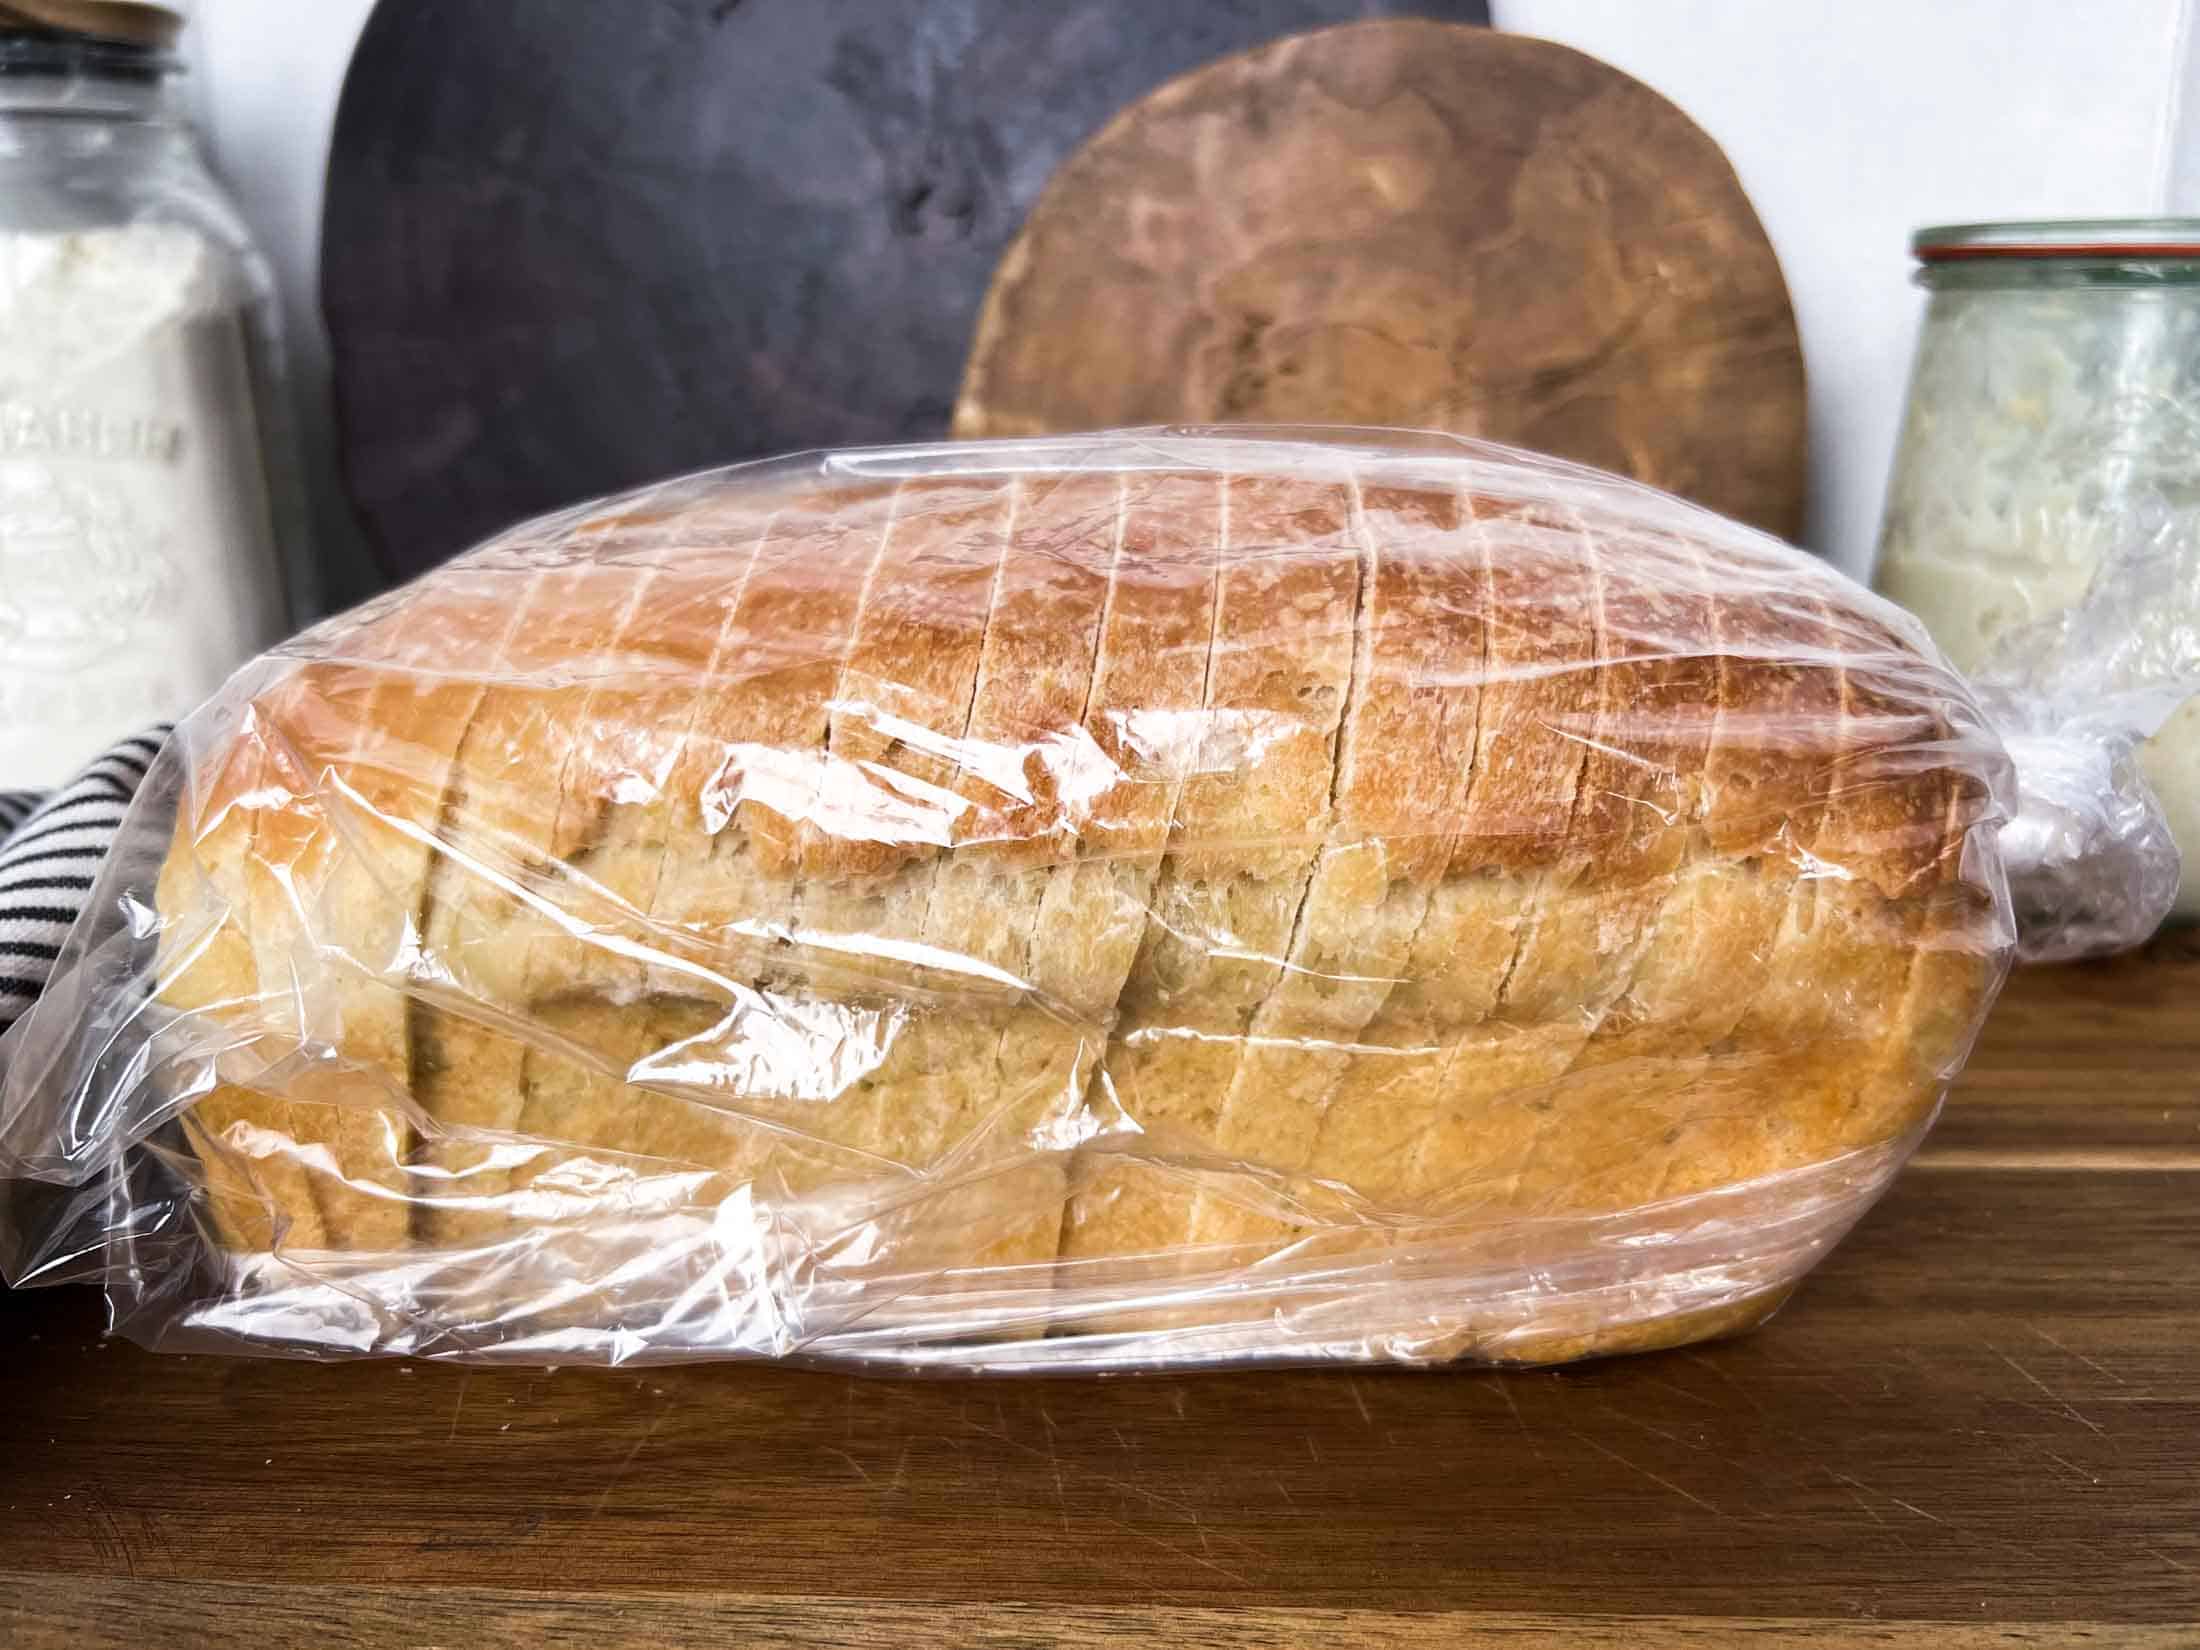
Fresh: Store the homemade bread at room temperature in a tight fitting bag or plastic wrap for 4-5 days. If you find the bread is drying out before you are able to finish it *gasp* consider toasting with peanut butter or warming in the oven for a few minutes. You can also brush any leftovers with olive oil and lightly toast it to make croutons or allow it to air dry to make delicious sourdough bread crumbs. Avoid storing your sourdough in the fridge- it tends to become hard and dry faster.
Frozen: Tightly wrap with plastic wrap, place in an additional freezer bag, and stow in the freezer for 2-3 months.
Sourdough Sandwich Bread Printable Recipe Card + Video
Sourdough Sandwich Loaf | Easy Guide + Video
This sourdough sandwich loaf is soft, buttery, and versatile! Make sourdough sandwich bread fit into your schedule with a small amount of kneading and an overnight rise followed by shaping and a final rise next day.
Ingredients
- 750g bread flour (6 cups)
- 90 grams butter (6 tablespoons)
- 20 grams honey (1 tablespoon)
- 13 grams sea salt (2 teaspoons)
- 75 grams sourdough starter (1/4 cup + 2 tablespoons)
- 405 grams warm water (1 2/3 cup)
Instructions
- Sourdough Starter Feed your starter with 50g starter, 50g water, 50g all purpose flour. Cover and let sit for 3-4 hours or until bubbly and doubled in size.
- Autolyse + Rest In the bowl of a stand mixer with the paddle attachment, combine 750g (6 cups) flour, 90g (1/2 cup) room temperature butter (sliced in small squares), 21g honey(1 tablespoon) , (13g) 2 teaspoon fine sea salt. Mix until completely incorporated- it should be nice and crumbly. In a small bowl, measure out 405g (1 2/3 cup) warm water and 75g (1/4 cup + 2 tablespoons) active sourdough starter. Lightly mix and add to the flour mixture in your mixing bowl. Switch to the dough hook attachment, turn on the mixer and allow it to mix on a low speed until fully incorporated (3-4 minutes). Turn off the mixer, cover the bowl with plastic wrap, and let the dough rest + gluten relax for 30 minutes.
- Mix + Bulk Rise Replace the dough hook on your mixer and mix for another 3 minutes. Remove the dough, lightly oil or grease the bowl, replace the dough and cover with plastic wrap. Let the dough sit on the counter overnight for the first rise (bulk fermentation) to take place.
- Shape Next morning, first thing, turn the dough out onto a very lightly floured surface. Gently press out the dough into a rectangle (approximately 12×8 inches) and pop any large bubbles. Fold the two short edges into each other like an envelope. Tuck the ends in and turn it over so that the smooth side is facing up. Using two hands, gently pull the loaf toward you to create surface tension. Pick the loaf up to make sure that the smooth side is still facing up and continue to tuck and pull until your loaf is tight and uniform. You may choose to tear any large bubbles that surface.
- Final Rise Place the shaped loaf into a greased 9×5 bread pan, seam side down. Sprinkle with a light dusting of flour and cover loosely with plastic wrap or a damp tea towel for the second rise. Place the covered dough in a warm spot in your kitchen for 2-3 hours (or more) until it has risen about 30%. Your loaf should be domed around an inch above the edge of your loaf pan. Check out the tips + tricks section for ideas on how to make your dough rise faster. Alternately, if you have errands to run or places to be, you can refrigerate during this step (before any rising has occurred) and the loaf will be safe from over fermenting for up to 18 hours.
- Bake Preheat your oven to 375°F. Place the loaf on the middle rack and bake for 40-45 minutes. Cooking time depends on a few variables including pan color and oven hot spots. Darker pans tend to cook and brown faster than lighter colored pans . Glass/ceramic pans tend to take slightly longer to warm but brown the edges of the bread faster creating a slightly thicker crust. If you are using a glass pan, consider lowering the oven temperature to 350°F.
- Cool Remove the loaf from the pan immediately after cooking and place it on a wire rack to cool. Generously rub the top of your hot loaf with butter to promote a soft crust and allow it to cool for 20 minutes before slicing and stowing in a plastic bag or other air tight container.
Notes
No mixer? No problem! This recipe is very forgiving and can handle hand kneading and kneading with the dough hook of a stand mixer instead of fussy stretching and folding.
Recommended Products
As an Amazon Associate and member of other affiliate programs, I earn from qualifying purchases.


Nutrition Information:
Yield: 14 Serving Size: 1Amount Per Serving: Calories: 253Total Fat: 6gSaturated Fat: 3gTrans Fat: 0gUnsaturated Fat: 2gCholesterol: 14mgSodium: 404mgCarbohydrates: 42gFiber: 1gSugar: 1gProtein: 7g
♥ Thanks for supporting me! Sharing, commenting, and reviewing all help to spread the word about Modern Harvest and help to grow the site! As an Amazon Associate I earn from qualifying purchases. I will never promote or link products that I don’t personally use or love. ♥